Waiting Room Schedule Reservation
"Waiting Room Schedule Reservation" is a scheduling feature that allows you to reserve and switch between different waiting rooms according to your event schedule. You can schedule specific waiting rooms at transition points to manage the user experience in stages, providing a sophisticated scheduling system for complex traffic control scenarios. This guide covers configuration, implementation, and best practices.
Overview
Running flash sales or product launches creates two major challenges: server overload when everyone rushes in simultaneously, and unfair access where bots and automated scripts connect faster than human users, creating an uneven playing field.
Real-world traffic doesn't spike only during the main event. Instead, you see extended periods of elevated activity:
Traffic Pattern:
    ▲
    │     ╭─╮
    │    ╱   ╲
    │   ╱     ╲
    │  ╱       ╲
    │ ╱         ╲
    │╱           ╲
    └─────────────► Time
 Before During After
This extended traffic period puts continuous strain on your servers, not just during peak times. What if there was a way to stage the user experience across different phases of your event? Instead of having everyone rush in at once, you could create distinct phases: a pre-event area where users see announcements and countdown timers, the main event with proper queue management, and a post-event space for marketing and lead generation.
This approach would distribute server load while building excitement and providing value to users throughout the entire event lifecycle. Most importantly, it would ensure fair access by randomly assigning queue positions to pre-waiting users, eliminating the advantage that bots and automated scripts have over human users.
The result would be a smoother experience for both you and your users. Your servers would stay stable, users would get fair access through proper queue management, and you could capture additional marketing value from users who arrive early or stay after the main event ends. Most importantly, the random queue assignment would ensure that all users - whether human or bot - have an equal chance of accessing your content, creating a truly fair system.
That's exactly what Waiting Room Schedule Reservation provides - a sophisticated scheduling system that allows you to reserve and switch between different waiting rooms according to your event schedule, managing user flow in stages.
Waiting Room Schedule Reservation only works when your segment is in Waiting mode, not in Block mode.
What This Feature Does
Waiting Room Schedule Reservation helps you manage customer flow during high-traffic events like:
- Limited product sales
- Course registrations
- Event ticket sales
- Any situation where you expect many visitors at once
You can schedule specific waiting rooms at the points where you want to transition. If there are no other waiting room reservations or segment status adjustments, the executed waiting room will maintain that state.
Instead of just one waiting room, you can create three phases. Here's how users experience each phase:
Pre-Waiting Room
Before Event
No queue numbers
Announcements & countdown
Main Waiting Room
During Event
Queue numbers & wait time
Fair entry system
Post-Waiting Room
After Event
Marketing content
Redirect buttons
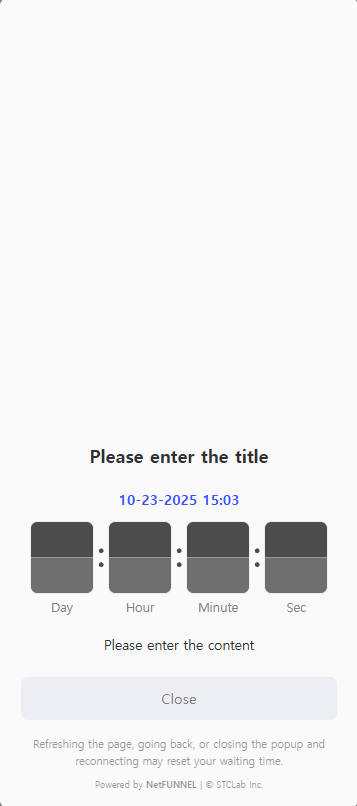
Phase 1: Pre-Waiting Room (Before Event)
- When: Before your main event starts
- What users see: Announcements, countdown timers, marketing content
- Queue numbers: None (users don't know their position yet)
- Purpose: Build excitement and distribute initial traffic
- Function: Acts as a blocking room with redirect buttons to guide users to other pages
- Exit: Automatic transition to main waiting room when time expires
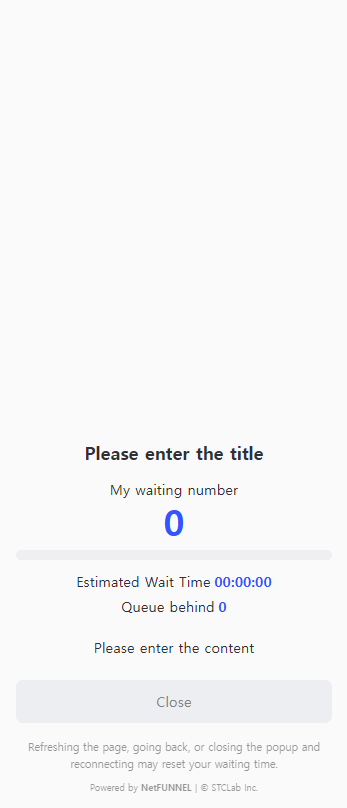
Phase 2: Main Waiting Room (During Event)
- When: During your main event
- What users see: Queue numbers, wait times, fair entry system
- Queue numbers: Random assignment (not based on pre-waiting order)
- Purpose: Fair access to your main content/product
- Function: True waiting room that manages queue and grants service access
- Exit: Service entry when queue position is reached
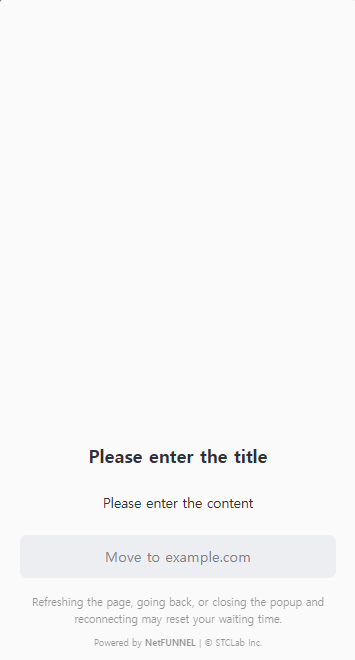
Phase 3: Post-Waiting Room (After Event)
- When: After your main event ends
- What users see: Marketing content, related offers, signup forms
- Queue numbers: None (marketing focus)
- Purpose: Additional sales and lead generation
- Function: Acts as a blocking room with redirect buttons to guide users to alternative content
- Exit: Redirect buttons or automatic end when configured time expires
How It Works
The system automatically switches waiting rooms based on scheduled reservations. When you schedule a waiting room according to your event schedule, that waiting room is activated at the set execution time.
By default, the order of pre-waiting room, main waiting room, and post-waiting room is recommended. Each waiting room automatically switches at the scheduled execution time, and if there are no other schedules, it maintains the current state.
Deactivation Warning: When you set the status to deactivated, users will bypass NetFUNNEL and enter the server directly, which cannot guarantee server stability.
Main Waiting Room Template: The waiting room template for the main waiting room is automatically applied from the waiting room template you applied in segment settings. That is, pre/post waiting rooms select templates during schedule registration, but the main waiting room does not.
8:00 AM   9:00 AM   10:00 AM   11:00 AM   12:00 PM   1:00 PM
|         |         |          |          |         |
|  Main   |Pre-Wait |Main-Wait |Post-Wait |  Main   |
|  Wait   |(1 hour) |(1 hour)  |(1 hour)  |  Wait   |
|         |         |          |          |         |
└─────────┴─────────┴──────────┴──────────┴─────────┘
          ↑         ↑          ↑          ↑
     Pre-Wait  Pre-Wait   Post-Wait   Post-Wait
      Start      End        Start        End
The system automatically switches waiting rooms based on scheduled reservations. Each waiting room is activated at its scheduled execution time, and if there are no other schedules, it maintains the current state.
Users experience different content in each waiting room. In the pre-waiting room, they see announcements, countdown timers, and marketing content without queue numbers. The main waiting room provides queue numbers, wait times, and a fair entry system. The post-waiting room focuses on marketing content, lead generation, and redirect options, again without queue numbers.
How Queue Numbers Work
Queue numbers are only assigned in the main waiting room. Queue numbers are not displayed in pre-waiting rooms or post-waiting rooms.
Queue Numbers in Main Waiting Room:
- When the main waiting room is activated, users are assigned queue numbers
- Queue numbers are assigned sequentially according to the limited inflow setting
- The limited inflow setting controls how many users can access the service simultaneously when their queue position is reached
Transition from Pre-Waiting Room to Main Waiting Room:
- There are no queue numbers in the pre-waiting room
- When the main waiting room schedule is executed, users who were in the pre-waiting room transition to the main waiting room and receive queue numbers
Configuration Process
Step 1: Access Settings
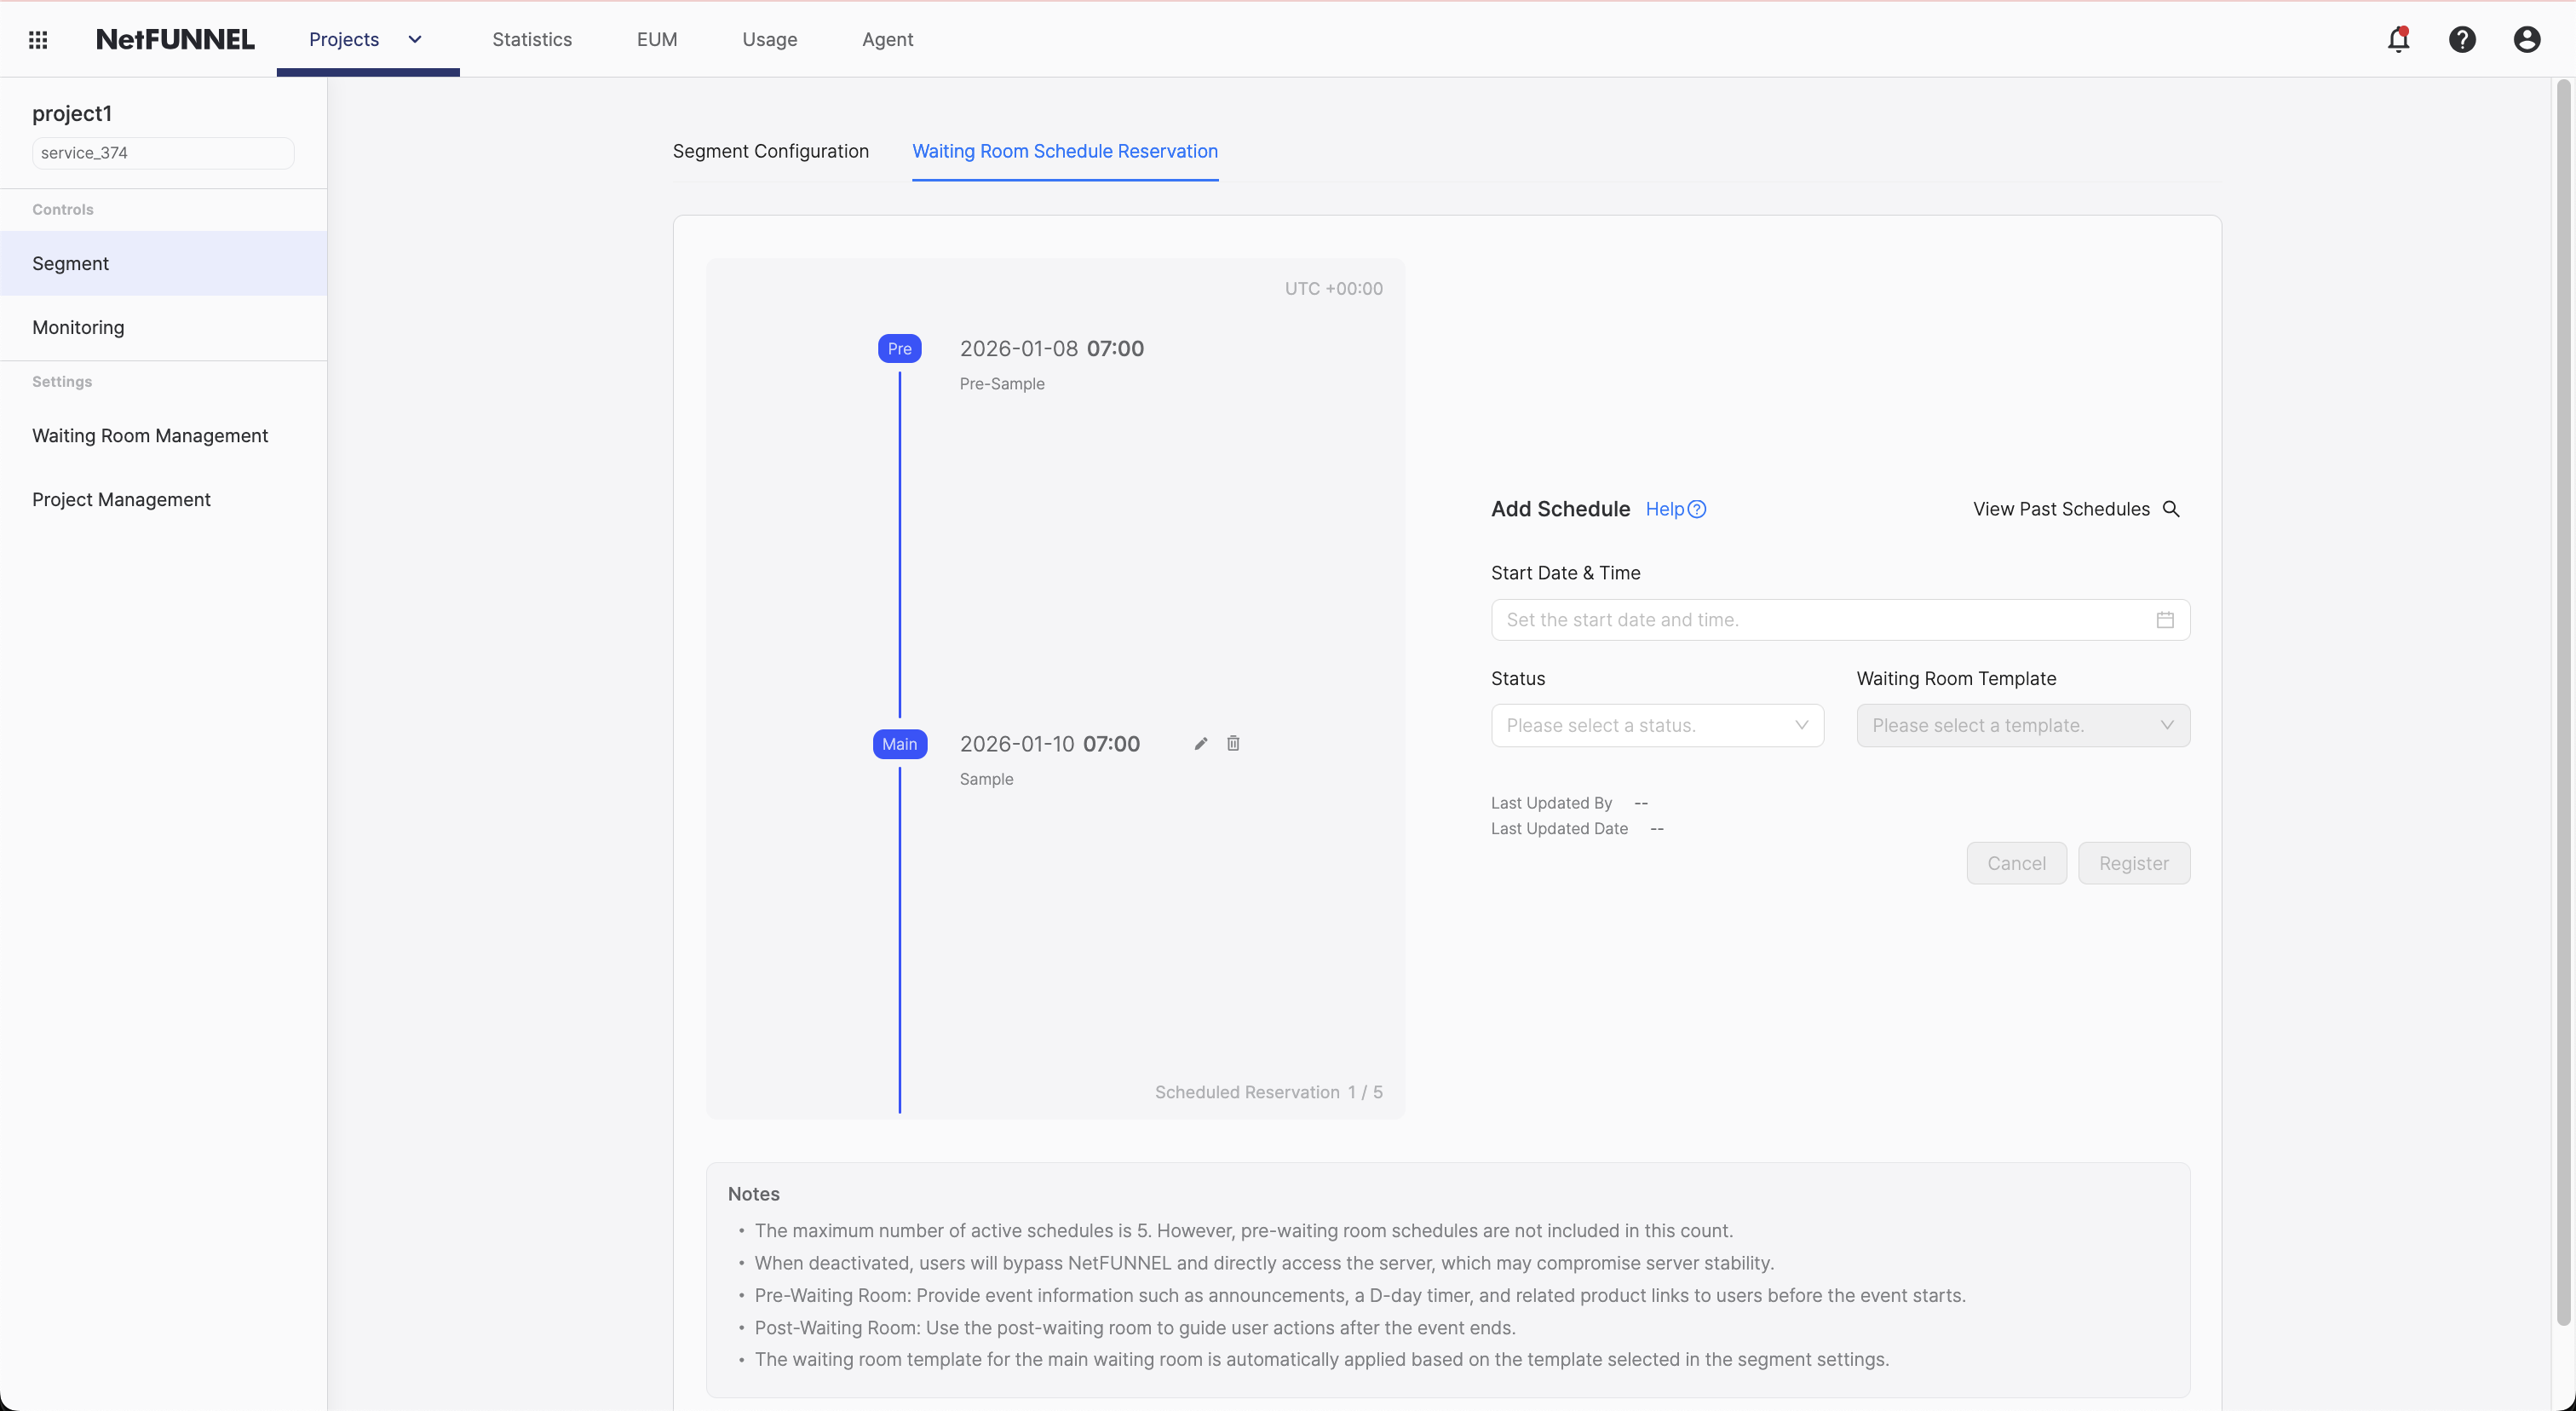
Navigate to the segment edit screen and go to the "Waiting Room Schedule Reservation" section.
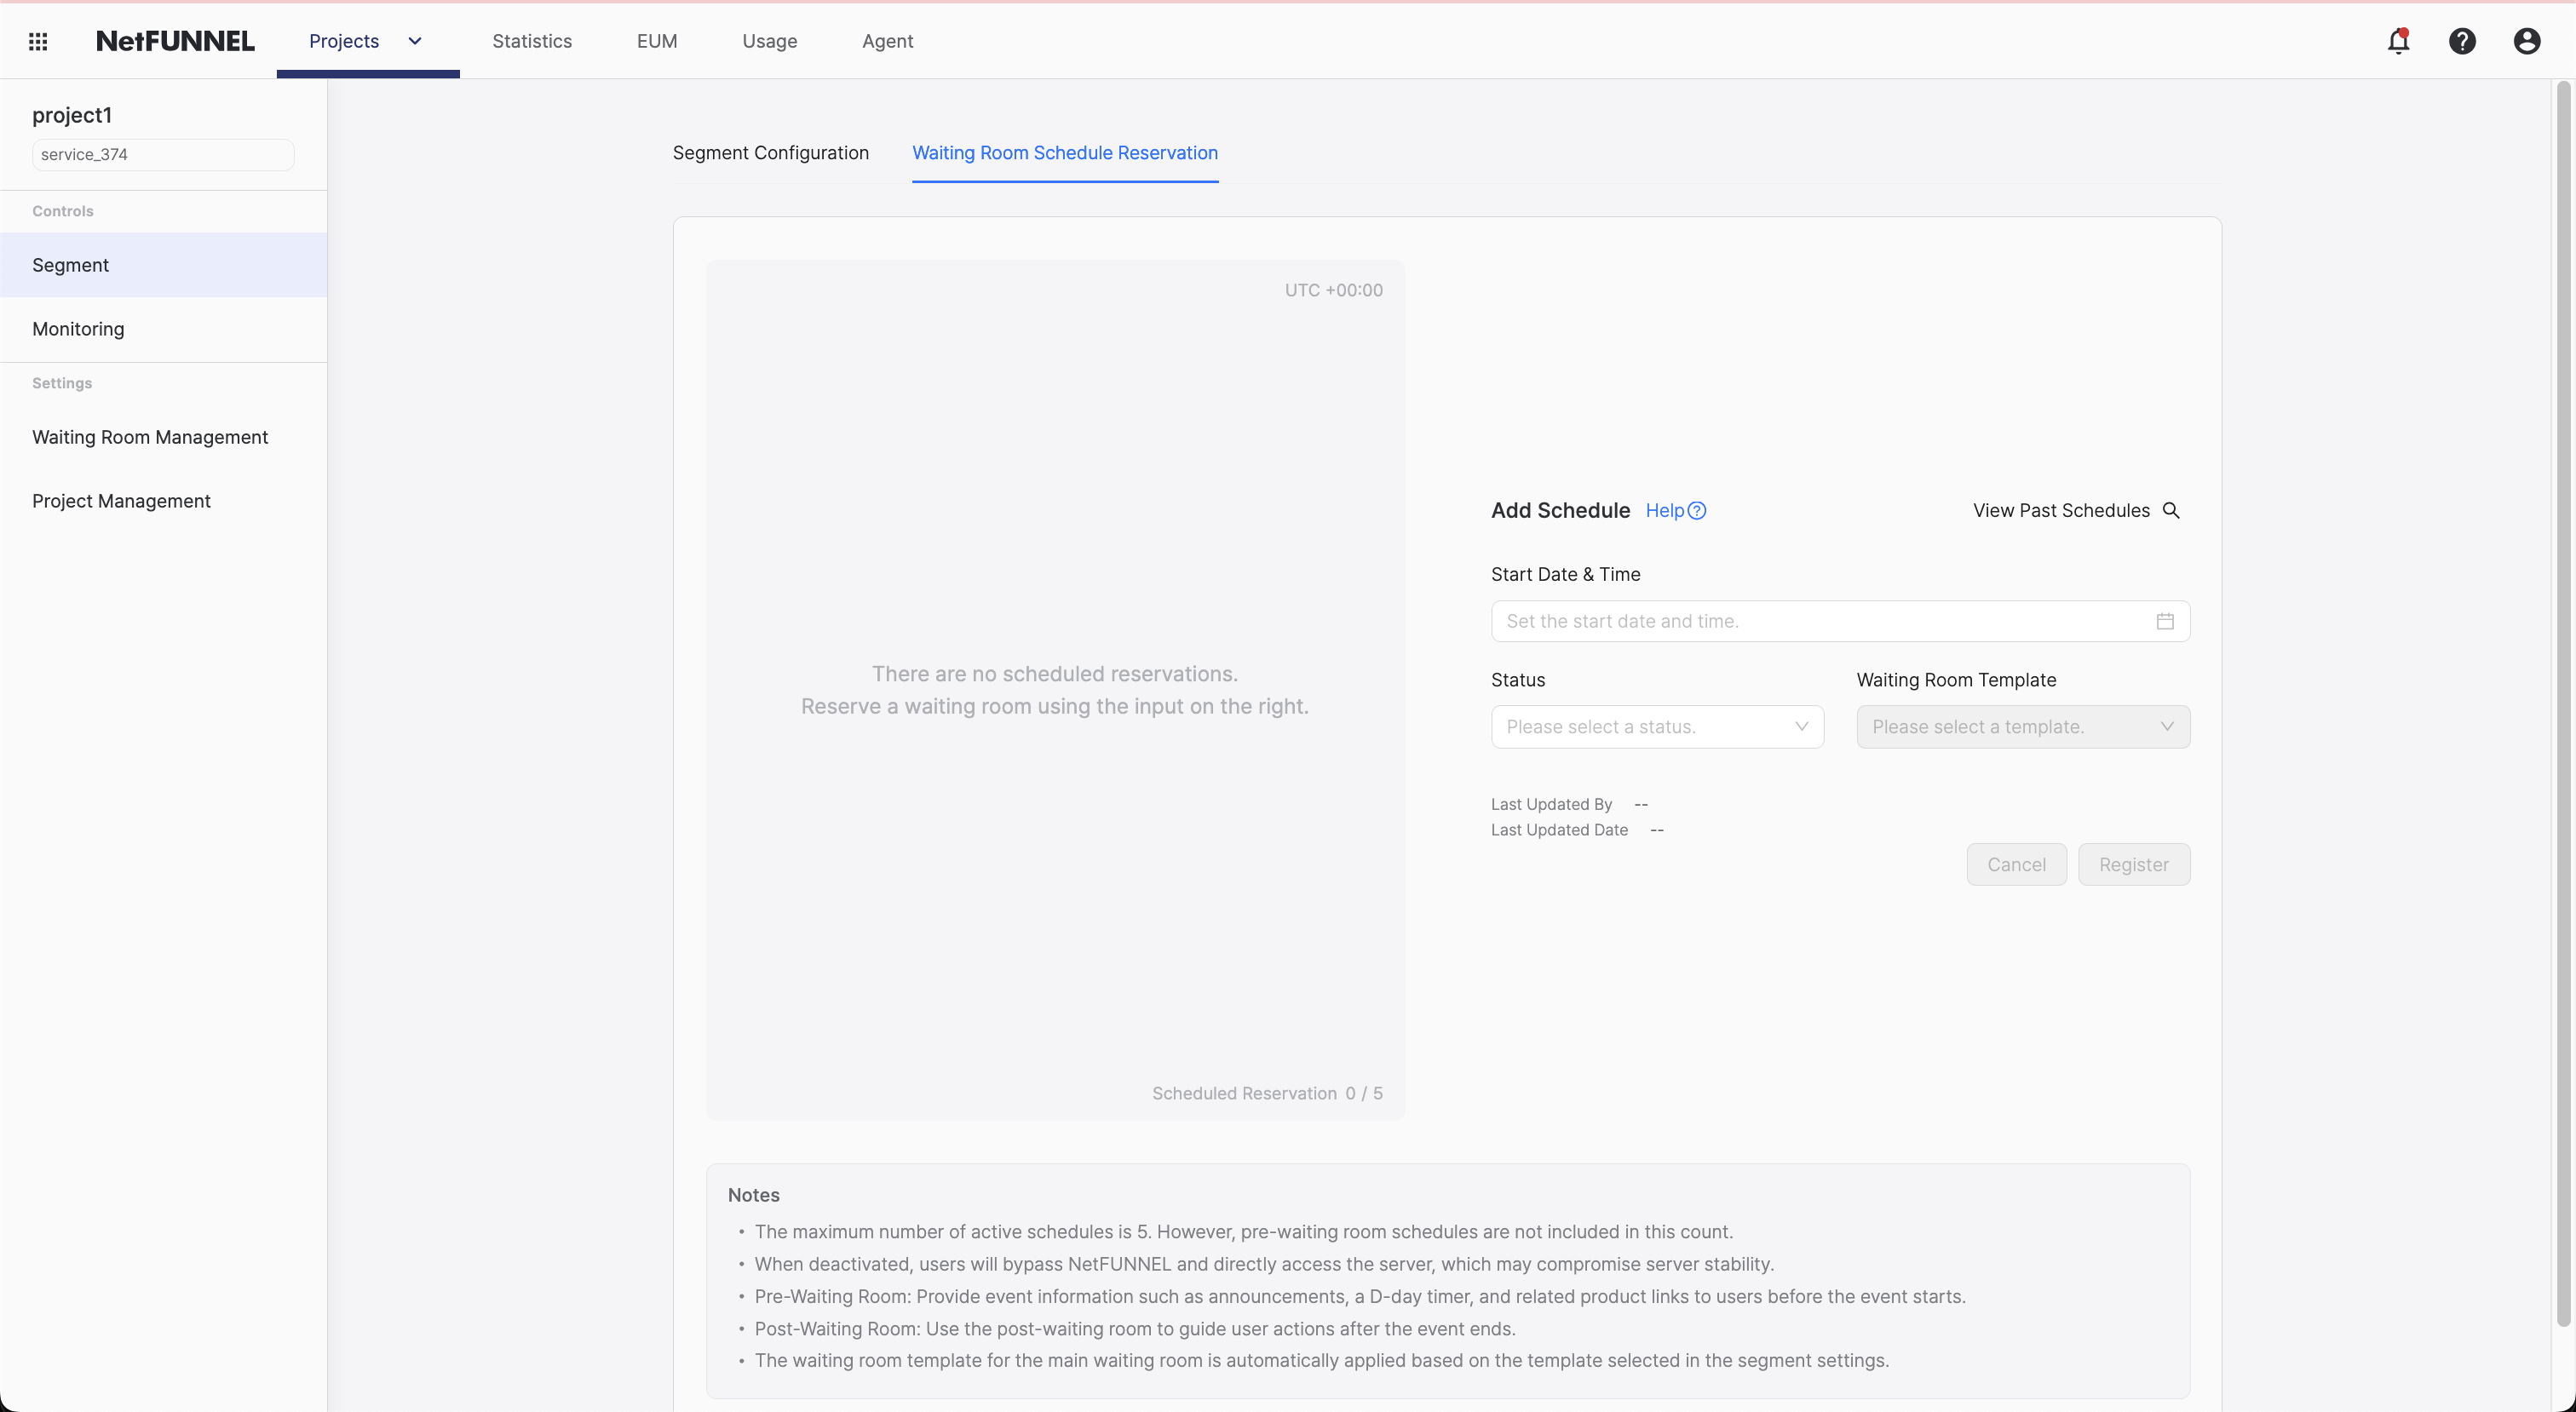
Waiting Room Schedule Reservation only works when your segment is in Waiting mode, not in Block mode.
Step 2: Register Schedule
Click the Register Schedule button to add a new waiting room schedule.
Each schedule requires the following information:
- Execution Date and Time
- Date and Time: Select the date and time when the schedule will be executed (UTC)
- The waiting room will be activated at this time
- Clicking the execution date/time opens a dropdown with a calendar and time selection screen

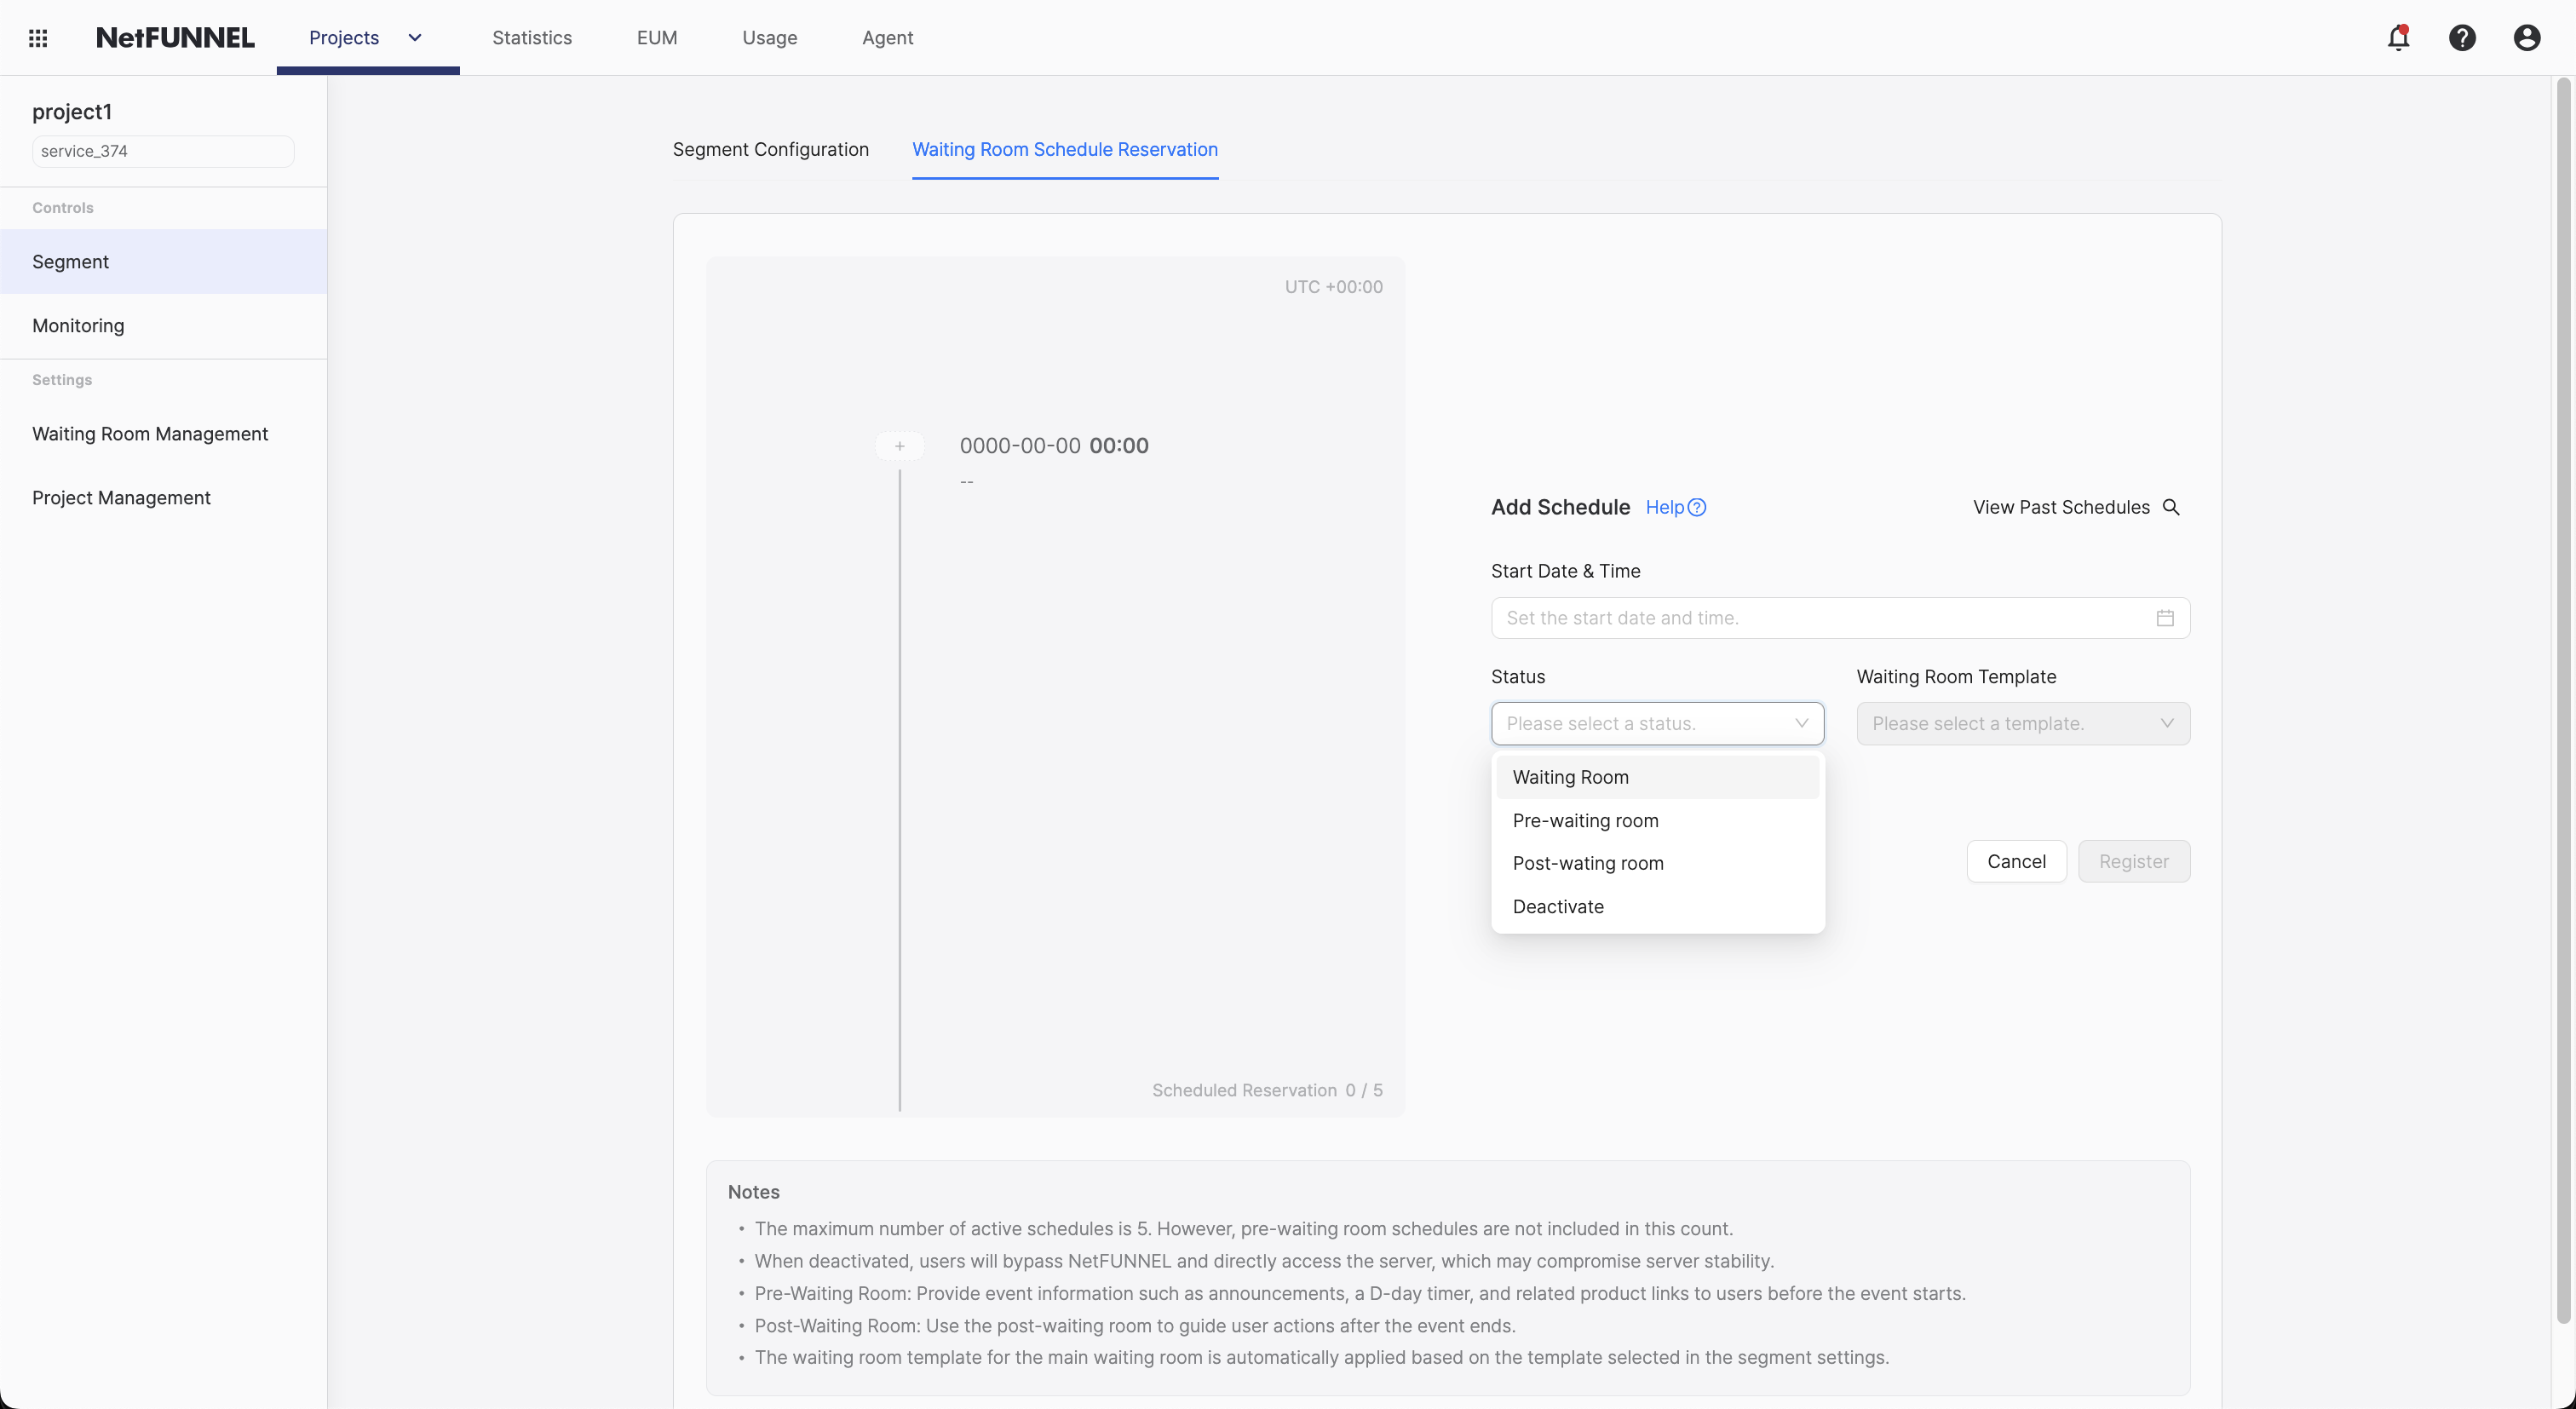
- Status
Select one of the following 4 statuses:
- Waiting Room: The waiting room is activated. The waiting room template applied in segment settings is automatically applied
- Pre-Waiting Room: The pre-waiting room is activated. Provides event information such as announcements, D-day timers, and related product links before the event starts
- Post-Waiting Room: The post-waiting room is activated. Provides marketing content that can guide user behavior after the event ends
- Deactivated: The segment is deactivated, and users bypass NetFUNNEL and enter the server directly
- ⚠️ Warning: Deactivation cannot guarantee server stability
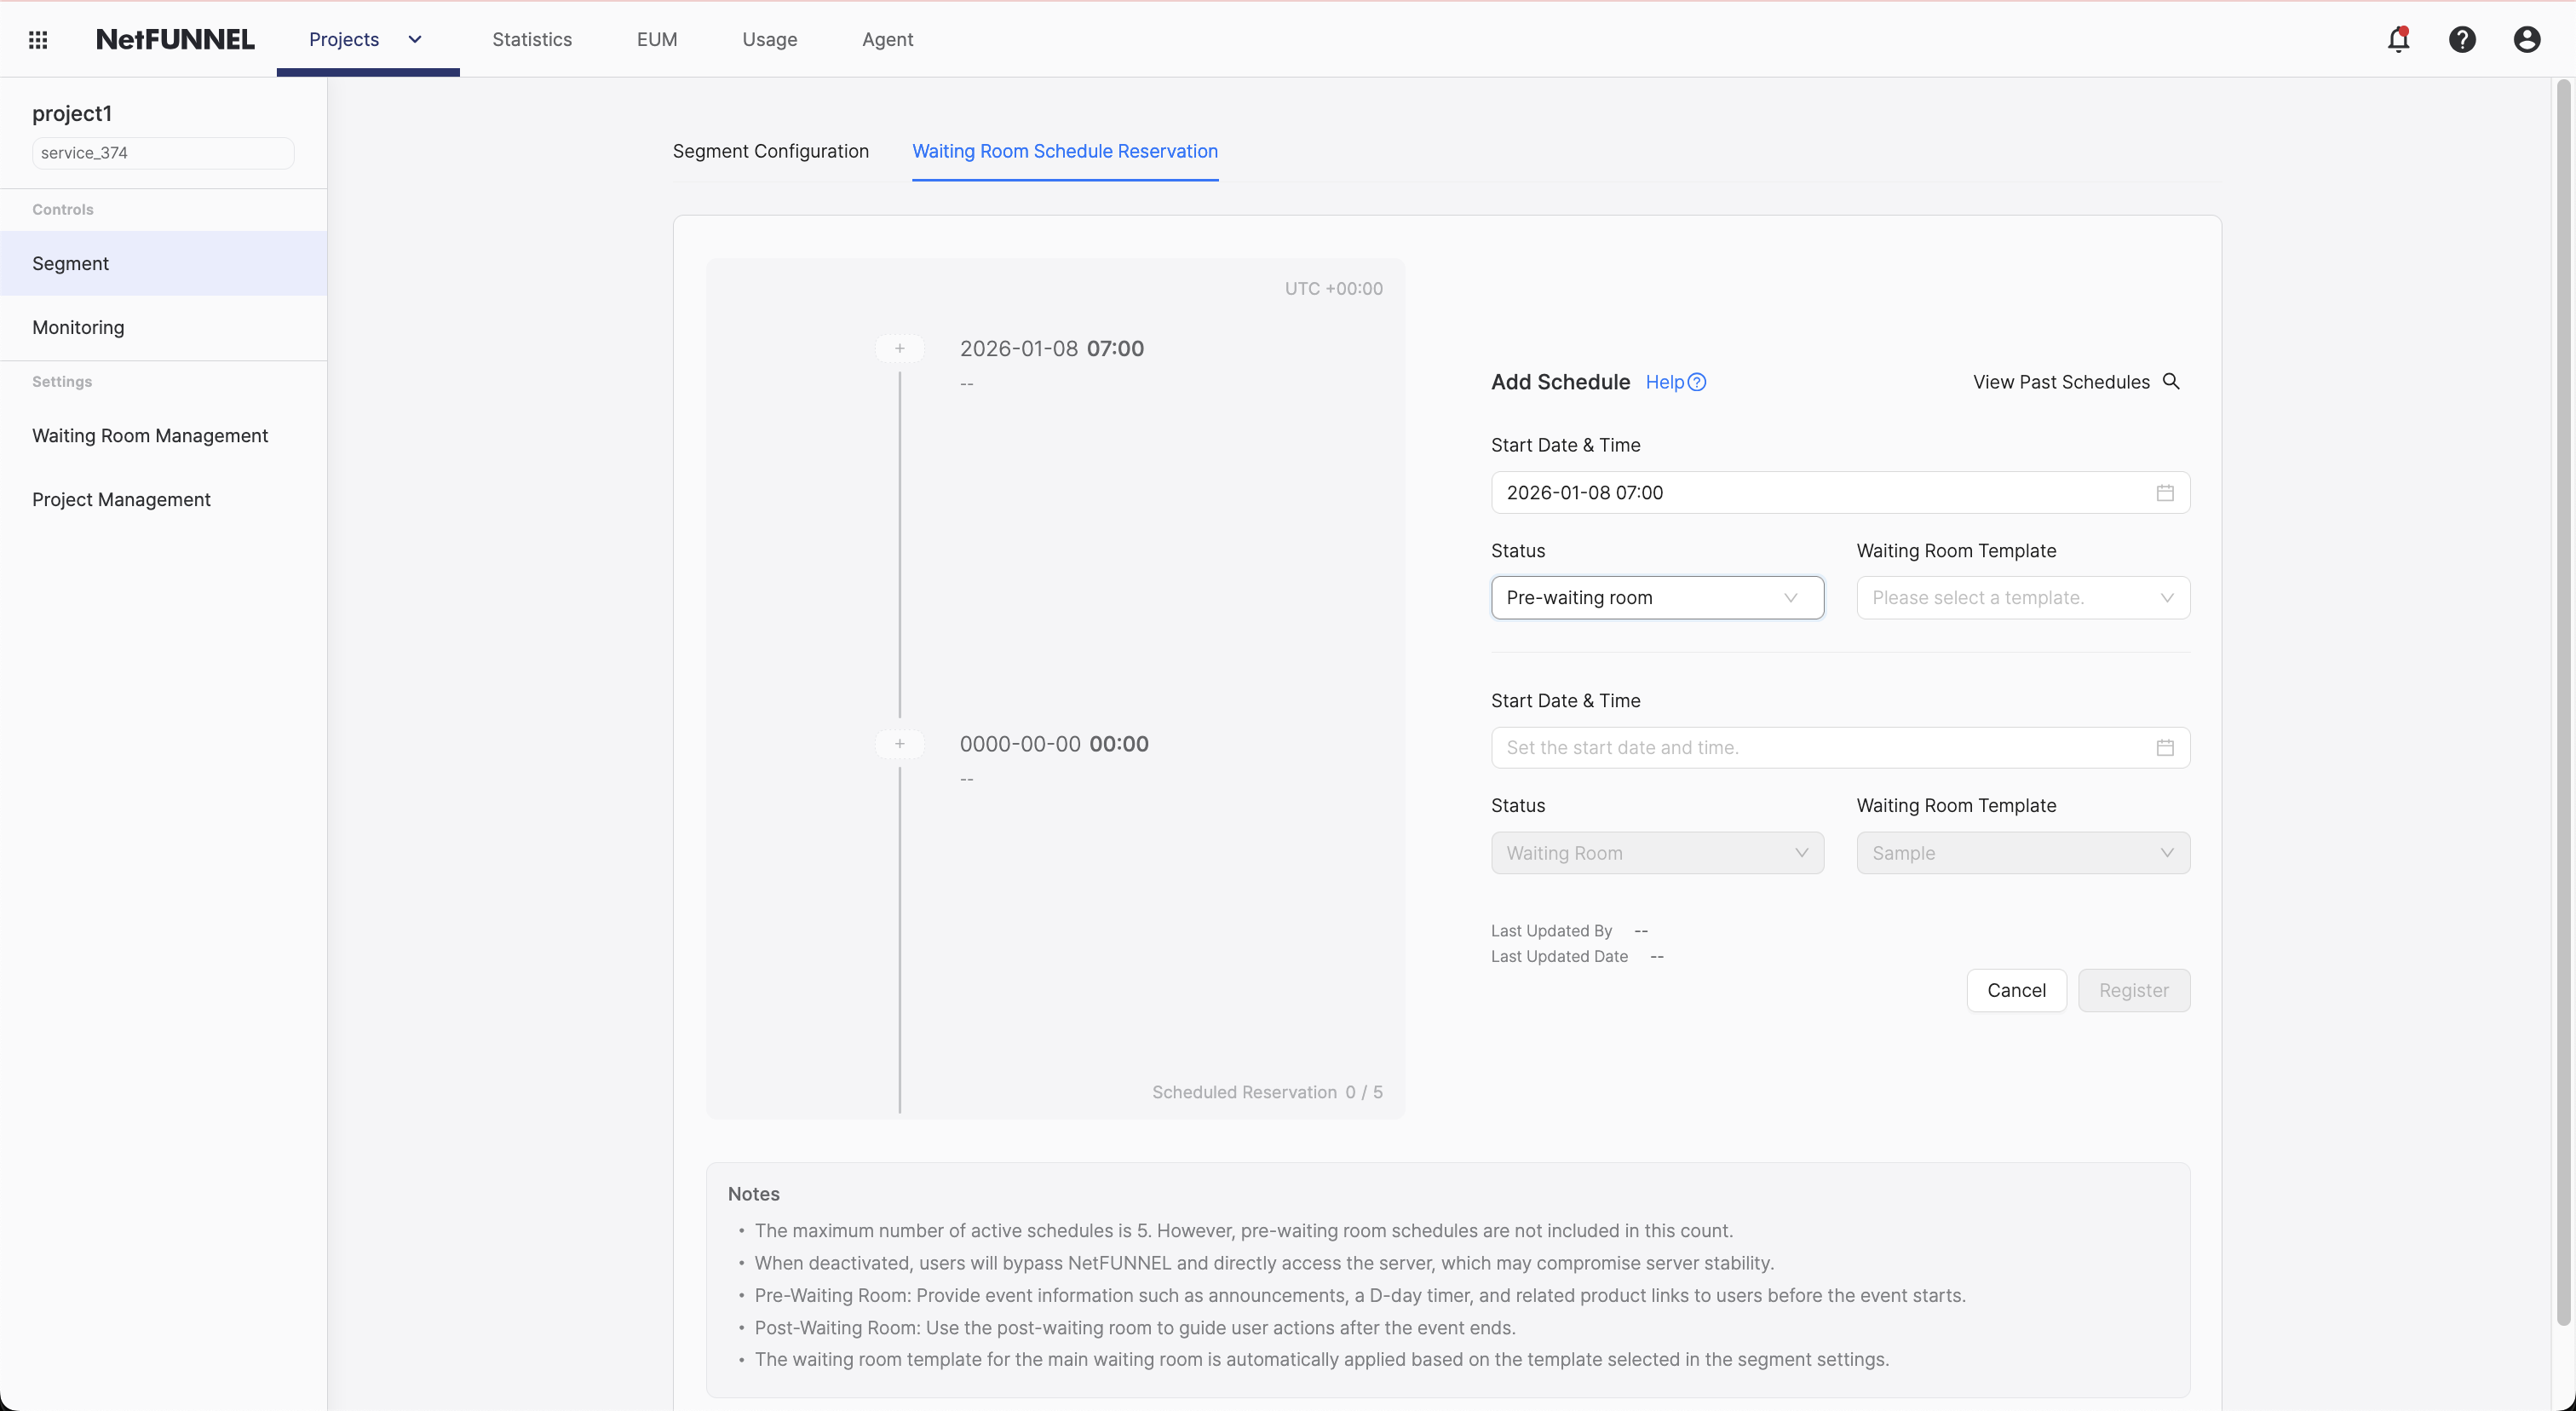
- Waiting Room Template
- If status is Pre-Waiting Room or Post-Waiting Room: You must select a waiting room template to use
- Pre-Waiting Room: Select a pre-waiting room template
- Post-Waiting Room: Select a post-waiting room template
- If status is Waiting Room: Template selection is not required
- The waiting room template for the waiting room is automatically applied from the waiting room template you applied in segment settings
- That is, pre/post waiting rooms select templates here, but the waiting room does not
- If status is Pre-Waiting Room or Post-Waiting Room: You must select a waiting room template to use
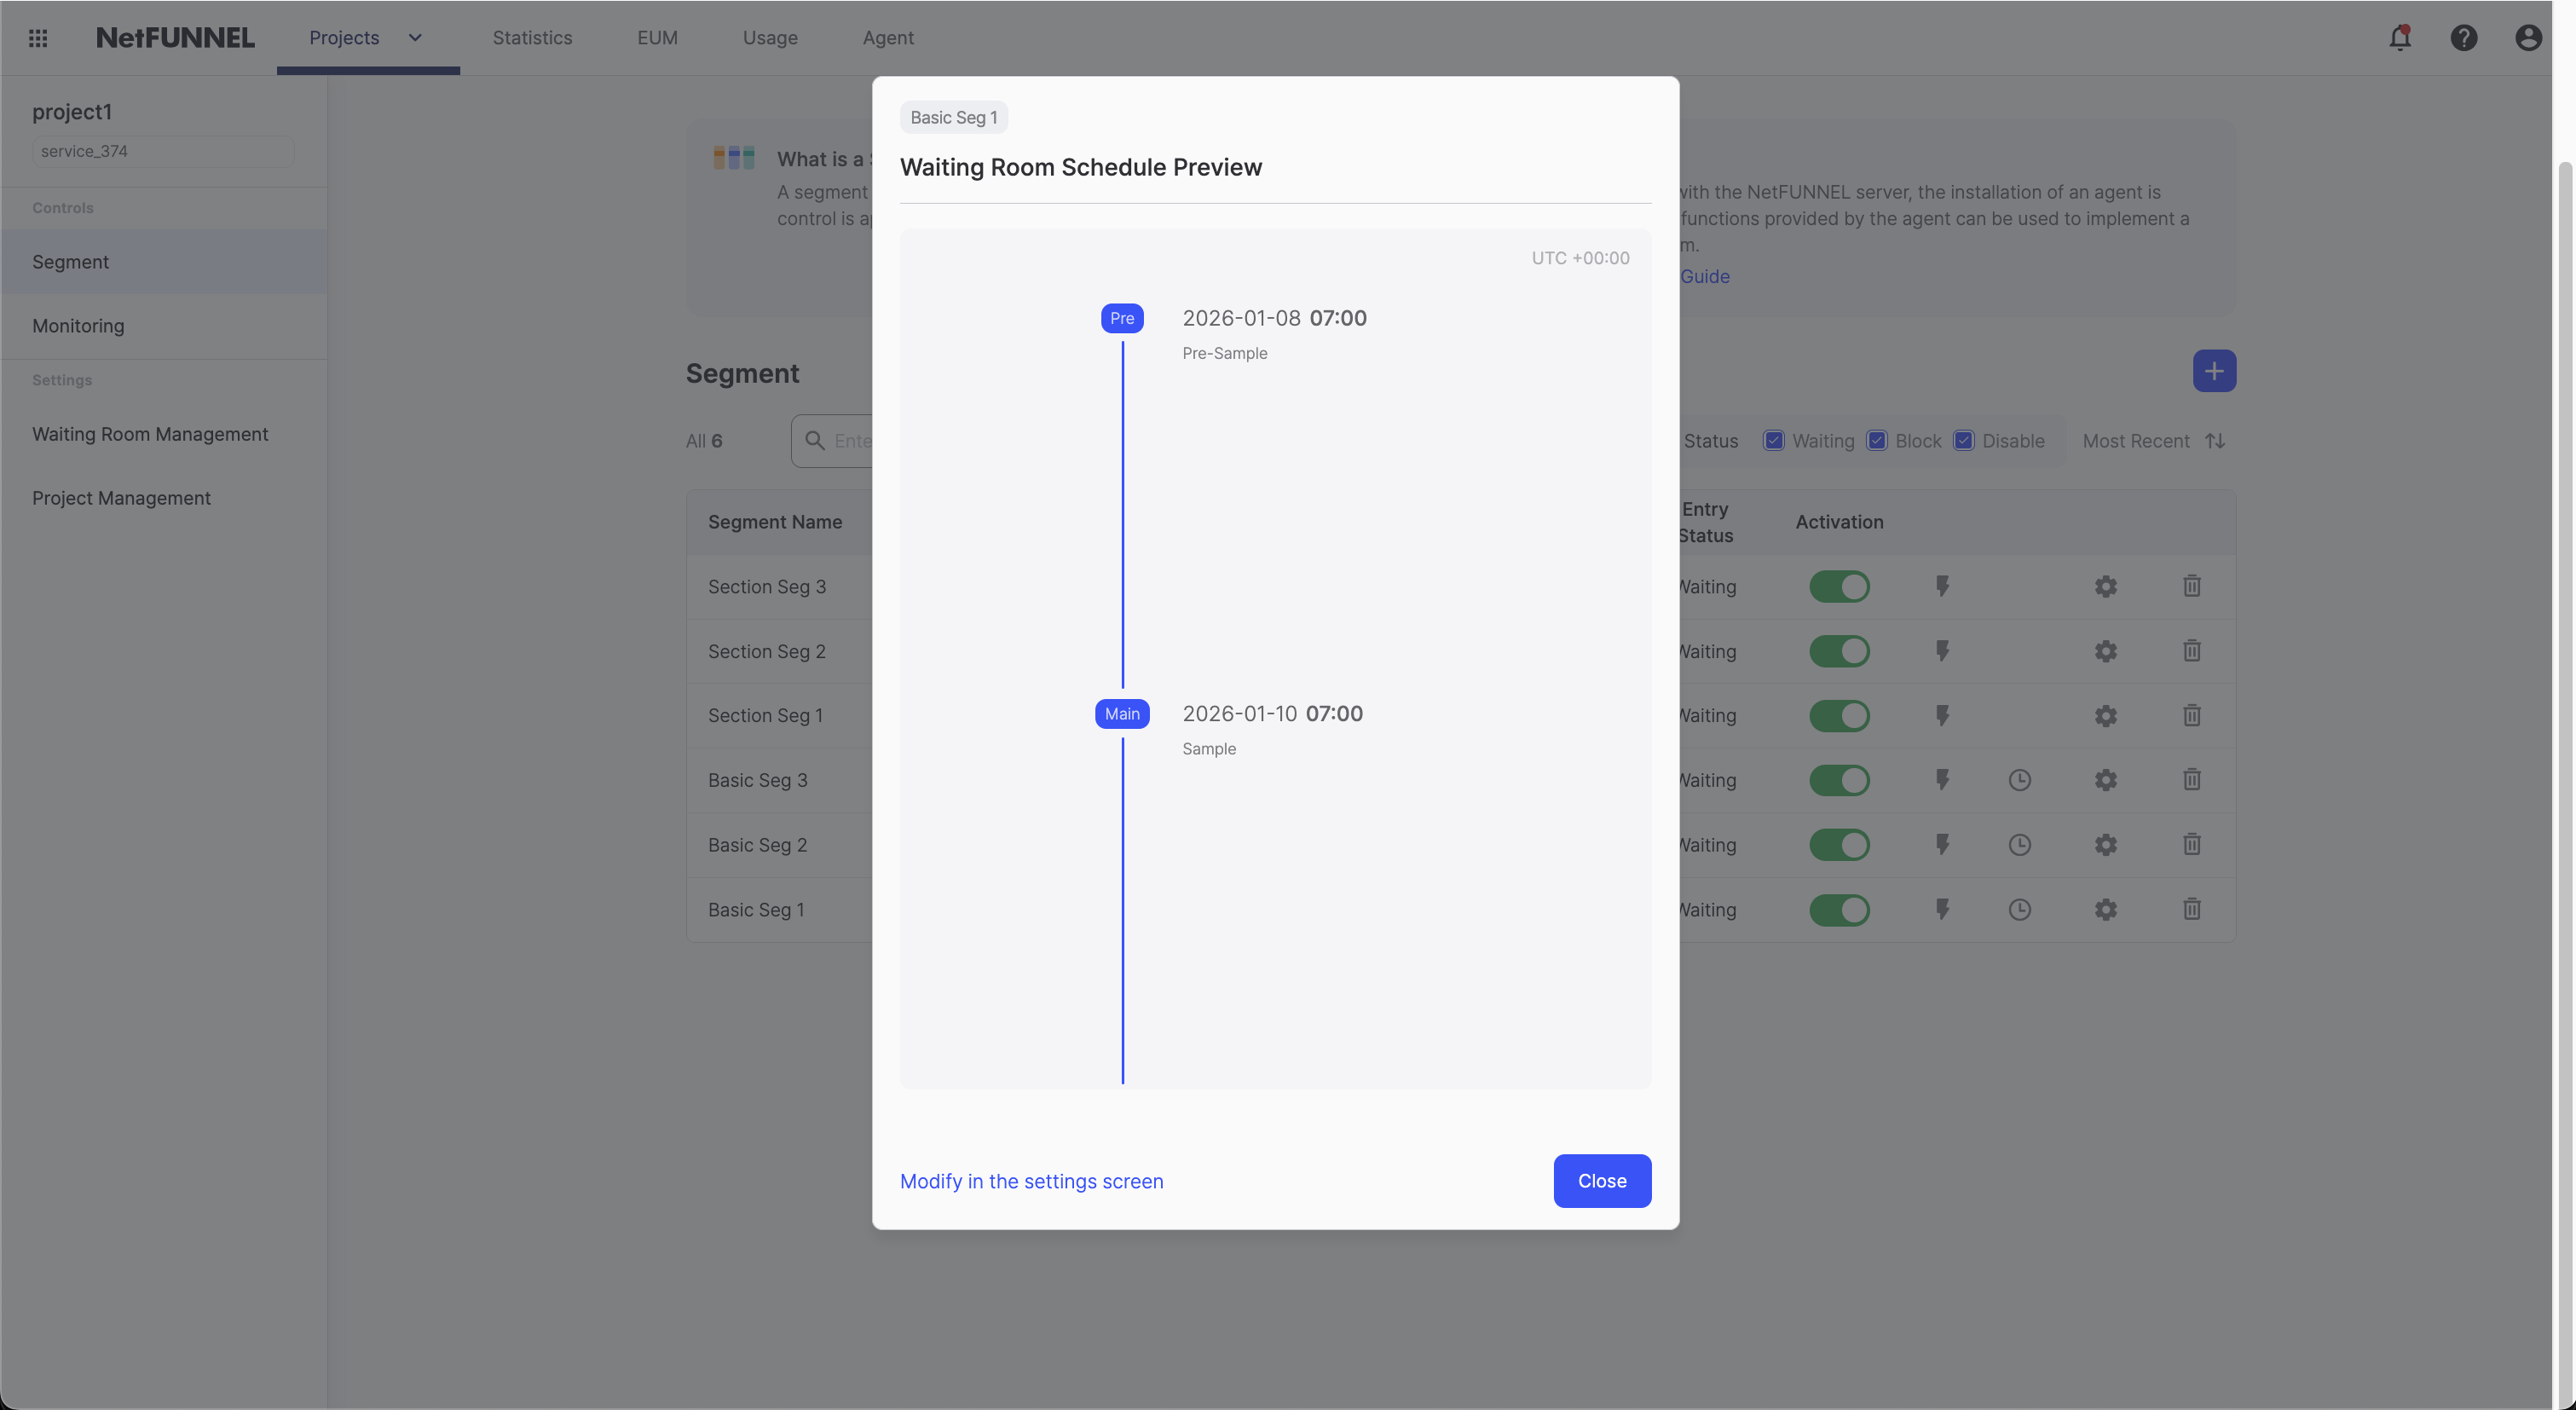
Example:
- 2026-01-08 07:00 - Status: Pre-Waiting Room, Template: Pre-Sample
- 2026-01-10 07:00 - Status: Waiting Room (Template: Sample, automatically applied)
Registered schedules can be viewed in the preview screen next to the settings screen.

Schedule Limitations:
- A maximum of 5 schedules can be registered, excluding pre-waiting room schedules
- Pre-waiting room schedules are included in the number of schedules display, but the actual registration limit is a maximum of 5 schedules excluding pre-waiting rooms
- Example: 3 pre-waiting schedules + 5 main/post/deactivated schedules = 8 total can be registered
- The UI counts 8 total, but the actual registration limit is only 5 schedules (main/post/deactivated) excluding pre-waiting rooms
Status Selection Rules (The status selection for the next schedule is limited based on the previous schedule):
-
First Schedule: All 4 statuses can be set
- Select from Waiting Room, Pre-Waiting Room, Post-Waiting Room, or Deactivated
-
If Previous Schedule is "Waiting Room": Only the remaining 3 statuses can be set (excluding Waiting Room)
- Select from Pre-Waiting Room, Post-Waiting Room, or Deactivated
-
If Previous Schedule is "Pre-Waiting Room": You must add a following "Waiting Room" schedule
- Only Waiting Room can be selected after Pre-Waiting Room
- If you select Pre-Waiting Room, you must add Waiting Room as the next schedule in a pair
-
If Previous Schedule is "Post-Waiting Room": Only the remaining 3 statuses can be set (excluding Post-Waiting Room)
- Select from Waiting Room, Pre-Waiting Room, or Deactivated
-
If Previous Schedule is "Deactivated": Only the remaining 3 statuses can be set (excluding Deactivated)
- Select from Waiting Room, Pre-Waiting Room, or Post-Waiting Room
Recommended Order: Pre-Waiting Room → Waiting Room → Post-Waiting Room
Step 3: Review and Save
- Verify Schedule: Check that the execution dates/times and order of registered schedules are correct
- Verify Status: Check that each schedule's status (Waiting Room/Pre-Waiting Room/Post-Waiting Room/Deactivated) is correct
- Verify Template: If the status is Pre-Waiting Room or Post-Waiting Room, check that the waiting room template applied to each schedule is correct
- Save: Save all settings
Check Schedule in Segment List
You can also view registered schedules from the segment list screen.
Number of Schedules Display: The segment list displays the number of schedules registered for each segment. Pre-waiting room schedules are included in the number of schedules display.
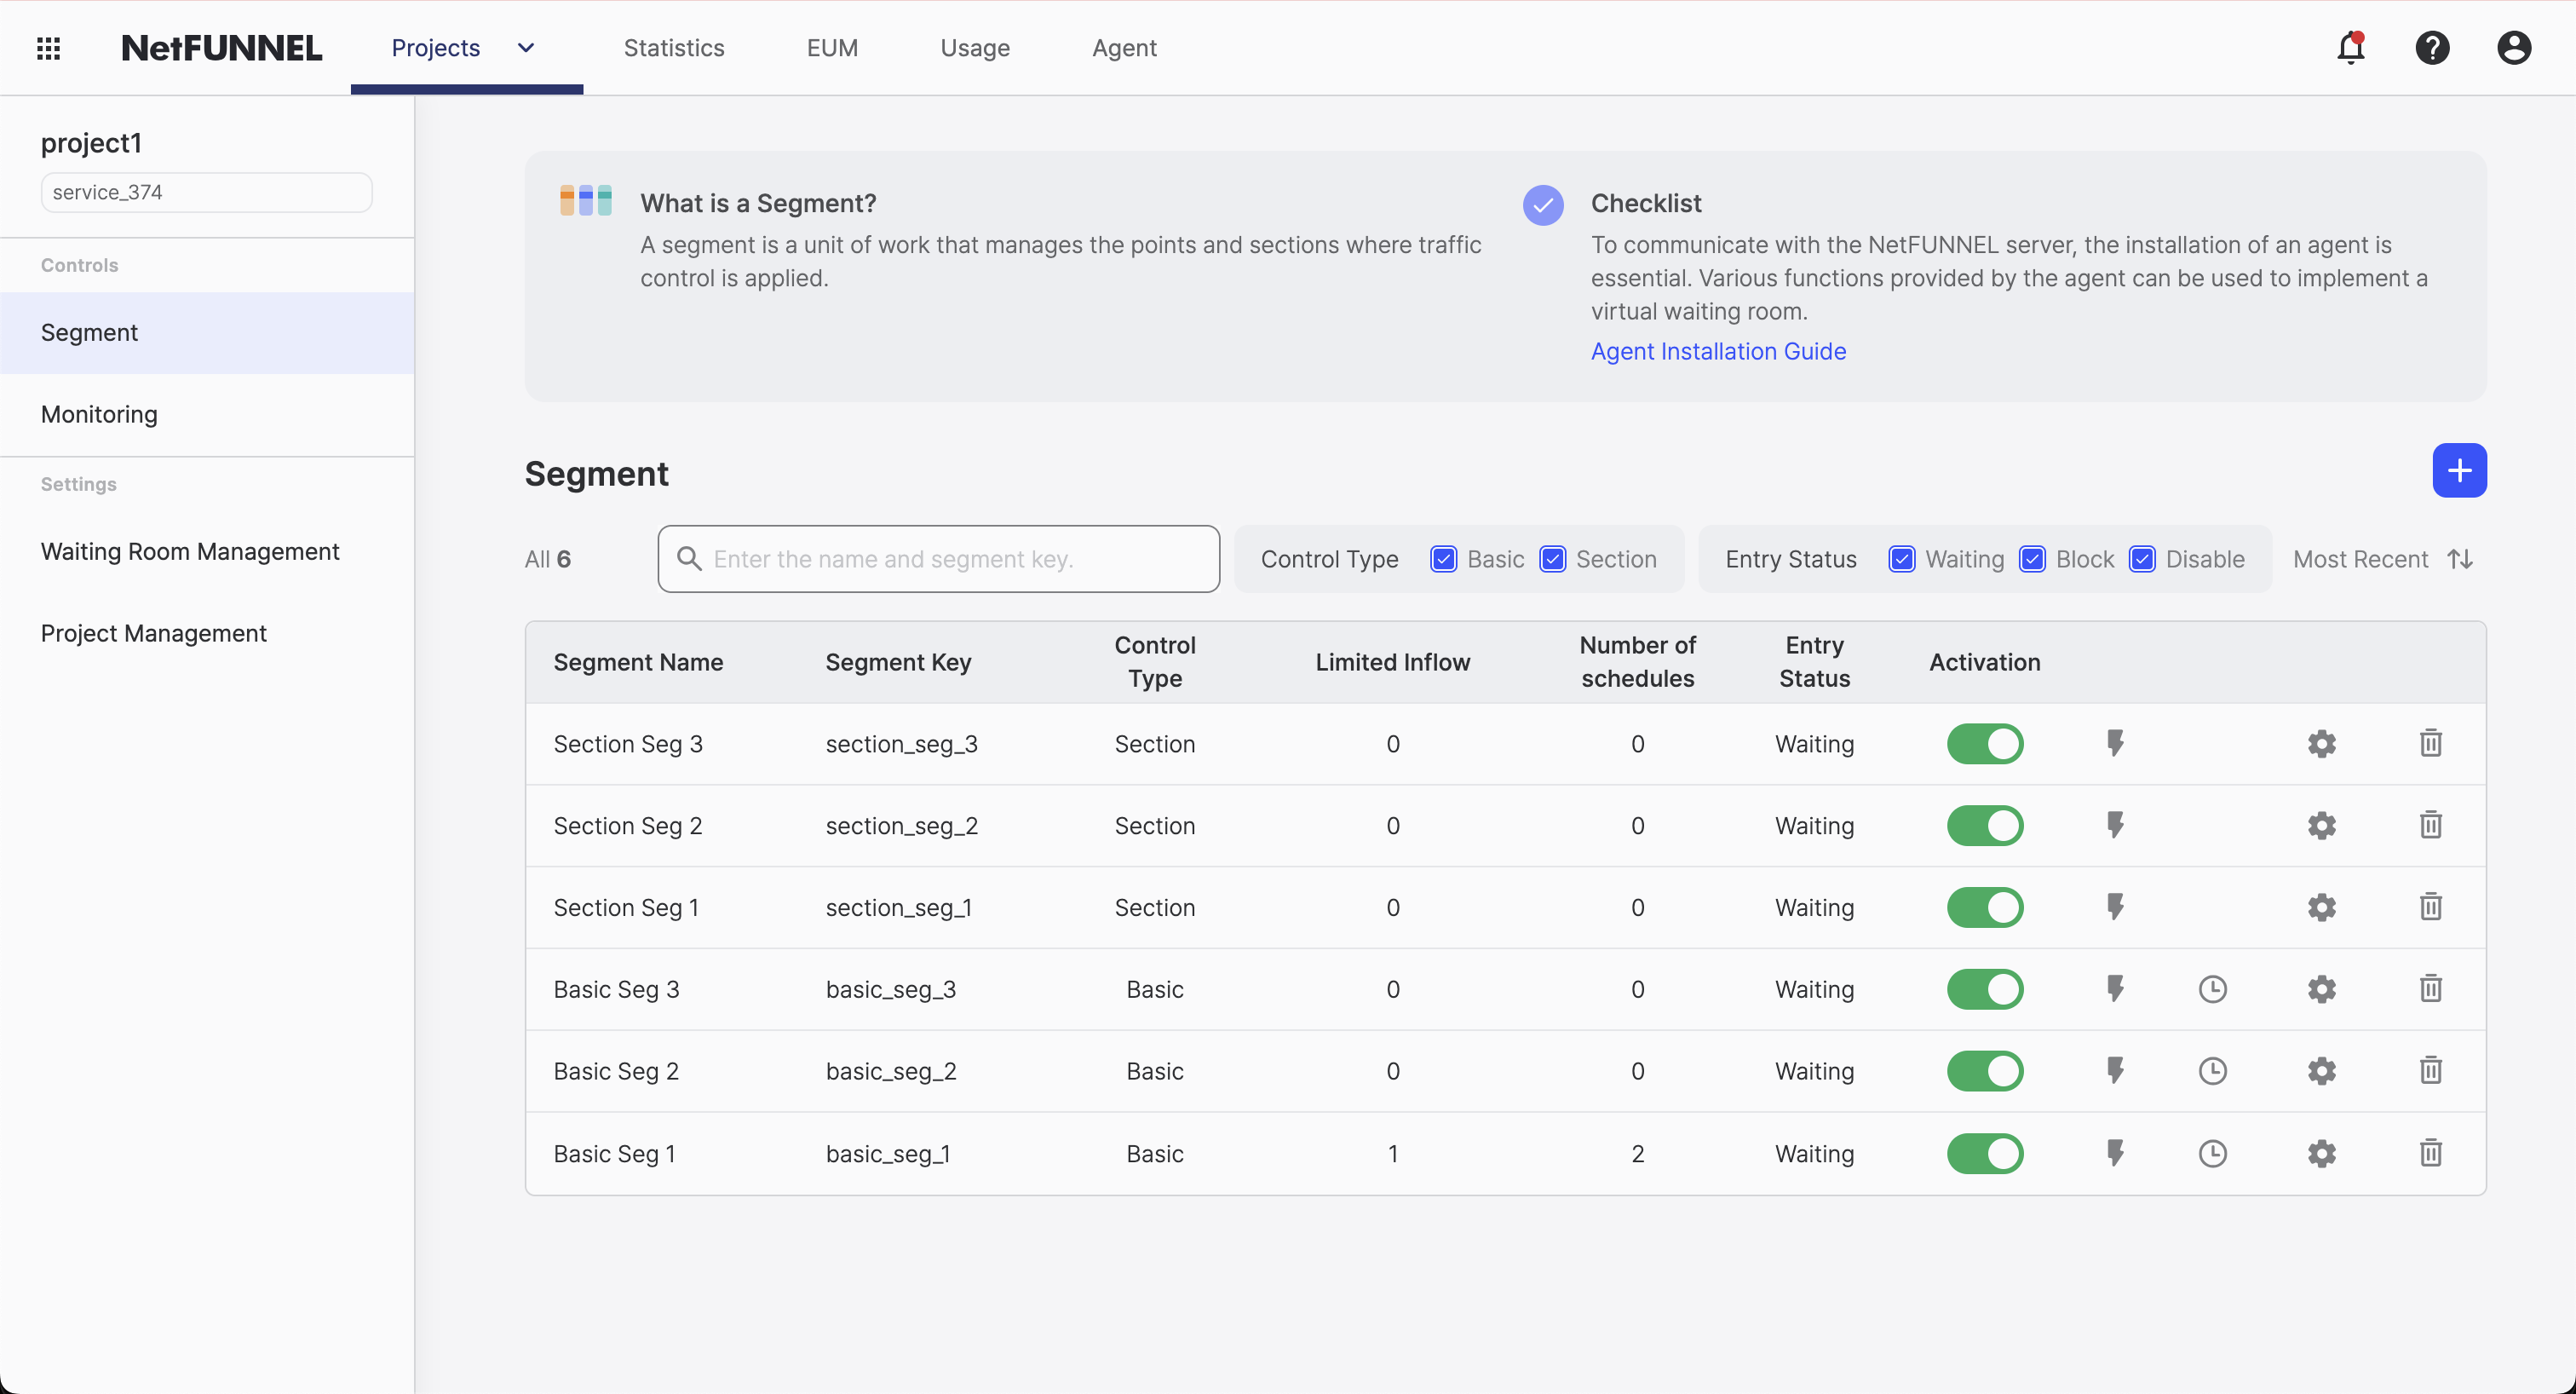
Schedule Preview: Click the clock icon in the segment list to preview registered schedules.
![]()
Clicking the clock icon displays the Waiting Room Schedule Preview dialog. You can view the list of registered schedules in the dialog, and clicking the "Modify in the settings screen" button navigates to the schedule edit screen.
Best Practices
Configuration Scenarios
You can configure various scenarios by scheduling waiting rooms according to your event schedule:
Main Waiting Room Only
The simplest configuration, using only the main waiting room to manage the queue.
When to use: When general queue management is needed
Pre-Waiting Room + Main Waiting Room
Provide announcements, countdown timers, etc. to users before the event starts, and switch to the main waiting room when the event starts.
When to use:
- When your event needs countdown timers and fair entry
- When people show up early and you want to provide a proper waiting experience instead of having them constantly refresh the page
Example: When Nike launches a new Air Jordan - fans start visiting hours before the release. They see countdown timers and announcements in the pre-waiting room, and when the event starts, they receive fair random queue numbers.
Main Waiting Room + Post-Waiting Room
Use a post-waiting room after the event ends to guide user behavior.
When to use:
- When your event has a clear endpoint and you want to capture people who missed it or convert them to other products
- When there's no reason for people to access the main service page after the event ends
Example: A product sale that reached capacity - collect emails for restock notifications, or a closed course registration - promote other courses or waitlist signup.
Full Experience (Pre + Main + Post)
Use for major events where you want complete control - from building excitement to capturing additional sales after everything ends.
When to use:
- Black Friday sales with massive traffic
- Exclusive launches with high demand
- Conference registrations with limited seats
User Journey: Build anticipation → Fair queue management → Access → Marketing
| Configuration | When It's Useful | User Journey |
|---|---|---|
| Main Only | General queue management | Queue → Access |
| Pre + Main | High anticipation, early traffic | Pre-event → Queue → Access |
| Main + Post | Want to capture missed opportunities | Queue → Access → Marketing |
| Pre + Main + Post | Major events, maximum control | Anticipation → Queue → Access → Marketing |
Schedule Limitations:
- A maximum of 5 schedules can be registered, excluding pre-waiting room schedules (Pre-waiting room schedules are included in the number of schedules display, but the actual registration limit is a maximum of 5 schedules excluding pre-waiting rooms)
- Pre-waiting rooms cannot be scheduled independently and must be scheduled together with the main waiting room as one schedule
- You cannot schedule the same waiting room consecutively after a specific waiting room. Please schedule a different waiting room
Schedule Modification and Management
Registered schedules can be modified or deleted at any time.
Schedule Modification:
- Change execution date/time
- Change status (select from Waiting Room/Pre-Waiting Room/Post-Waiting Room/Deactivated)
- Change waiting room template (if status is Pre-Waiting Room or Post-Waiting Room)
Schedule Deletion:
- Schedules that are no longer needed can be deleted
Precautions:
- Setting status to deactivated allows users to bypass NetFUNNEL and enter the server directly, which cannot guarantee server stability
- Deleting a schedule means the waiting room transition will not occur at that time, and the previous schedule state will be maintained
Event Schedule Planning
Recommended Schedule Order: Pre-Waiting Room → Waiting Room → Post-Waiting Room
For Most Events (Recommended):
- Pre-Waiting Room: Can provide announcements, related product links, etc. before the event starts
- Main Waiting Room: Queue management during the actual event period
- Post-Waiting Room: Can guide user behavior after the event ends
Traffic Management Benefits:
- Pre-Waiting Room: Captures initial traffic spikes and distributes load
- Main Waiting Room: Handles peak traffic with controlled queue management
- Post-Waiting Room: Manages lingering traffic and converts it to value
Content and Redirect Strategy
Pre-Waiting Room Content:
- Event announcements: "Sale starts in 30 minutes!"
- Countdown timers: Build excitement with live countdown
- Product previews: Show what's coming up
- Redirect buttons: Browse other products, read FAQs, follow social media, contact support
Post-Waiting Room Content:
- Re-stock notifications: "Get notified when we restock"
- Related products: "Check out these similar items"
- Newsletter signup: "Stay updated on future events"
- Redirect buttons: Alternative products, customer support, future events
Key Strategy: Use redirect buttons strategically to guide users to valuable content while they wait, turning waiting time into engagement opportunities.
Testing Before You Go Live
Essential Tests:
- Timing test: Visit your site at different times to see transitions
- Content test: Make sure all your links and content work
- Mobile test: Check how it looks on phones and tablets
- Queue test: Verify queue numbers appear correctly in main waiting
Pro Tip: Test with a small group first, or use a test segment before your real event.
For advanced configuration options and integration details, refer to the Basic Control Segment Overview and Basic Settings documentation.