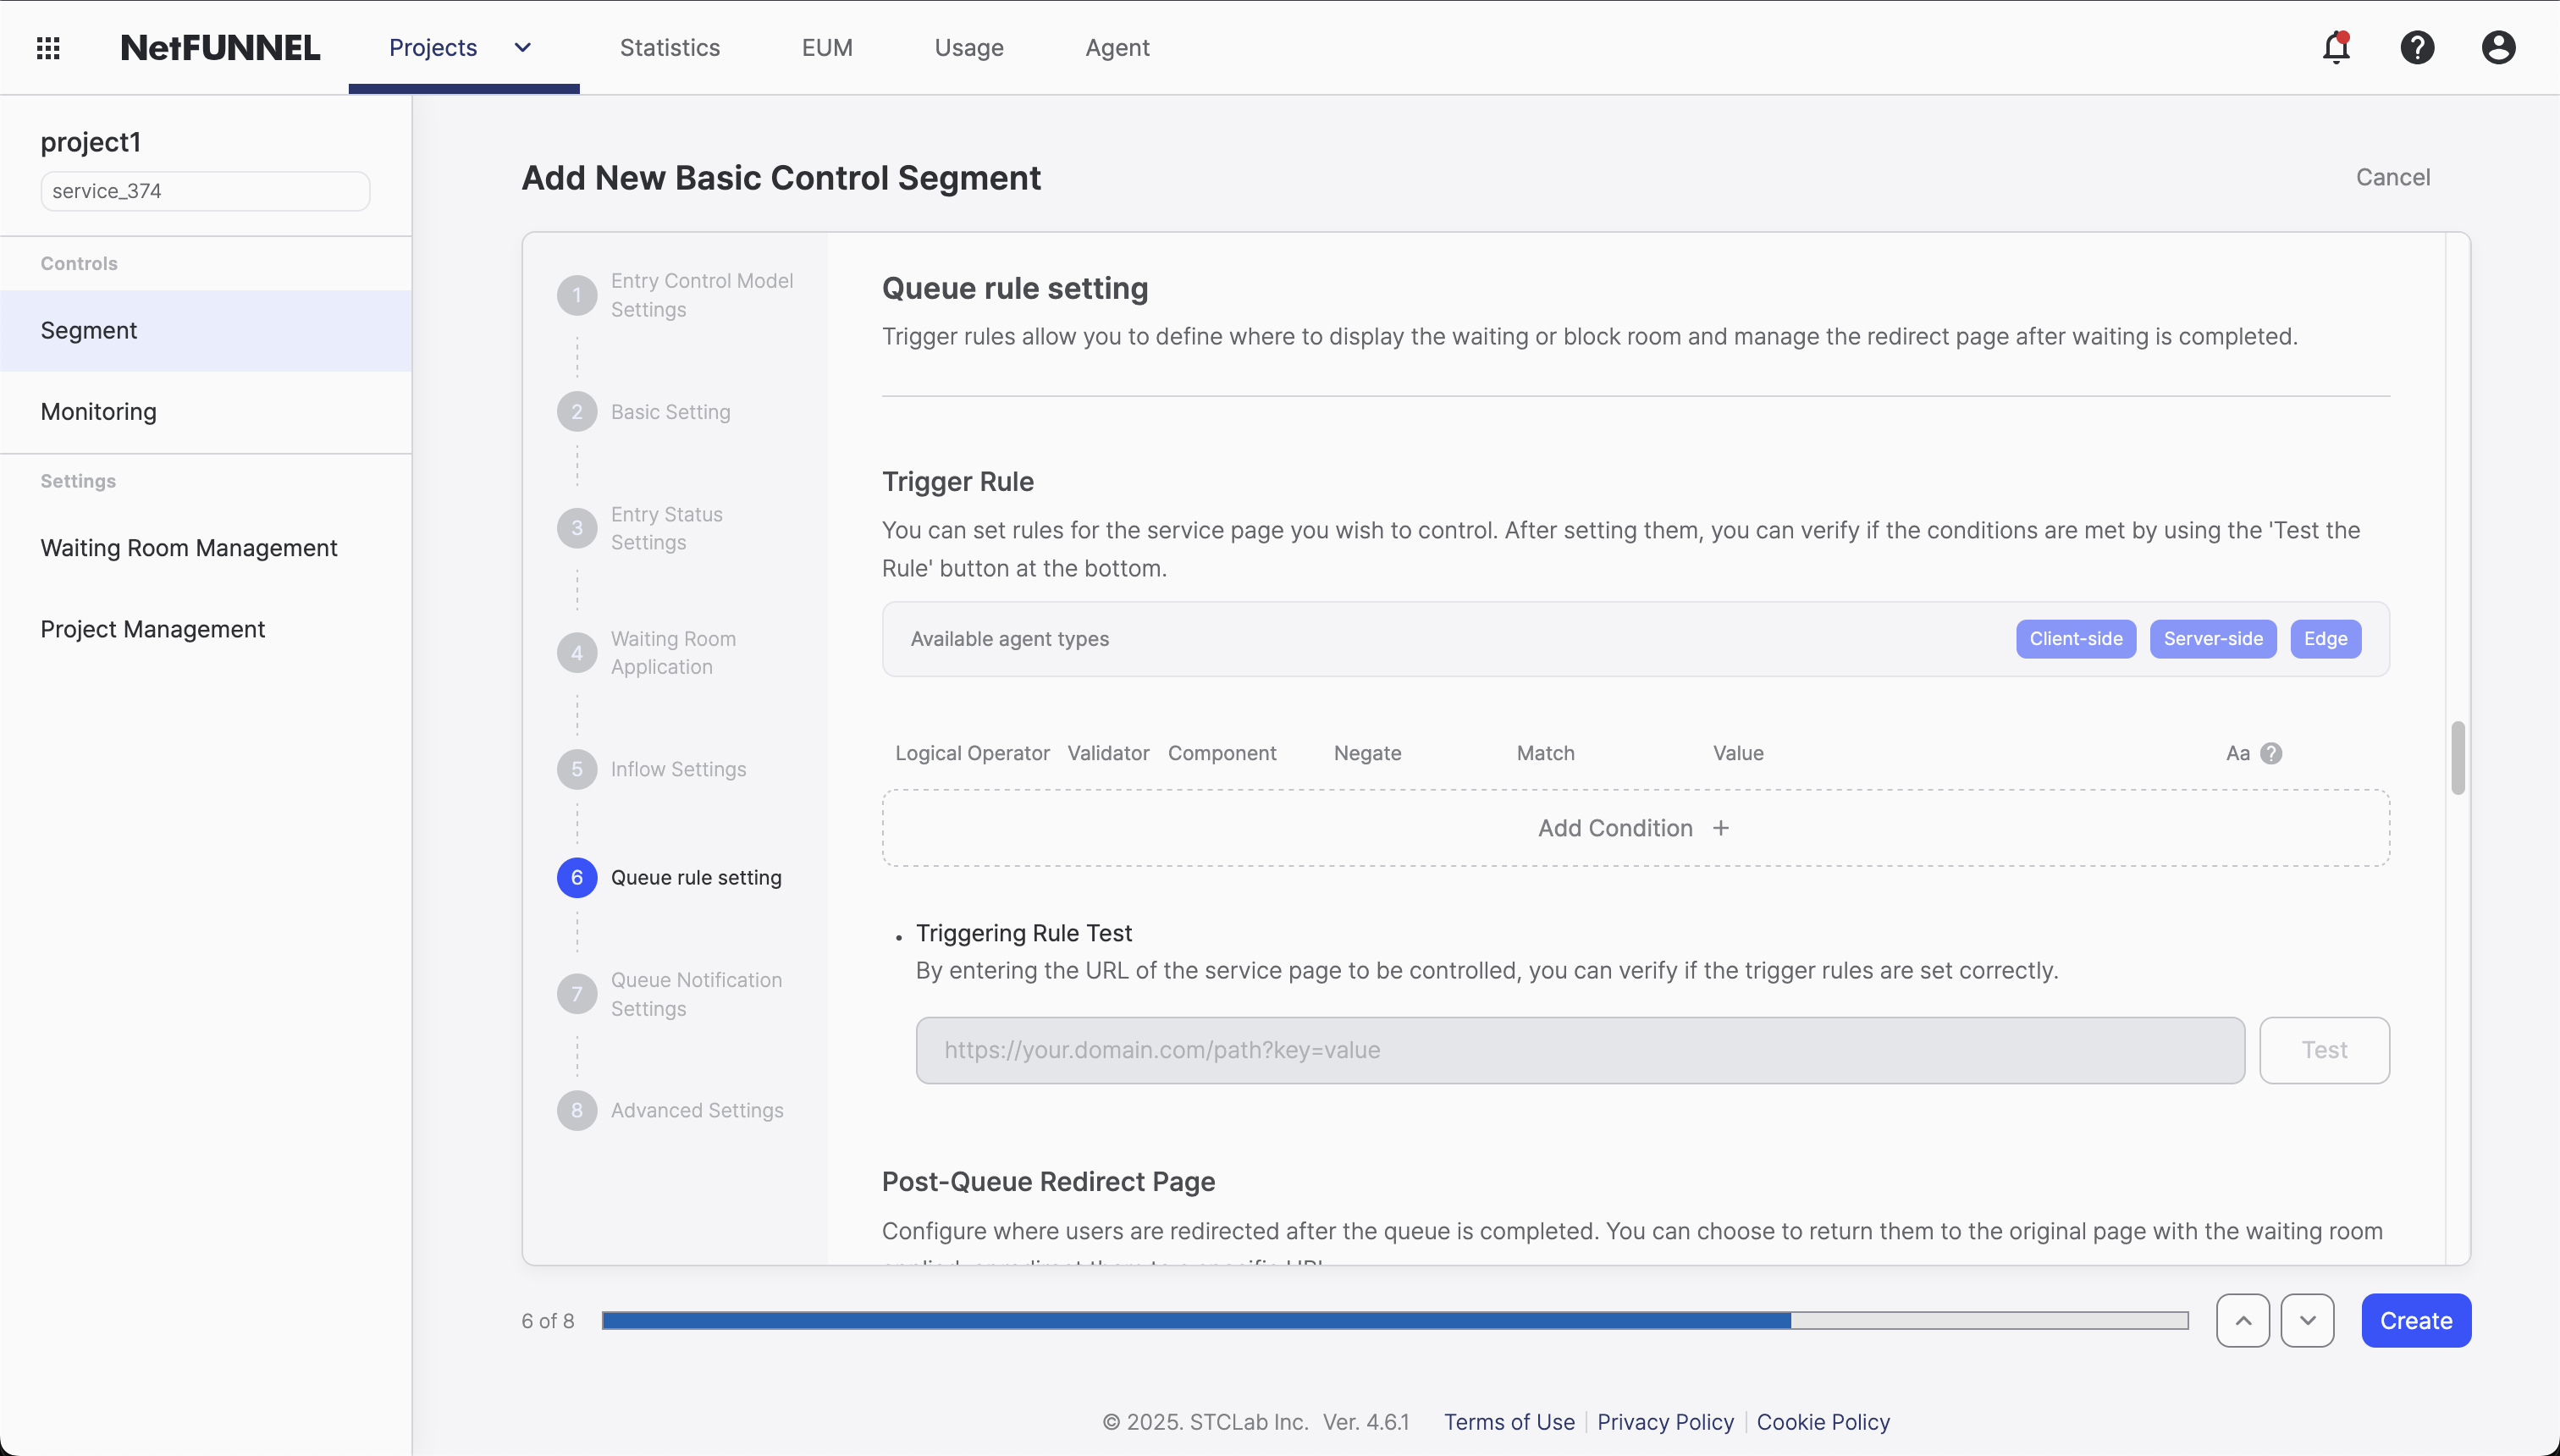
Trigger Rule Setting
"Trigger Rule Setting" is the configuration that allows you to set rules to expose Waiting Room/Block Room according to specific URL conditions, providing fine-grained control over when traffic control should be activated. This function only makes sense with URL-Triggered Integration (UTI).
Overview
In URL-Triggered Integration (UTI), you need to define where to apply traffic control on your website. While Code-Based Integration (CBI) uses nfStart() and nfStop() functions to wrap specific code segments, UTI uses URL-based rules to determine which pages should trigger traffic control.
Trigger rules are the core configuration that answers the fundamental question: "Which requests should go through traffic control?"
UTI only applies to page requests, not API calls. When users navigate to pages (like clicking links or typing URLs), UTI can control access. However, AJAX calls, API requests, or other background requests are not affected by trigger rules.
If you need to protect API endpoints, use Code-Based Integration (CBI) with nfStart() and nfStop() functions instead.
How It Works
When someone visits your website, NetFUNNEL examines the URL they're trying to access and checks it against your trigger rules:
- If the URL matches a rule: The visitor goes to the waiting room before accessing that page
- If the URL doesn't match any rule: The visitor goes straight to the page
This allows you to set up multiple rules that define exactly which pages, paths, or domains should be protected with traffic control.
Trigger Rule Processing Flow
Trigger rules only make sense with URL-Triggered Integration (UTI). If you're using Code-Based Integration (CBI), trigger rules are not needed because you control traffic directly in your code using nfStart() and nfStop() functions.
Think of it this way: With UTI, you're controlling traffic at the door (URL level), so you need rules to decide which pages require waiting. With CBI, you're controlling traffic inside the building (code level), so you already know exactly what to protect.
Rule Components
A trigger rule consists of multiple conditions that are combined using logical operators (AND/OR). Each condition specifies what to look for in the URL, and the logical operator determines how these conditions work together.
Trigger Rule Structure
Trigger Rule
└── Condition 1
    ├── Validator: URL
    ├── Component: Path | Domain | URL
    ├── Match Type: Equals | Contains | StartsWith | EndsWith | Exists
    ├── Value: Specific text to match
    ├── Negate: Does | Does not
    └── Case Sensitivity: Checked | Unchecked
    ↓
    [AND | OR]  ← Logical Operator
    ↓
    Condition 2 (same structure)
    ↓
    [AND | OR]  ← Logical Operator (if more conditions)
    ↓
    Condition N... (same structure)
Example: A trigger rule with 2 conditions using AND operator
- Condition 1: Path equals
/checkout - AND ← Logical Operator
- Condition 2: Domain equals
shop.example.com - Result: Only
/checkoutpages onshop.example.comtrigger traffic control
Logical Operator
When you have multiple conditions, this defines how they work together:
- AND: "All conditions must be true" - All conditions must match for traffic control to apply
- OR: "At least one condition must be true" - Any condition can trigger traffic control
Validator
The type of request attribute to examine:
- URL: Currently the only option - examining the web address someone is trying to access
- Future options may include Header, Cookie, and other request attributes
Component
Which part of the URL to examine:
| Component | What It Checks | Example |
|---|---|---|
| URL | The complete web address | https://example.com/page?id=123 |
| Domain | Just the website name | example.com, www.example.com |
| Path | The specific page path | /page, /api/users |
Negate
Whether to apply the rule normally or in reverse:
- Does: "Apply traffic control when this is true" (normal)
- Does not: "Apply traffic control when this is false" (reverse) - Like "Apply traffic control to all pages EXCEPT admin pages"
Match Type
How to compare the URL component:
| Match Type | How It Works | Example |
|---|---|---|
| Exists | "Does this part exist at all?" | Does the page have a path? |
| Equals | "Is this exactly the same?" | Path must be exactly /event |
| Contains | "Does this include this text?" | Domain contains api |
| StartsWith | "Does this begin with this?" | Path starts with /mobile |
| EndsWith | "Does this end with this?" | Path ends with .html |
Value
The specific text to match against. This is what you're looking for in the URL.
Case Sensitivity (Aa)
Whether to care about capital letters:
- Unchecked: "VIP" and "vip" are treated the same
- Checked: "VIP" and "vip" are treated differently
Configuration Process
Setting up trigger rules is like creating a special menu system for your restaurant. Let's walk through it step by step:
Step 1: Access Trigger Rule Settings
- Go to your Basic Control Segment in NetFUNNEL
- Click on "Trigger Rule Setting"
- Important: Verify you're using UTI - trigger rules only make sense with URL-Triggered Integration
Step 2: Create Your First Condition
Think of this as adding a special section to your menu:
- Choose what to check: Select "URL" (this is like choosing to check which menu section someone wants)
- Pick which part to examine: Choose Domain, Path, or full URL (like checking just the restaurant name vs. the full menu item)
- Decide how strict to be: Choose your match type (exact match, contains, starts with, etc.)
- Write down what to look for: Enter the specific value (like "VIP Lounge" on your special menu)
- Choose normal or reverse: Pick "Does" or "Does not" (normal condition or exception condition)
- Decide about capital letters: Check if case sensitivity matters for your condition
Step 3: Test Your Rules
Before going live, test your rules to make sure they work as expected:
- Enter test URLs in the console (like testing different menu items)
- Check if the rules apply correctly
- Adjust settings if needed
Step 4: Add Multiple Conditions (Optional)
If you need more complex logic:
- Add additional conditions
- Choose AND/OR to combine them (like "VIP lounge AND special events")
- Test the combined behavior
Query string filtering is not currently supported in trigger rules. You can only match against the URL path, domain, or full URL.
Workaround for query strings: If you need to protect pages with specific query parameters, copy the complete URL including query strings from your browser and use URL exact match.
This limitation may be addressed in future updates.
Common Use Cases
Here are the most common scenarios and their typical configurations:
| Scenario | Component | Match Type | Value | Logical Operator | Example |
|---|---|---|---|---|---|
| Specific Page Protection | Path | Equals | /checkout | - | Protect only checkout page |
| Page Group Protection | Path | StartsWith | /event | - | Protect all event pages |
| Multiple Pages | Path | Equals | /checkout, /flash-sale, /limited-edition | OR | Protect multiple specific pages |
| Domain-Specific Protection | Domain | Equals | shop.example.com | - | Protect only shop subdomain |
| Combined Conditions | Path + Domain | Equals | /checkout + shop.example.com | AND | Protect checkout only on shop domain |
| Full URL Protection | URL | Equals | https://example.com/checkout?step=payment | - | Protect specific URL with query string |
Best Practices
When setting up trigger rules, it's important to start simple and build complexity gradually. Many users make the mistake of trying to configure everything at once, which often leads to confusion and unexpected behavior.
Start Simple, Then Expand
The best approach is to begin with your most critical page and add more conditions gradually. For example, an e-commerce site might start by protecting just the /checkout page, then add /flash-sale and /limited-edition conditions after monitoring traffic patterns for a few weeks.
This incremental approach helps you understand how trigger rules work with your specific traffic patterns before adding complexity.
Testing Strategy
Before going live, always test your conditions thoroughly. Set your Limited Inflow to 0 to verify the waiting room appears correctly, then test with different URL variations including different cases, parameters, and formats.
A good testing approach includes:
- Testing exact matches:
https://example.com/event(should trigger) - Testing case variations:
https://example.com/EVENT(should trigger if case-insensitive) - Testing with parameters:
https://example.com/event?id=123(should trigger) - Testing edge cases:
https://example.com/events(should NOT trigger with Equals)
Common Mistakes to Avoid
Overly broad conditions are a frequent issue. Using "Path starts with /" will protect everything on your site, which is rarely what you want. Instead, be specific like "Path starts with /checkout" to protect only the areas that need it.
Case sensitivity confusion is another common problem. Unless you have specific requirements, keep case sensitivity unchecked since users might access /Event vs /event depending on how they navigate to your site.
Not testing parameter variations can cause issues where /product?id=123 works but /product?category=electronics doesn't. Always test URLs with different parameter combinations to ensure your conditions work as expected.
Pro Tips
Use descriptive names for your conditions instead of generic ones like "Rule 1". Names like "Checkout Protection" or "Flash Sale Protection" make management much easier, especially when you have multiple conditions.
Start conservative with your settings and increase gradually. It's much easier to increase limits than to deal with system overload, and this approach helps you find the sweet spot for your specific traffic patterns.
Finally, always monitor your server metrics (CPU, memory, response times) when conditions are active to ensure they're actually helping your system rather than causing additional problems.
For advanced configuration options and integration details, refer to the Basic Control Segment Overview and Basic Settings documentation.