Segment Interface Guide
This guide explains how to work with segments using the NetFUNNEL console interface. Learn how to view the segment list, create new segments, edit existing segments, and delete segments.
Overview
The segment management interface provides a centralized view of all segments in your project, allowing you to perform common management tasks such as creating, editing, and deleting segments.
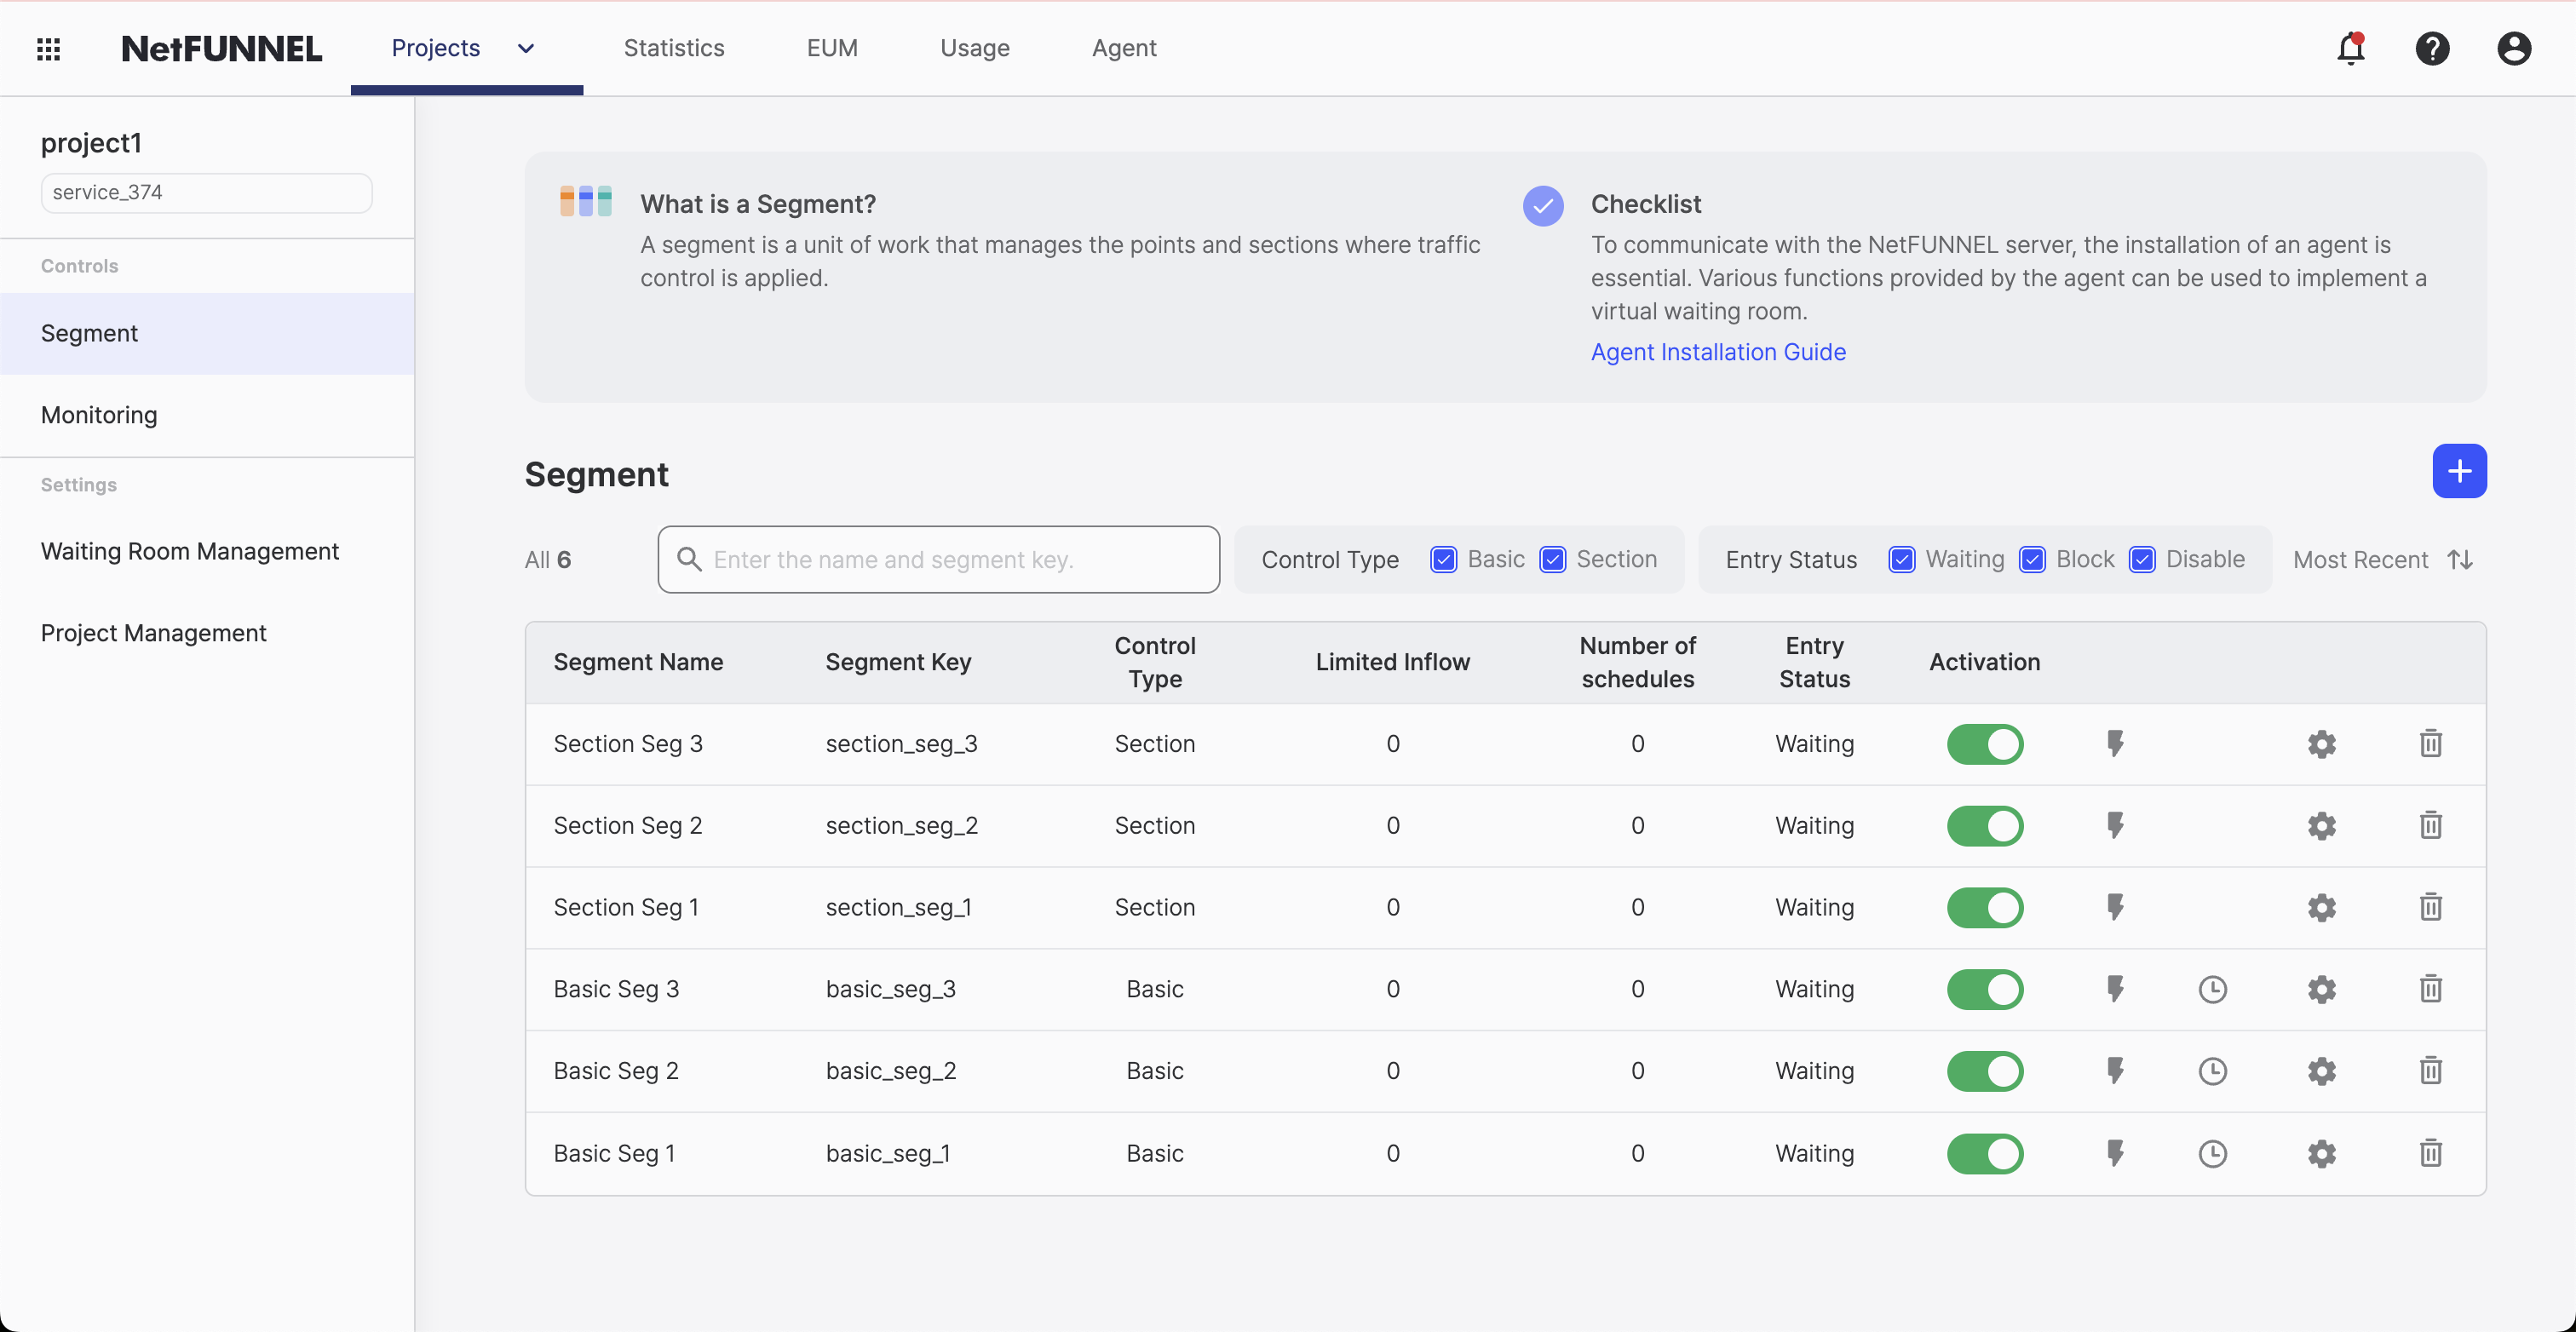
The segment management page consists of two main sections:
- List Control Section: Contains controls for filtering and creating segments
- Segment List Section: Displays all segments with their key information and management options
Viewing Segments
The segment list displays all segments in your project, organized by control type (Basic Control or Section Control).
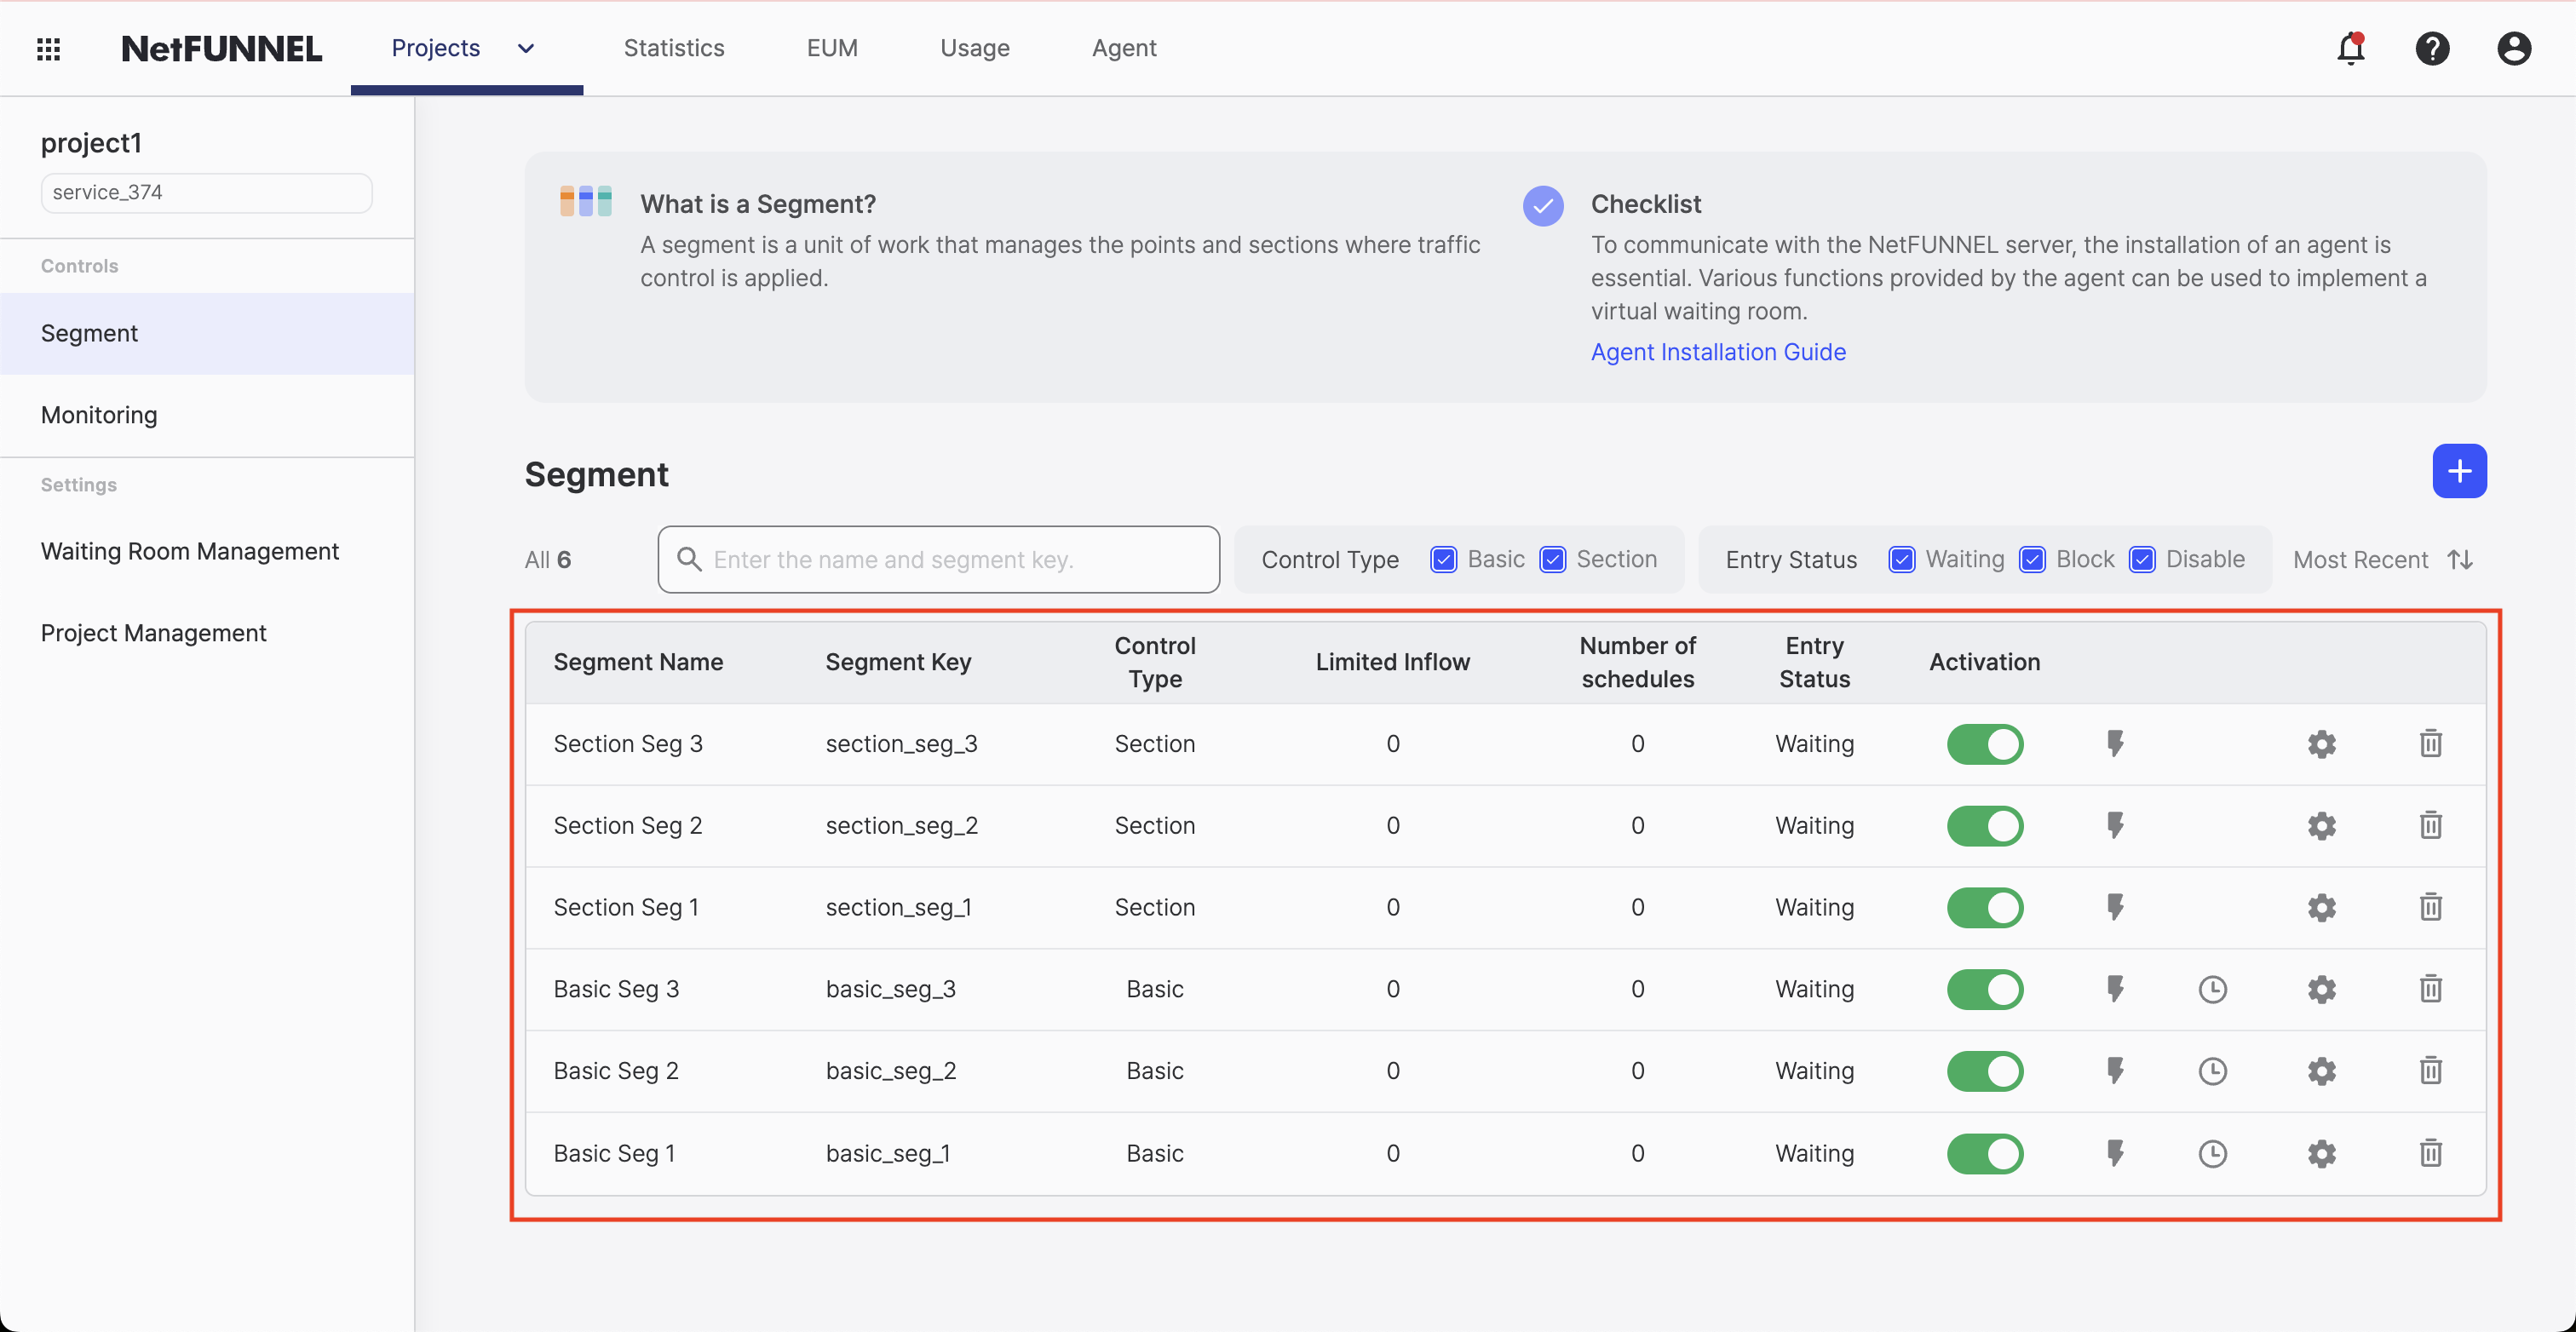
Segment List Columns
The segment list displays the following columns:
Data Columns:
| Column | Description |
|---|---|
| Segment Name | The name assigned to the segment |
| Segment Key | Unique identifier used for API integration |
| Control Type | Basic Control or Section Control |
| Limited Inflow | Configured capacity limit |
| Entry Status | Waiting, Block, or Disable status |
Action Buttons:
| Column | Description |
|---|---|
| Activation | Toggle button to activate or deactivate the segment |
| Pre/Post Waiting Room | Quick edit button for Pre/Post-waiting room reservation (only for Basic Control segments) |
| Edit | Button to edit segment settings |
| Delete | Button to delete the segment |
List Control Section
The list control section provides filtering, sorting, and creation options.

Available Controls:
| Control | Description |
|---|---|
| Search Filter | Search segments by segment key or segment name (string search) |
| Control Type Filter | Filter segments by Basic Control or Section Control |
| Entry Status Filter | Filter segments by entry status (Waiting, Block, or Disable) |
| Sort | Sort segments by creation time (ascending or descending order) |
| Create Button | Create a new segment |
Creating Segments
To create a new segment, click the create button in the list control section.
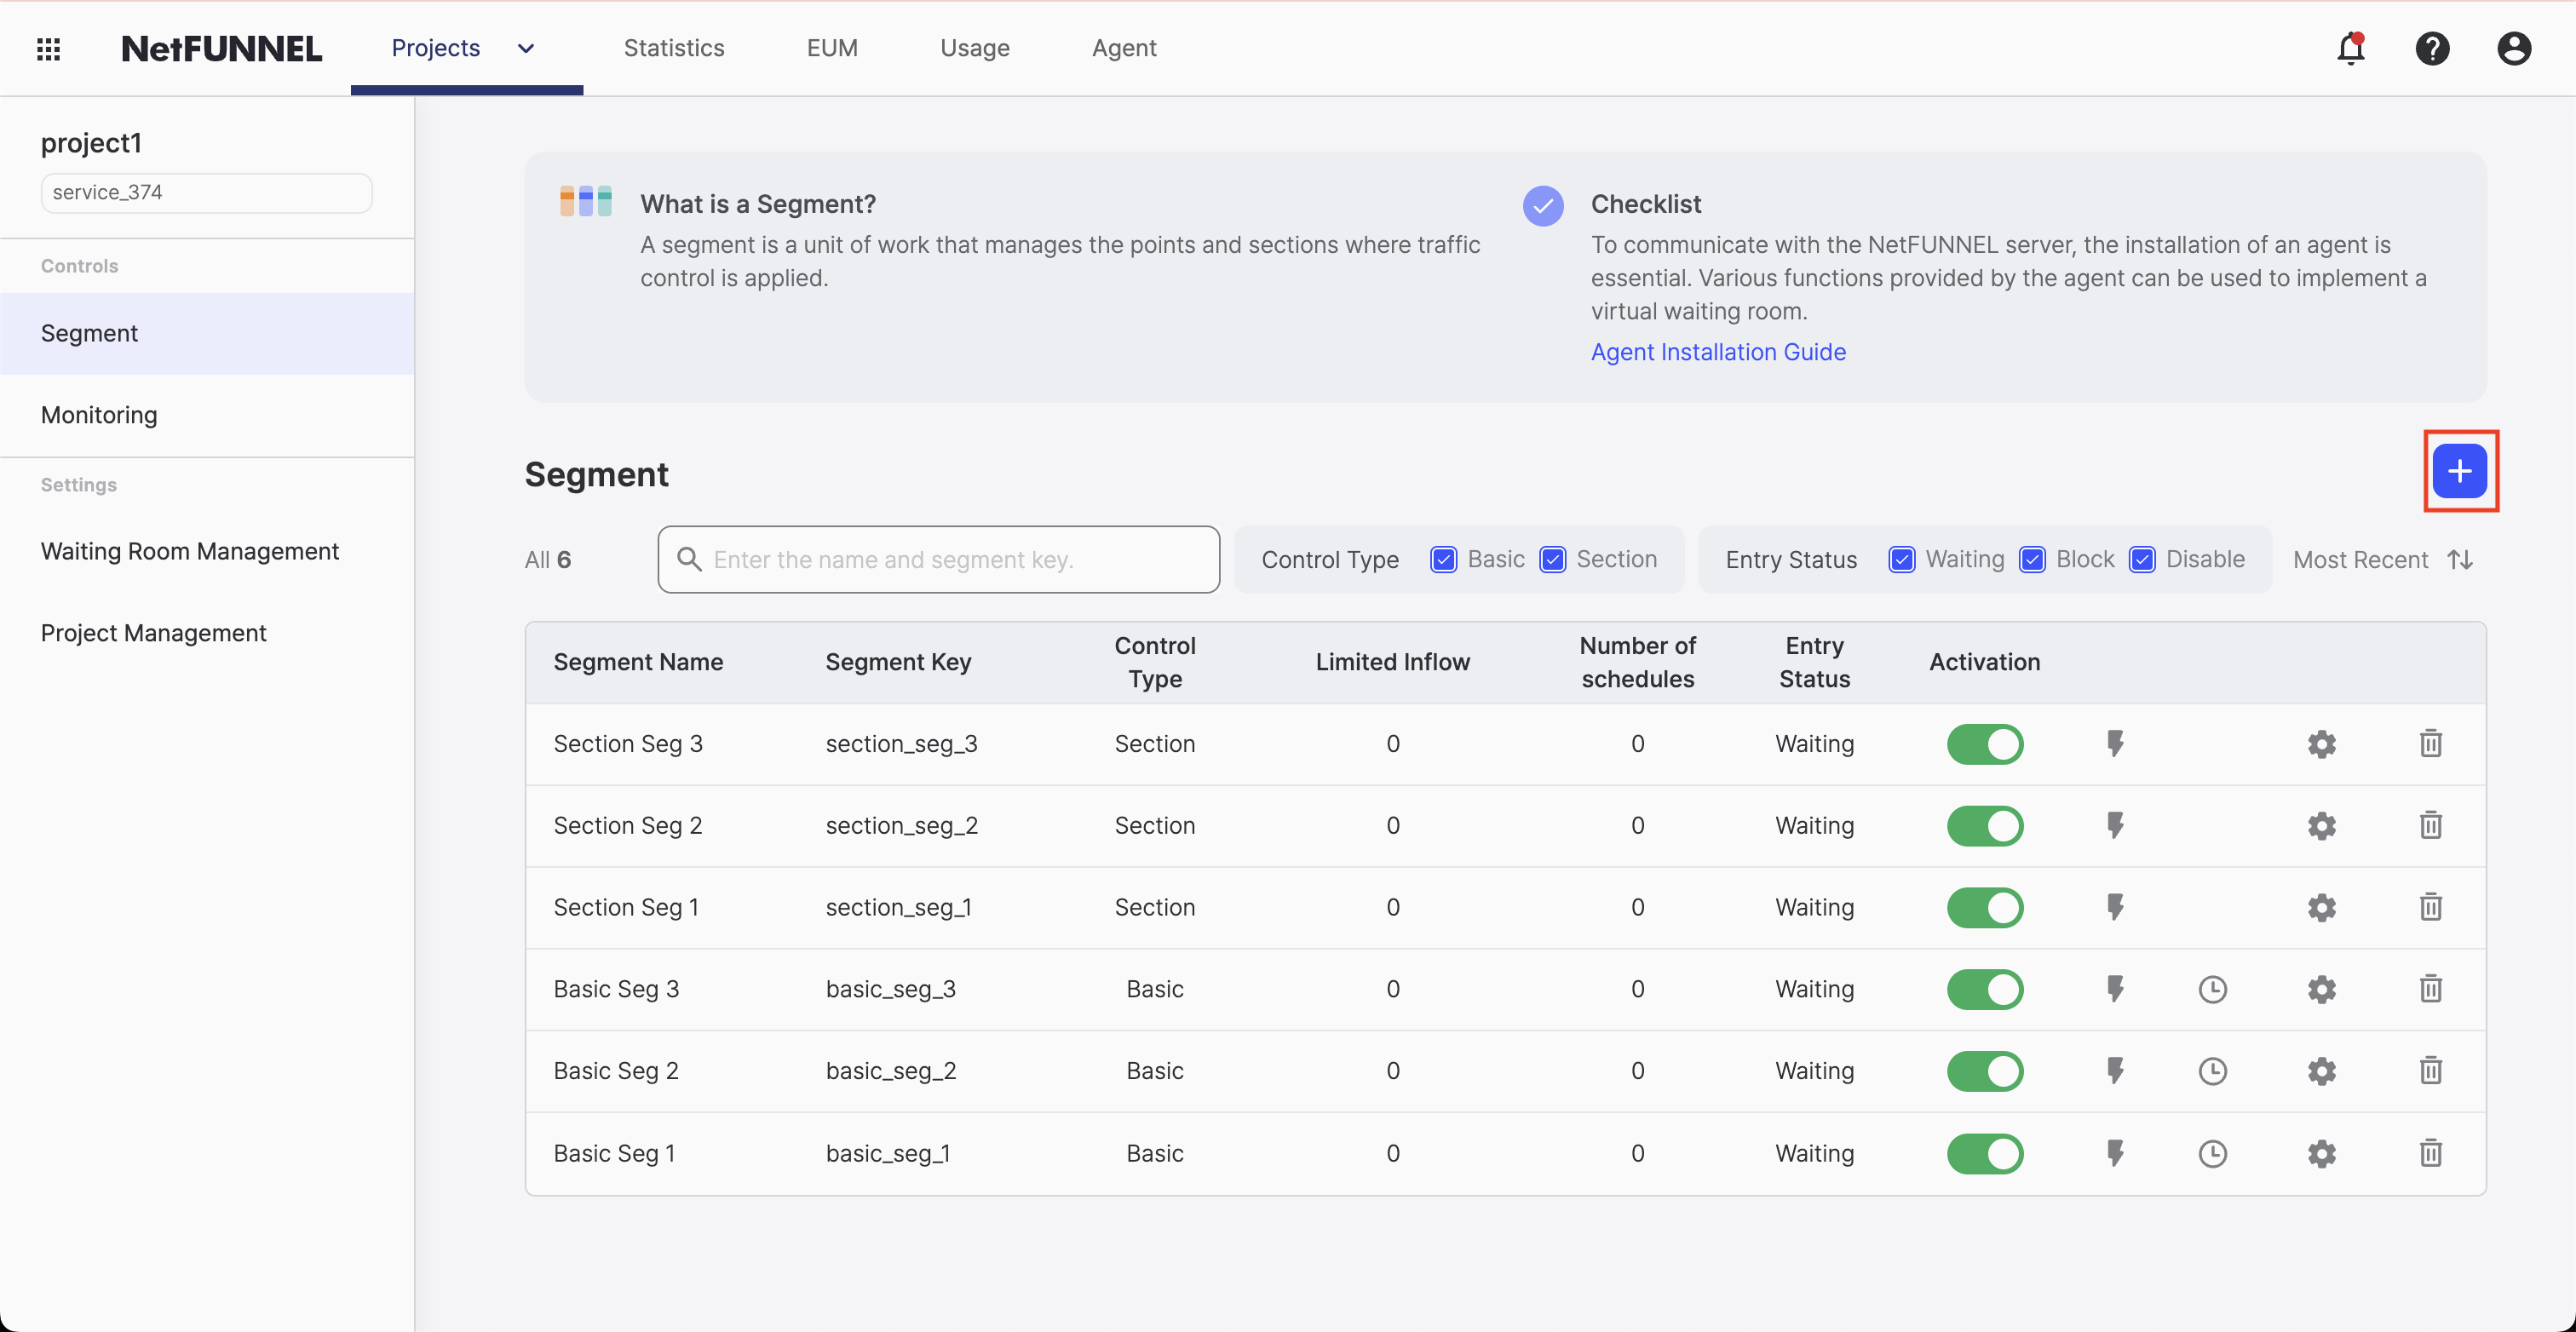
Steps to Create a Segment:
- Click the "+" button in the list control section
- Select the control type (Basic Control or Section Control)
- Configure segment settings according to the selected control type. For detailed configuration instructions, see:
- Basic Control Segment - Complete guide to Basic Control segment settings
- Section Control Segment - Complete guide to Section Control segment settings
- Click "Create" or "Save" to create the segment
After creation, the new segment appears in the segment list and is ready for use.
Editing Segments
You can edit existing segments to modify their configuration.
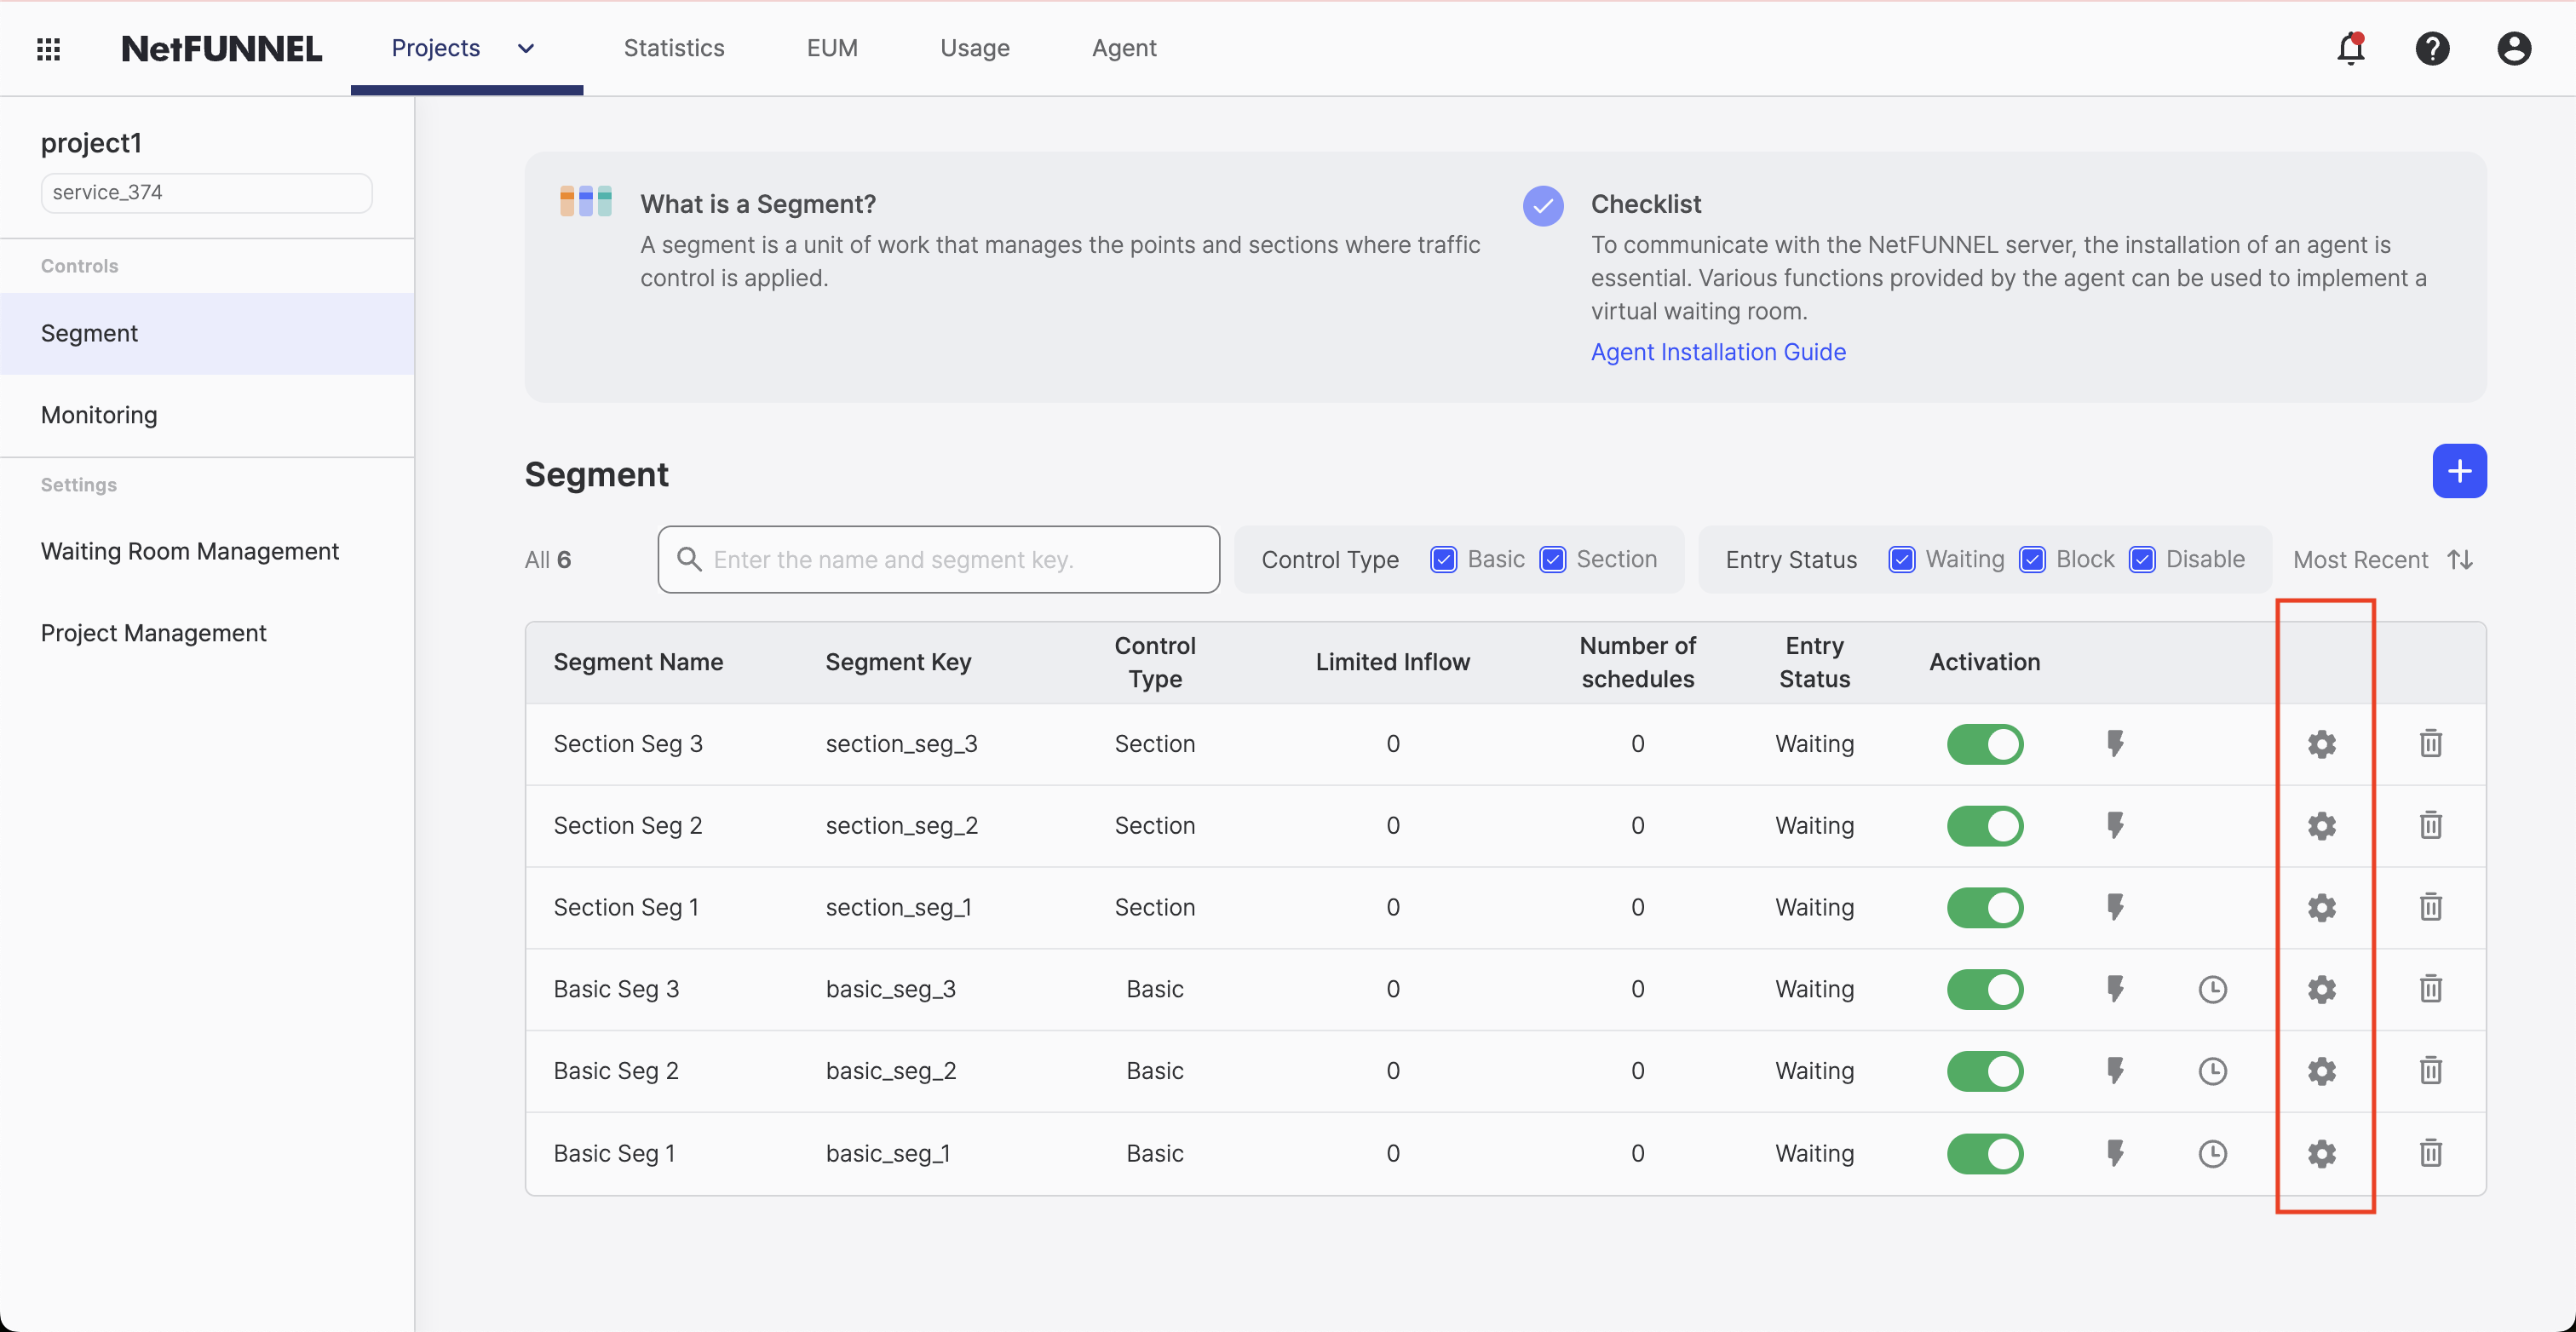
Steps to Edit a Segment:
- Locate the segment in the segment list
- Click the edit button (pencil icon) next to the segment
- Modify the desired settings according to the segment's control type. For detailed configuration instructions, see:
- Basic Control Segment - Complete guide to Basic Control segment settings
- Section Control Segment - Complete guide to Section Control segment settings
- Click "Save" to apply changes
Some settings like segment key cannot be modified after creation. If you need a different segment key, create a new segment.
Activating/Deactivating Segments
You can activate or deactivate segments using the activation toggle button in the segment list.
Steps to Toggle Activation:
- Locate the segment in the segment list
- Click the activation toggle button in the Activation column
- The segment status changes immediately (Active/Inactive)
When a segment is deactivated, traffic control rules are bypassed and NetFUNNEL traffic control is disabled for that segment.
Editing Pre/Post Waiting Room
For Basic Control segments only, you can quickly configure Pre-waiting Room and Post-waiting Room settings directly from the segment list.
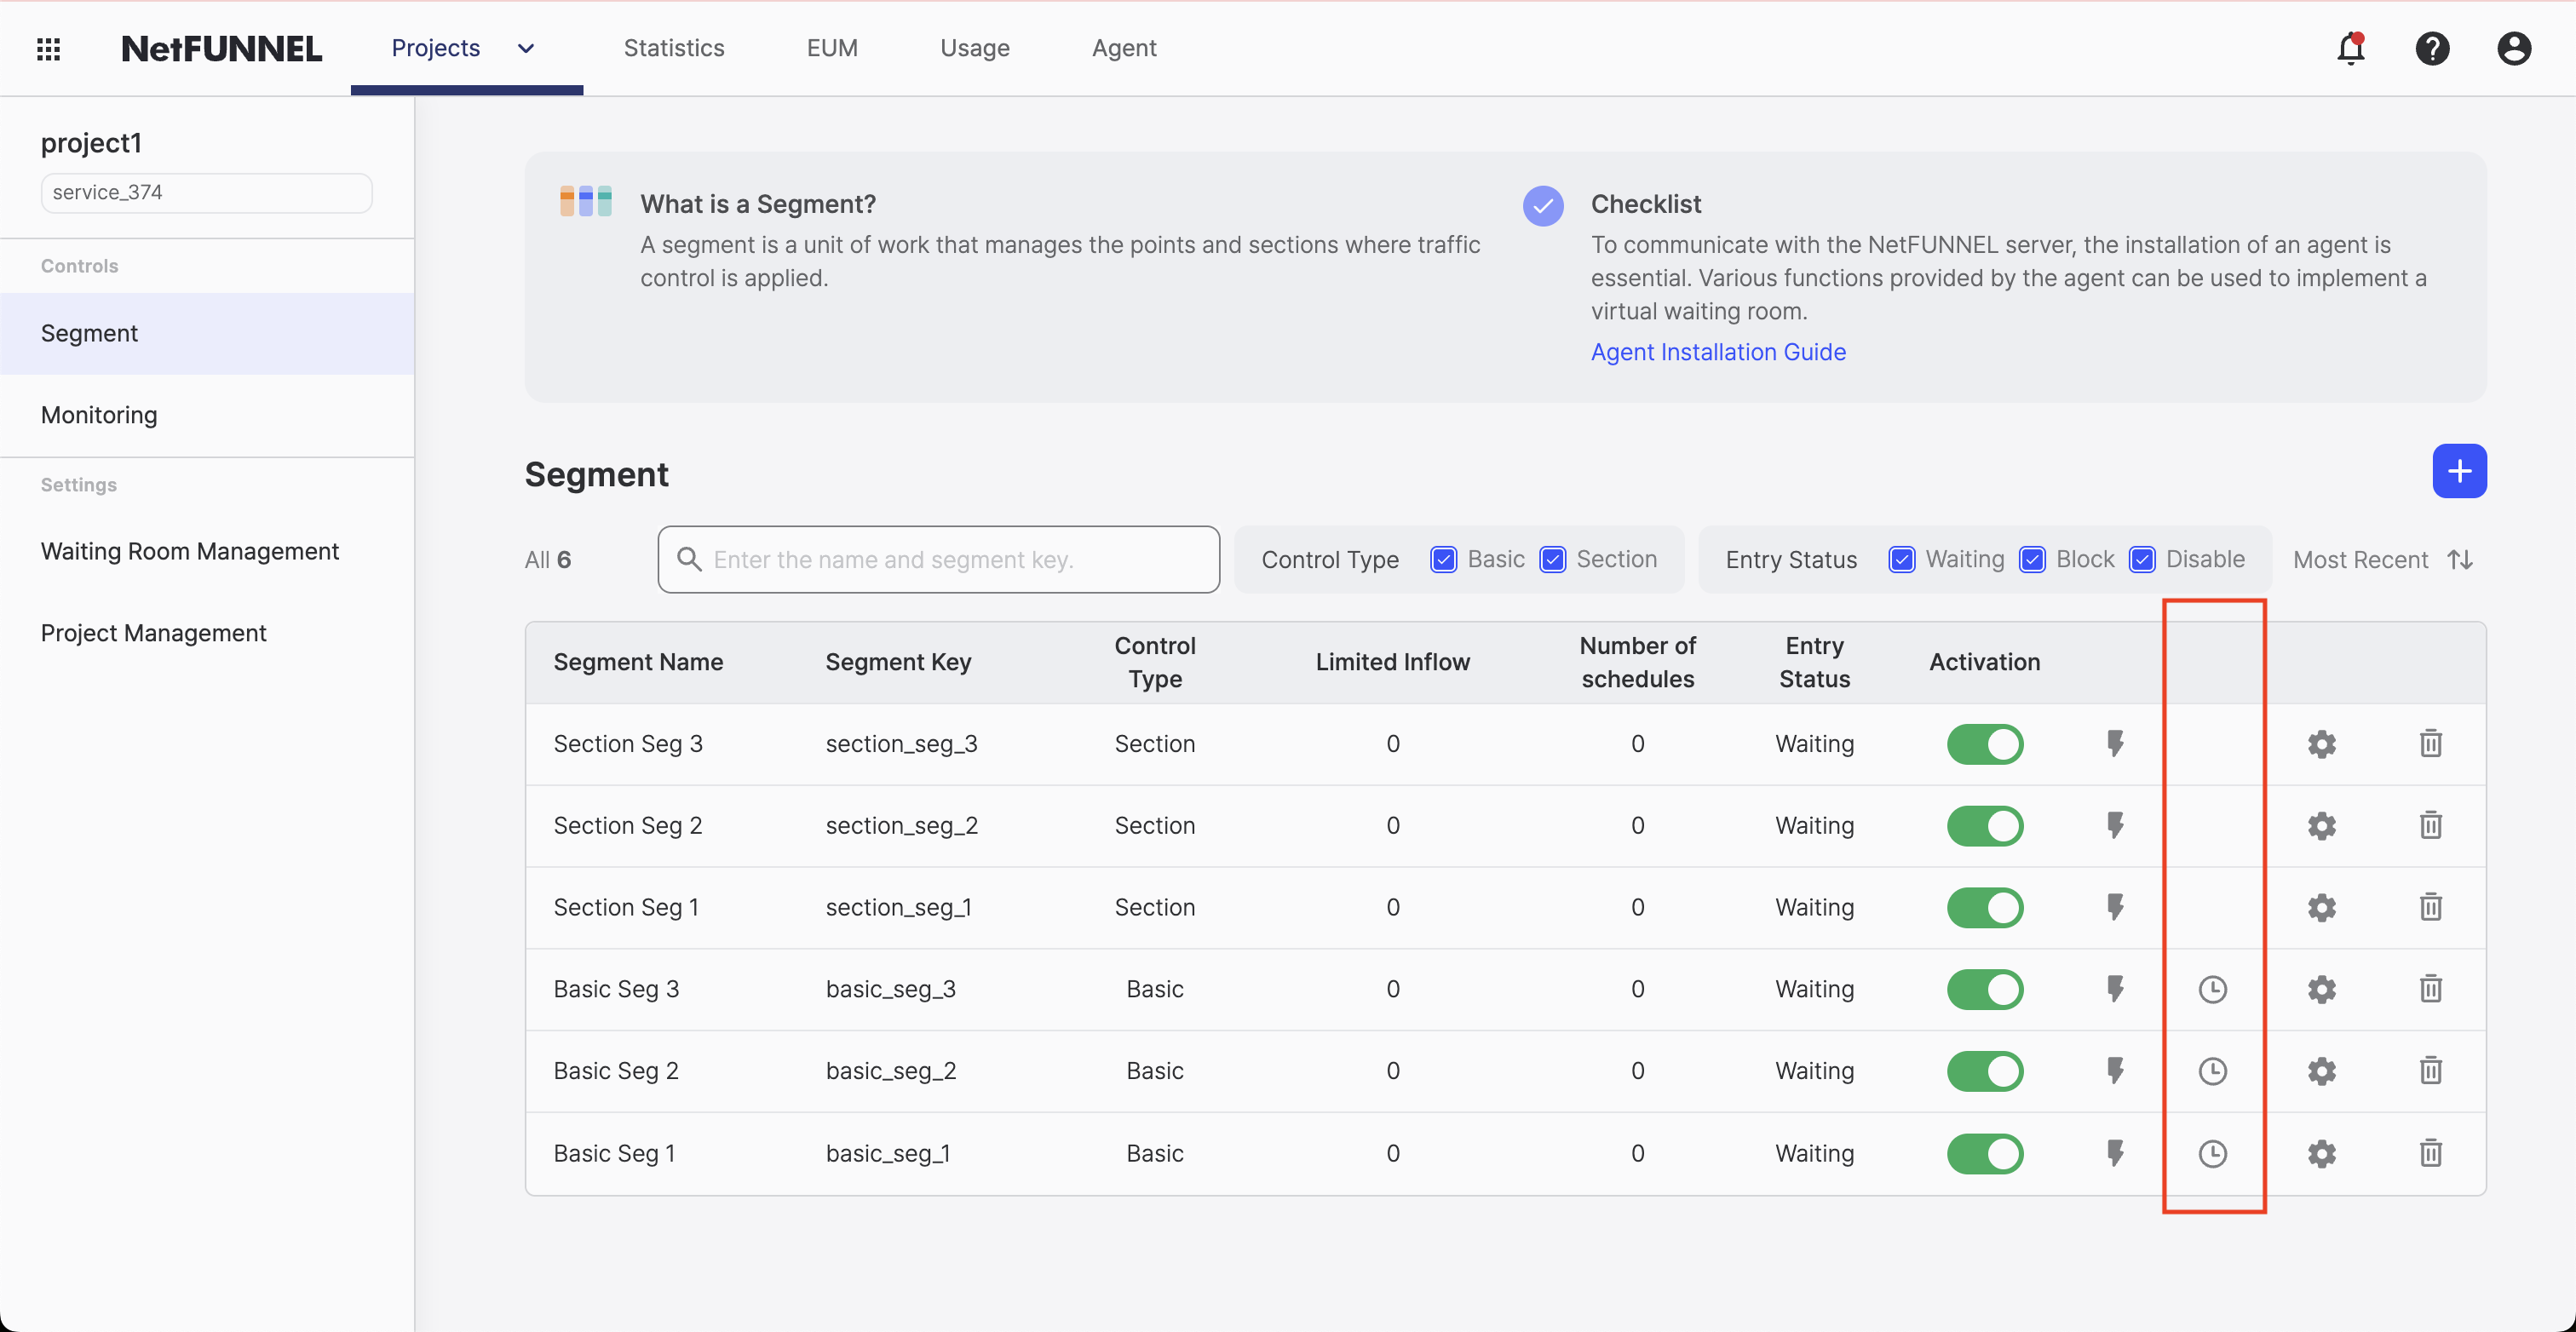
Steps to Edit Pre/Post Waiting Room:
- Locate a Basic Control segment in the list
- Click the Pre/Post Waiting Room quick edit button (calendar icon) in the action column
- Configure reservation settings:
- Pre-waiting Room: Schedule waiting room before main event
- Post-waiting Room: Schedule waiting room after main event
- Set reservation dates and times
- Click "Save" to apply changes
Pre/Post Waiting Room quick edit button is only available for Basic Control segments. This feature allows you to schedule waiting rooms before and after specific events.
Deleting Segments
You can delete segments that are no longer needed.
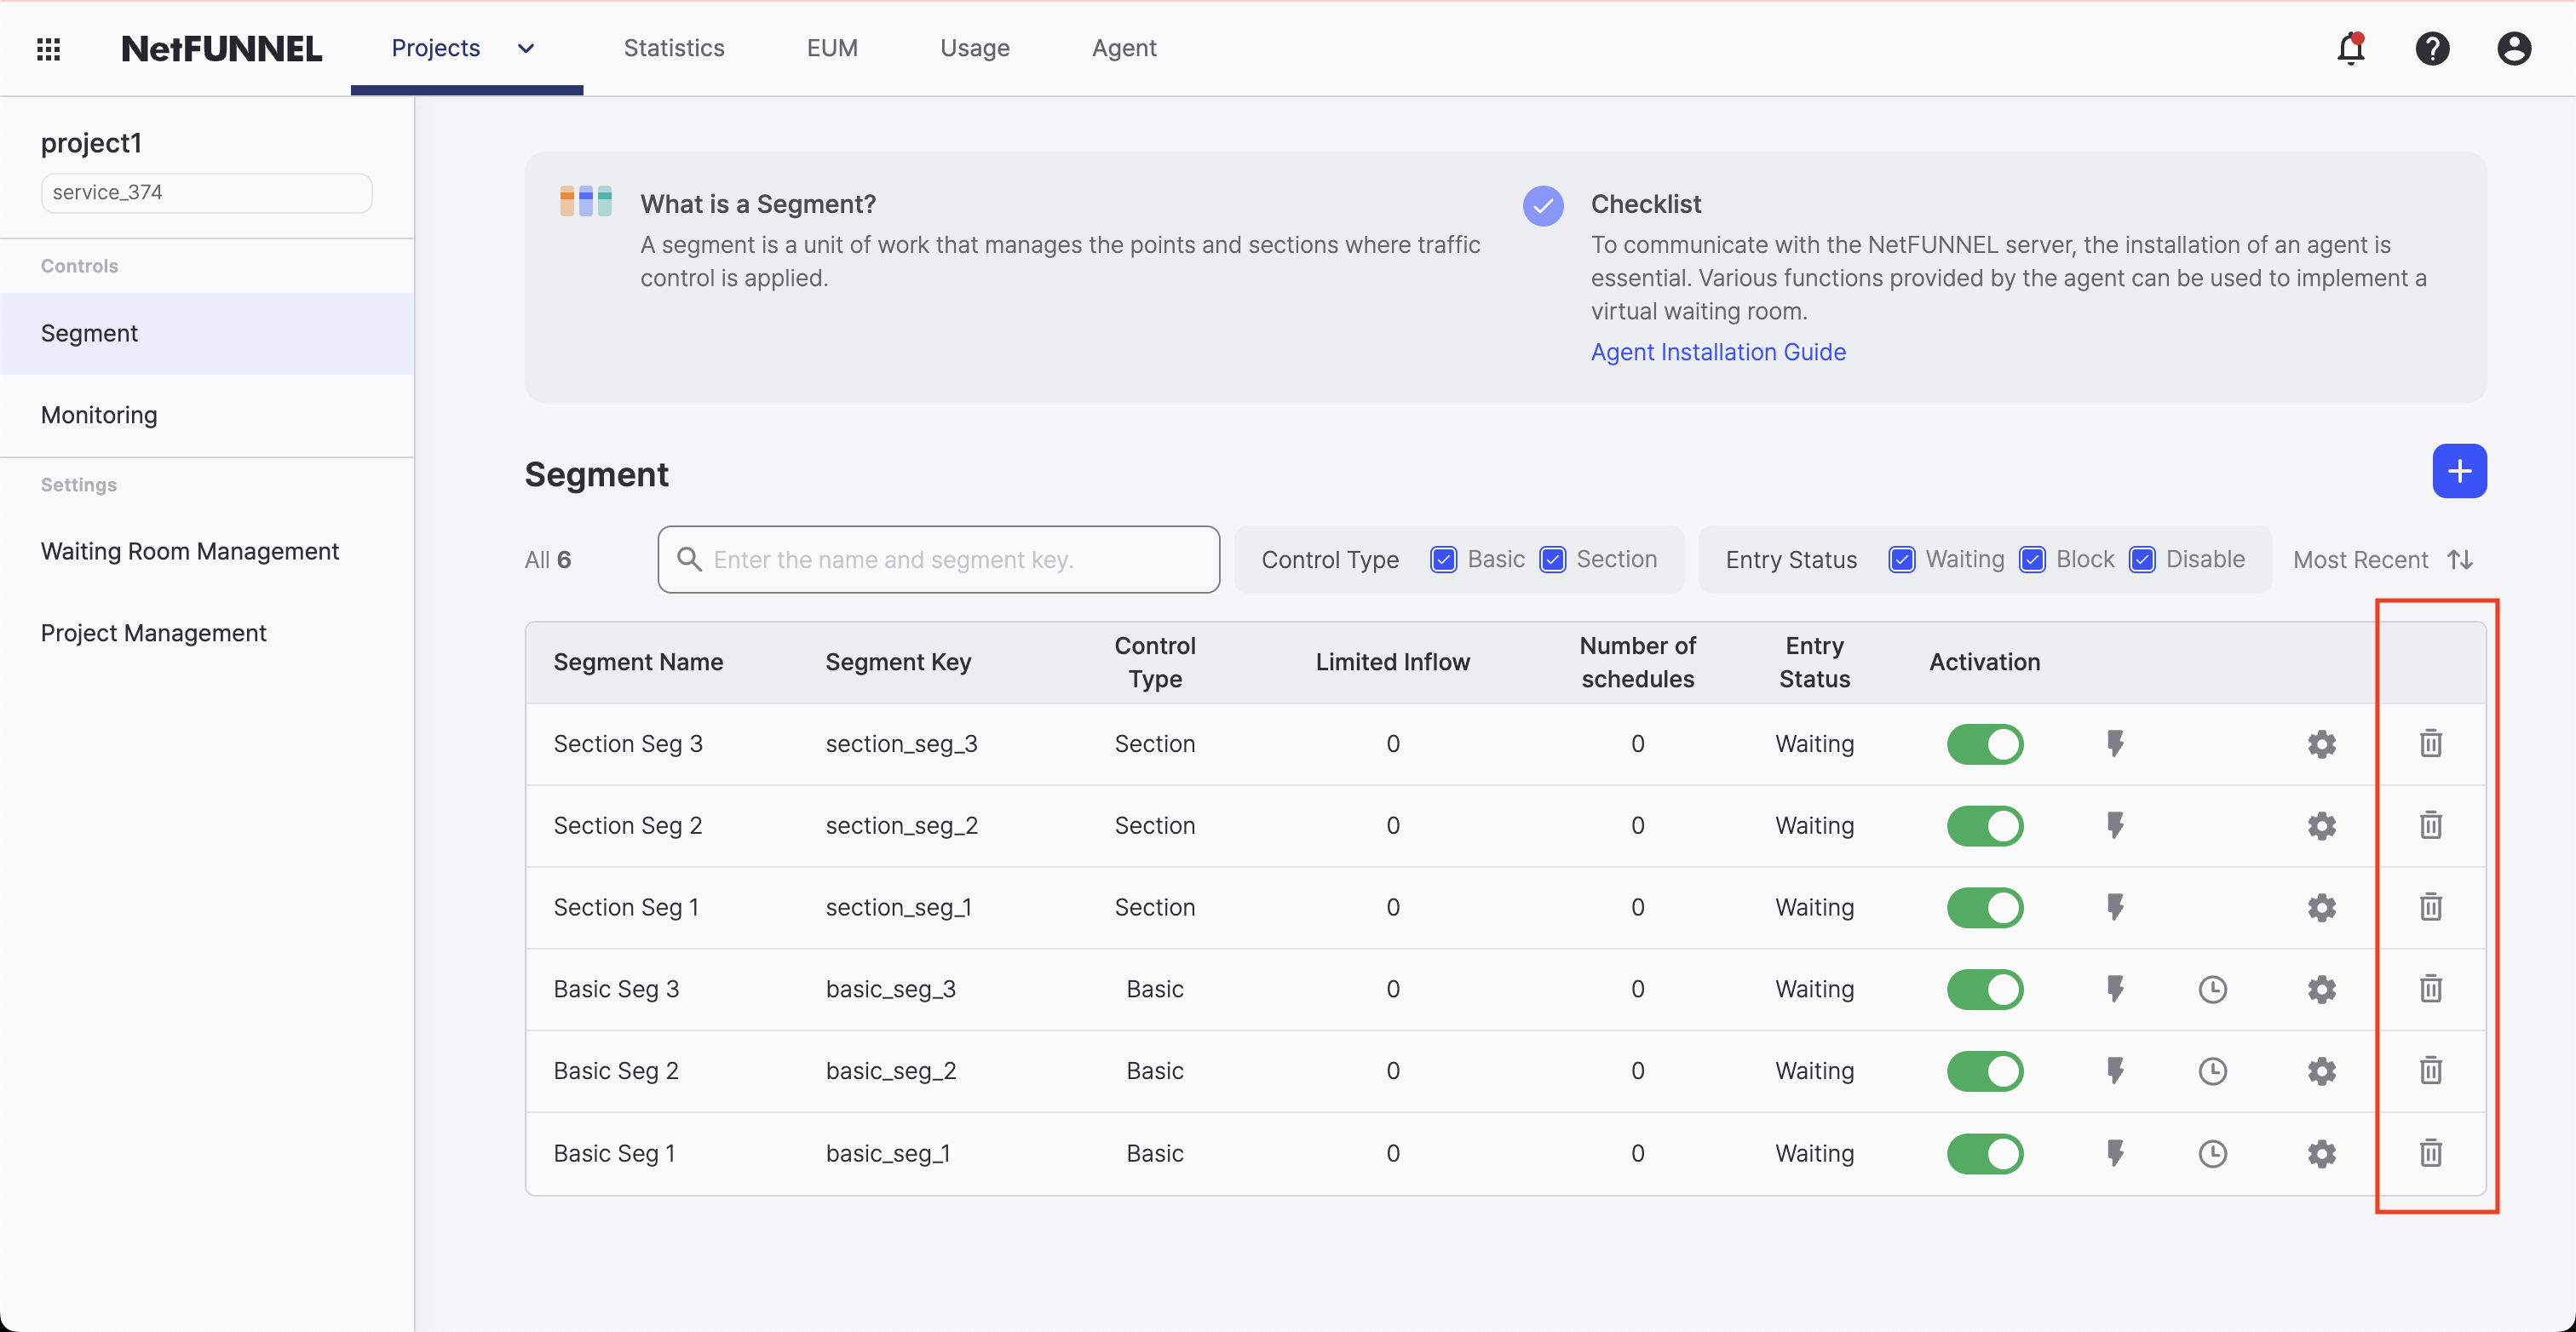
Steps to Delete a Segment:
- Locate the segment in the segment list
- Click the delete button (trash icon) next to the segment
- Confirm the deletion in the confirmation dialog
- The segment is permanently removed from your project
- Deletion is permanent and cannot be undone
- Make sure the segment is not in use before deleting
- Consider deactivating the segment first if you want to temporarily disable it
Load Tester (Lite)
Load Tester (Lite) is a feature that allows you to inject simulated virtual traffic for each segment. Click the lightning bolt icon in the action column of each segment in the segment list to run a load tester for that segment.
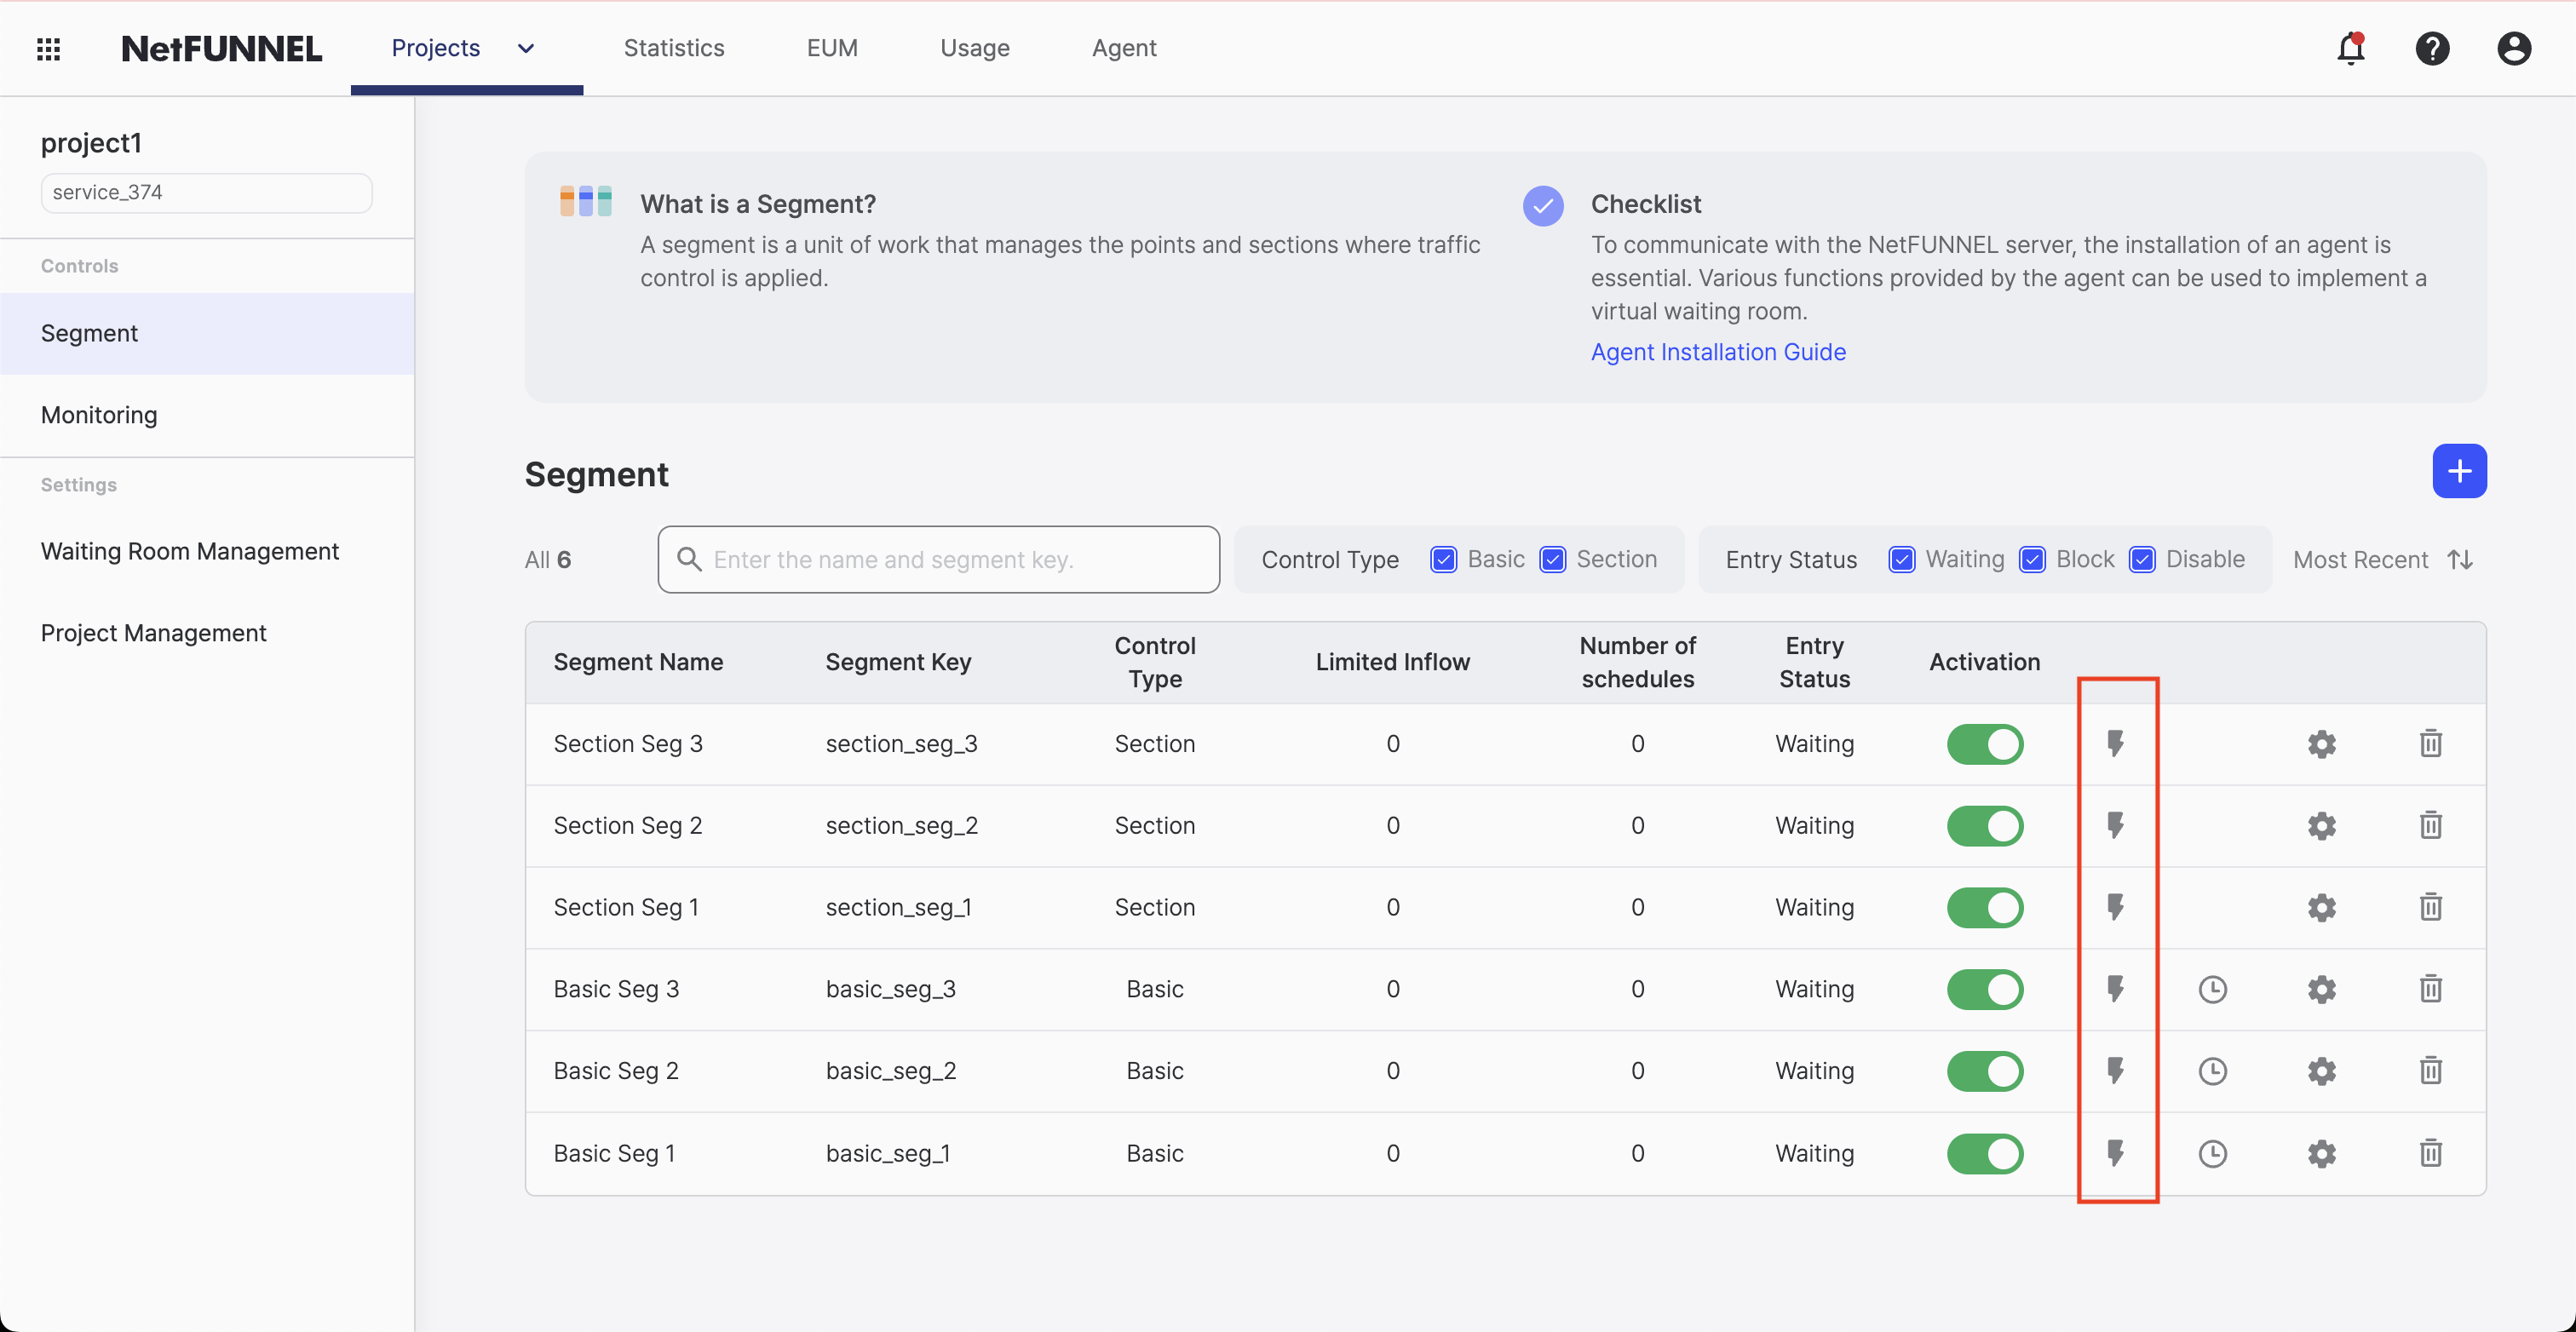
How to Use Load Tester:
- Locate the segment you want to apply load tester to in the segment list
- Click the Load Tester icon (lightning bolt icon) in the segment's action column
- Configure test parameters in the Load Tester settings screen
- Run the test and review the results
Load Tester (Lite) allows you to inject simulated virtual traffic for each segment. This enables you to generate waiting users arbitrarily for testing purposes.