URL-Triggered Integration
Apply waiting rooms to specific URLs without any code changes by configuring trigger rules in the NetFUNNEL console.
This is one of two integration methods available. See the Integration Methods Overview to compare with Code-based Integration and choose the best approach for your use case.
How It Works
User Experience:
- User accesses target URL
- Redirected to waiting room page
- When entry allowed, returned to original page
Best For:
- Landing pages and promotions
- Blocking entire page access
- External link protection (SNS shares)
- Quick deployment (no code changes)
Prerequisites
- Installation & Initialization completed
- NetFUNNEL console access
- Target URL(s) identified
Need a basic project to practice with? Check out our Sample Projects which include a Web Application (Vanilla JavaScript MPA) template ready for NetFUNNEL integration practice.
Step 1: Prepare Testing Environment
Browser Setup:
- Use Firefox (recommended) or Chrome/Edge/Safari
- Firefox Private mode recommended for clean testing
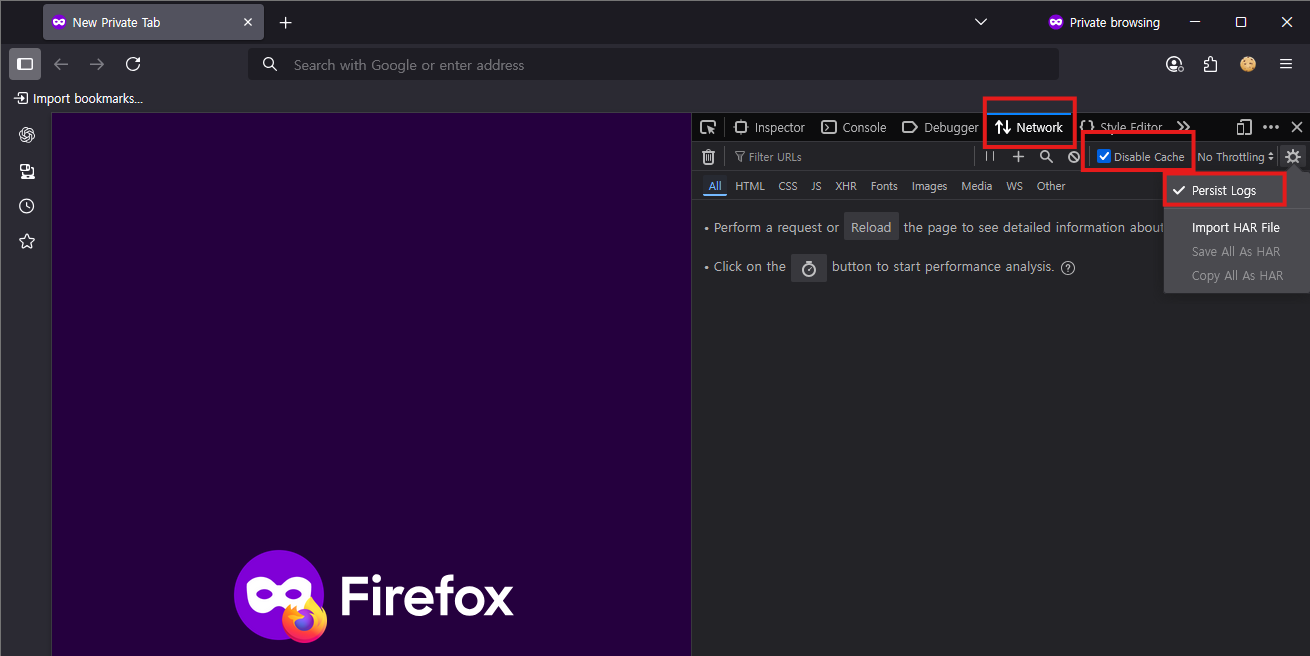
DevTools Configuration:
- Open DevTools:
F12(Windows) or⌘⌥I(macOS) - Network tab settings:
- ✅ Preserve log or Persist Log
- ✅ Disable cache
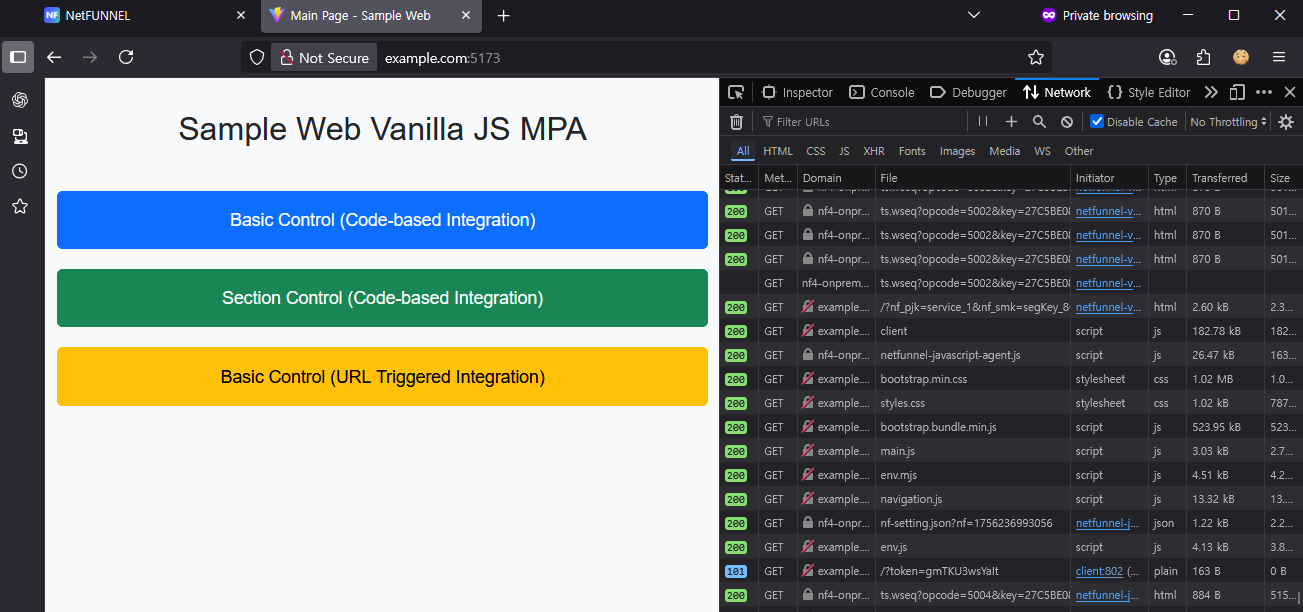
Step 2: Verify Agent Installation
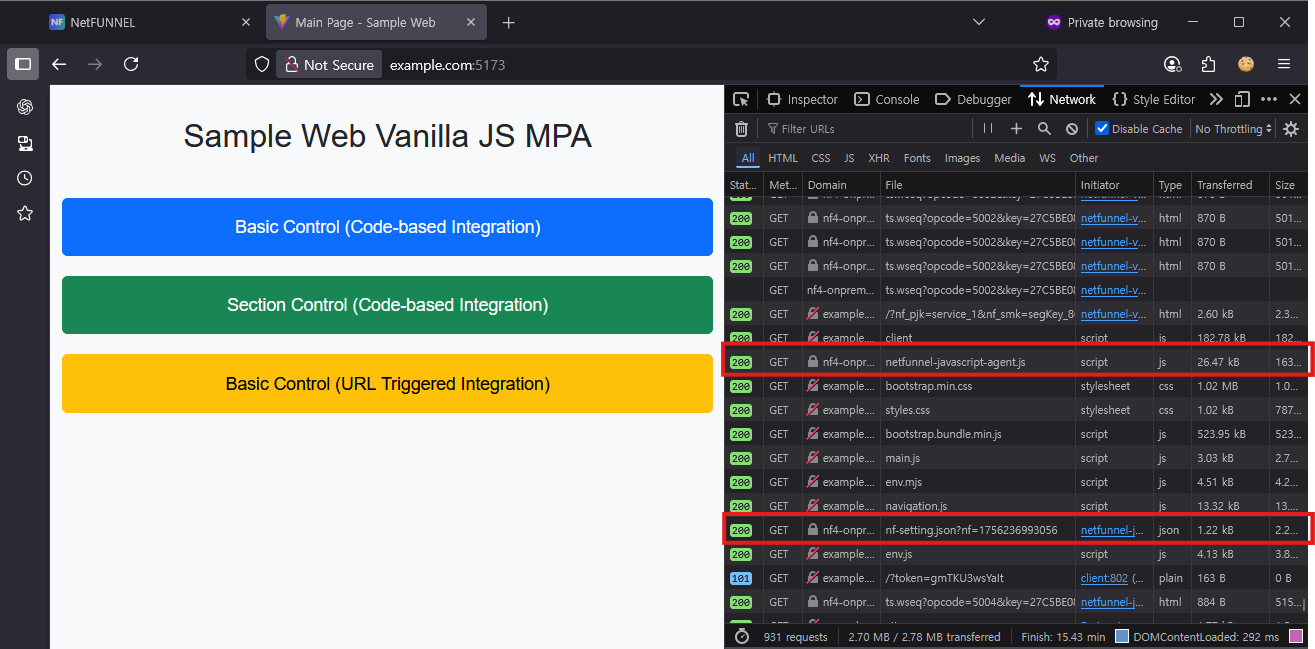
Confirm the NetFUNNEL agent loads correctly by checking for these files with HTTP 200:
netfunnel-javascript-agent.jsnf-setting.json
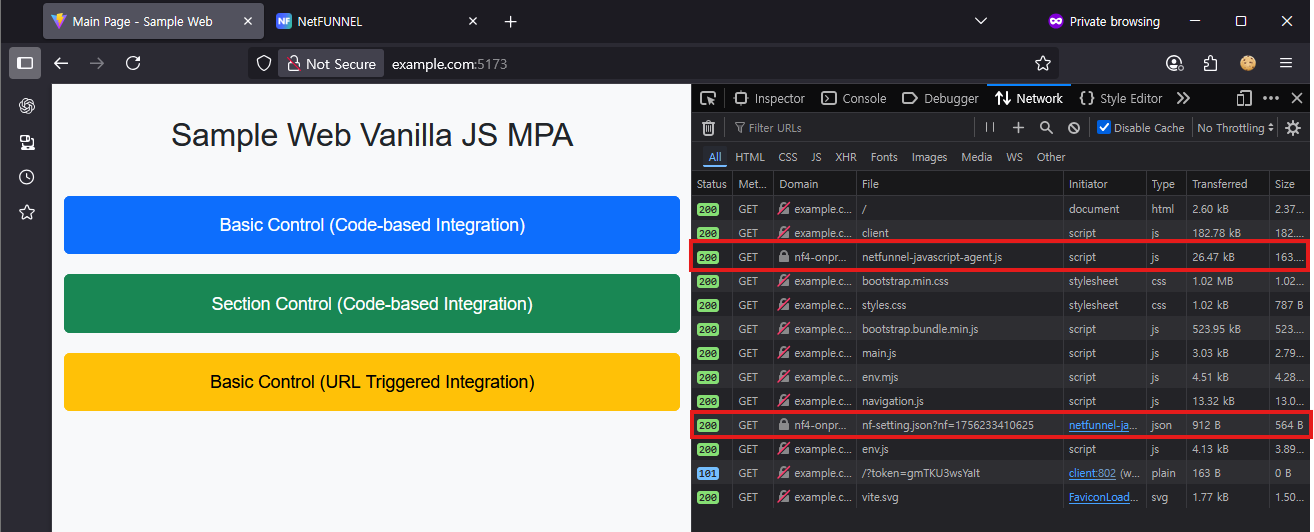
If these files are not loading with HTTP 200 status, the NetFUNNEL agent is not properly installed. Please return to the Installation & Initialization guide and complete the setup process before proceeding.
Step 3: Create a Segment
URL-Triggered Integration supports Basic Control only. Choose Basic Control when creating the segment.
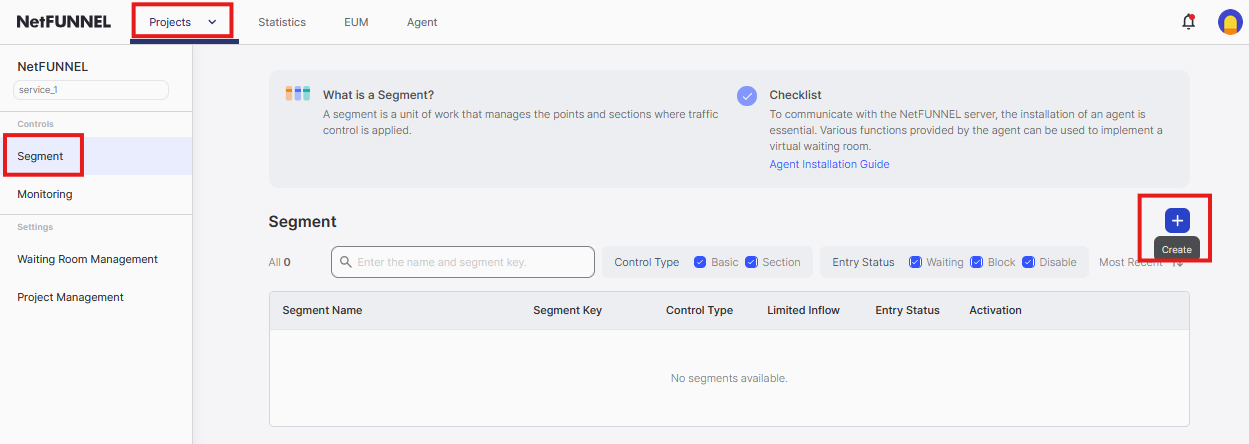
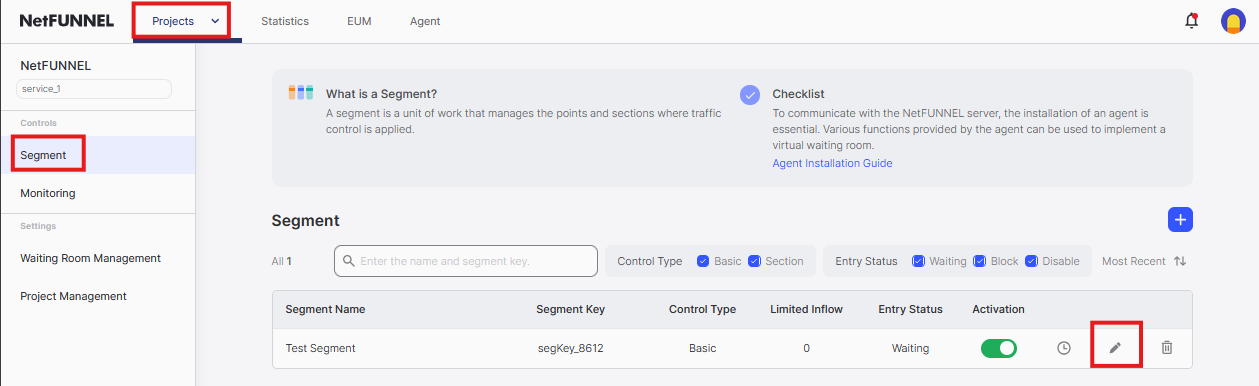
3.1 Create New Segment
- Go to NetFUNNEL console →
Projects→Segment - Click the
+button to create a new segment
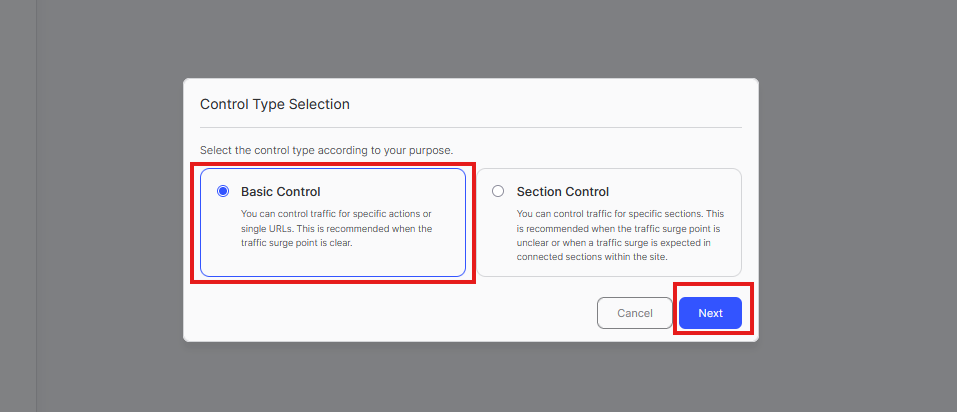
3.2 Select Control Type
Choose Basic Control and click Next
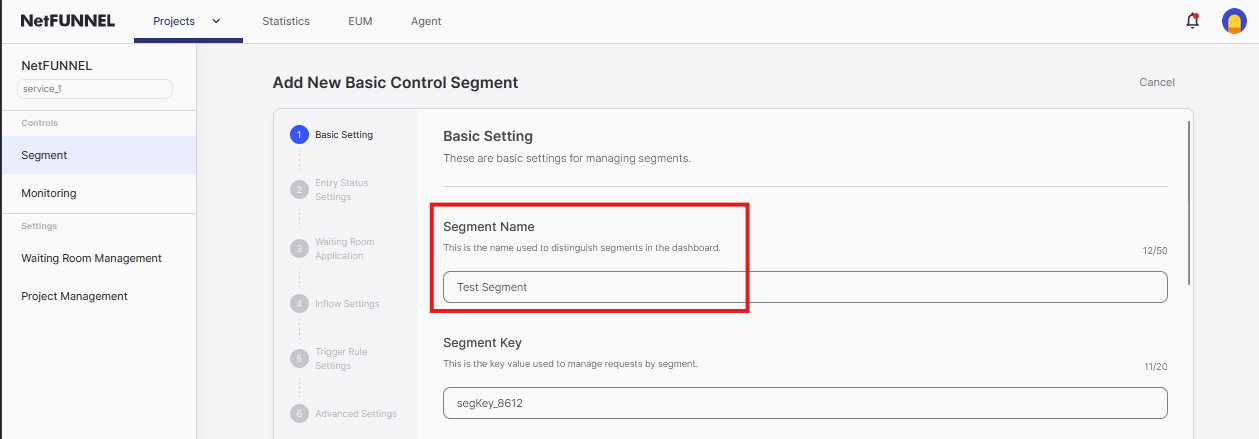
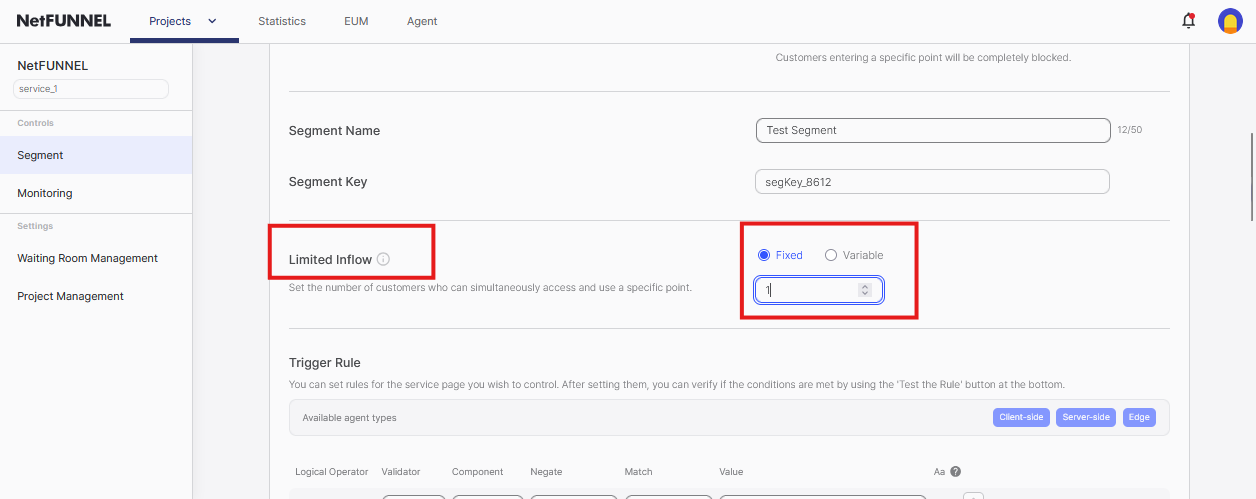
3.3 Configure Segment
Segment Name: Enter a descriptive name (e.g., "Main Page", "Product Details")
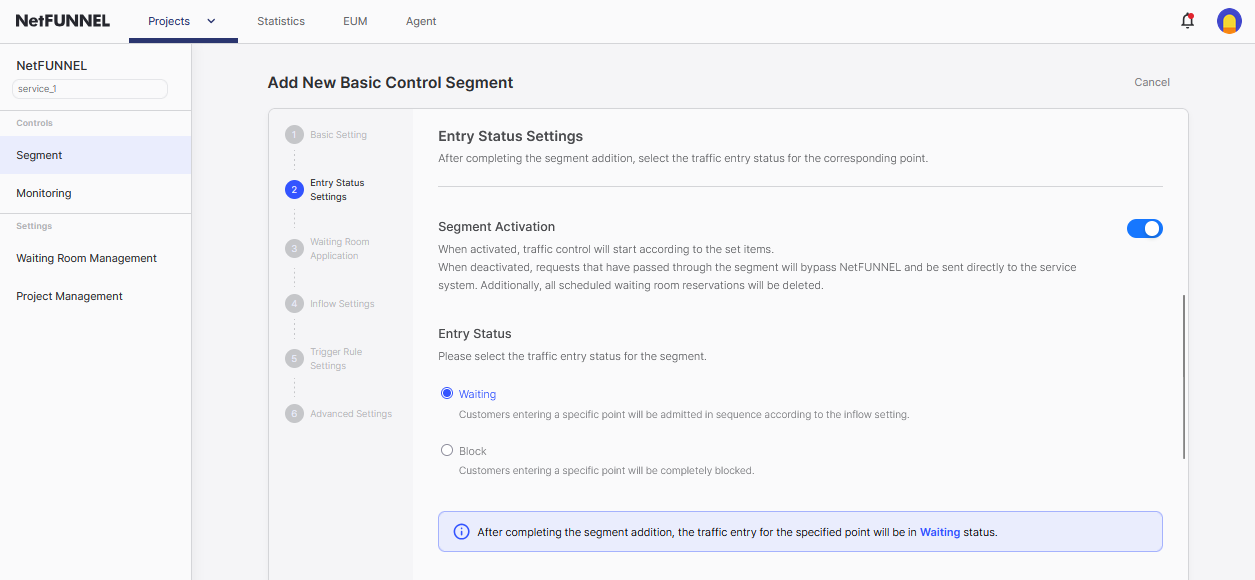
Entry Status:
- ✅ Segment Activation enabled
- Entry Status:
Waiting(sends users to waiting room)
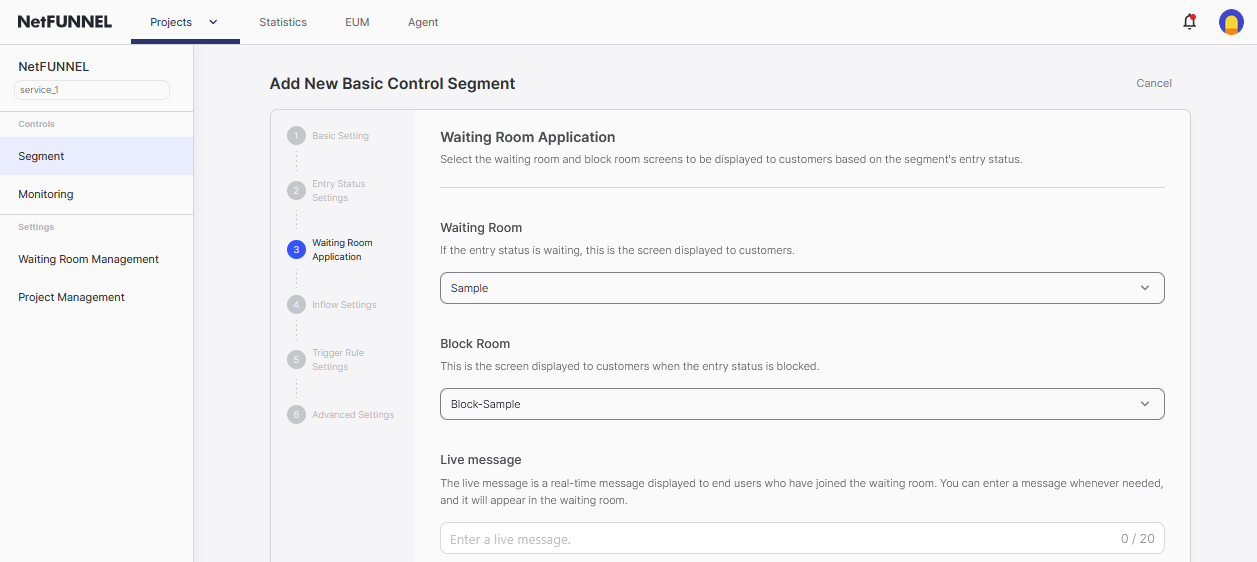
Waiting Room Application:
- Use default settings for testing
- Leave Live Message blank
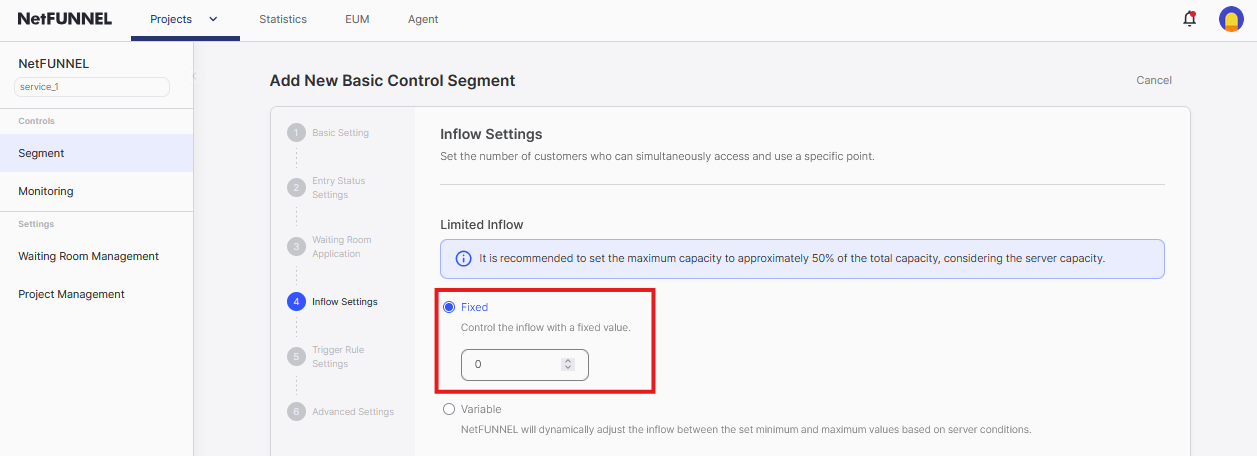
Limited Inflow:
- Set to
0for testing (no one admitted, waiting room always appears)
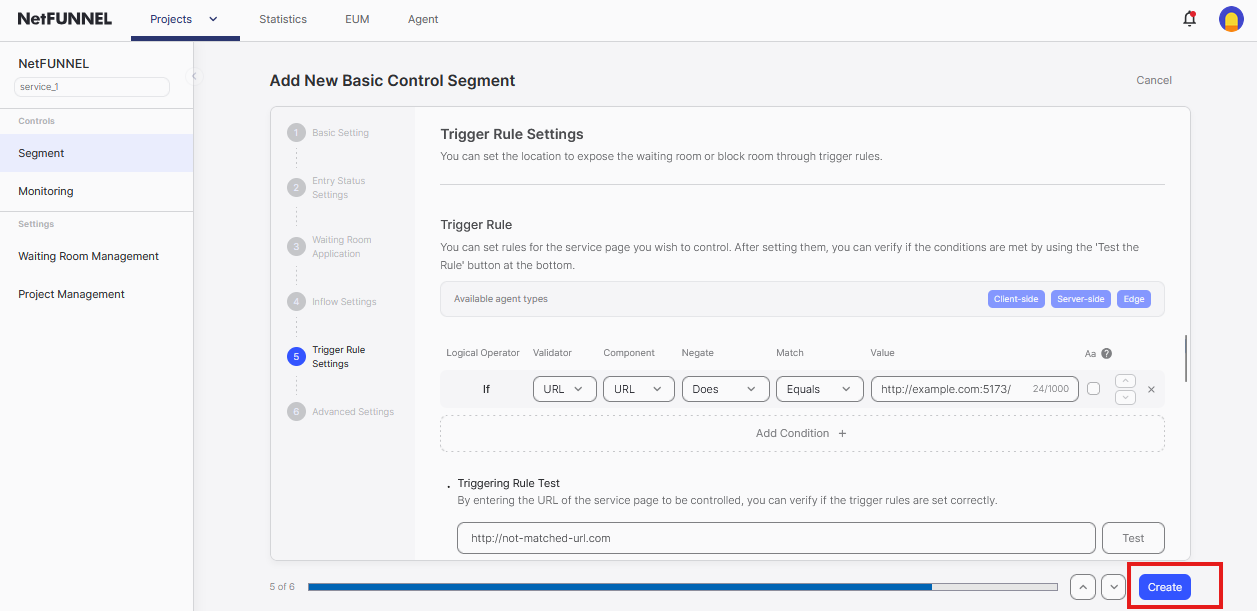
Step 4: Configure Trigger Rules
Trigger rules determine which URLs get the waiting room. This is the most important step.
4.1 Add Condition
Click Add Condition to create a URL matching rule

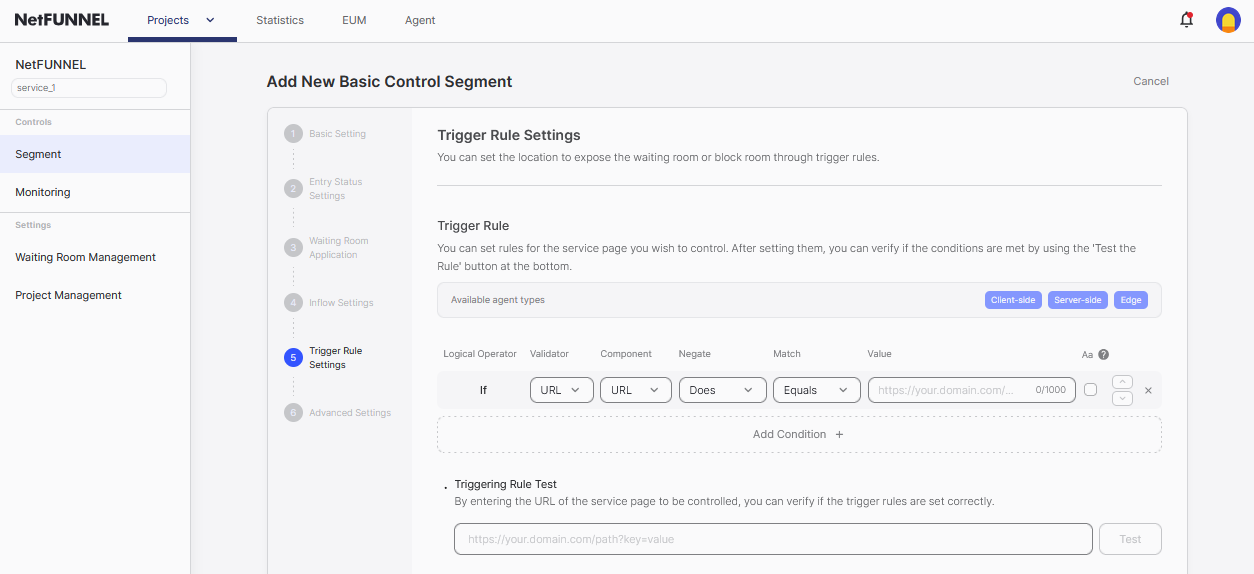
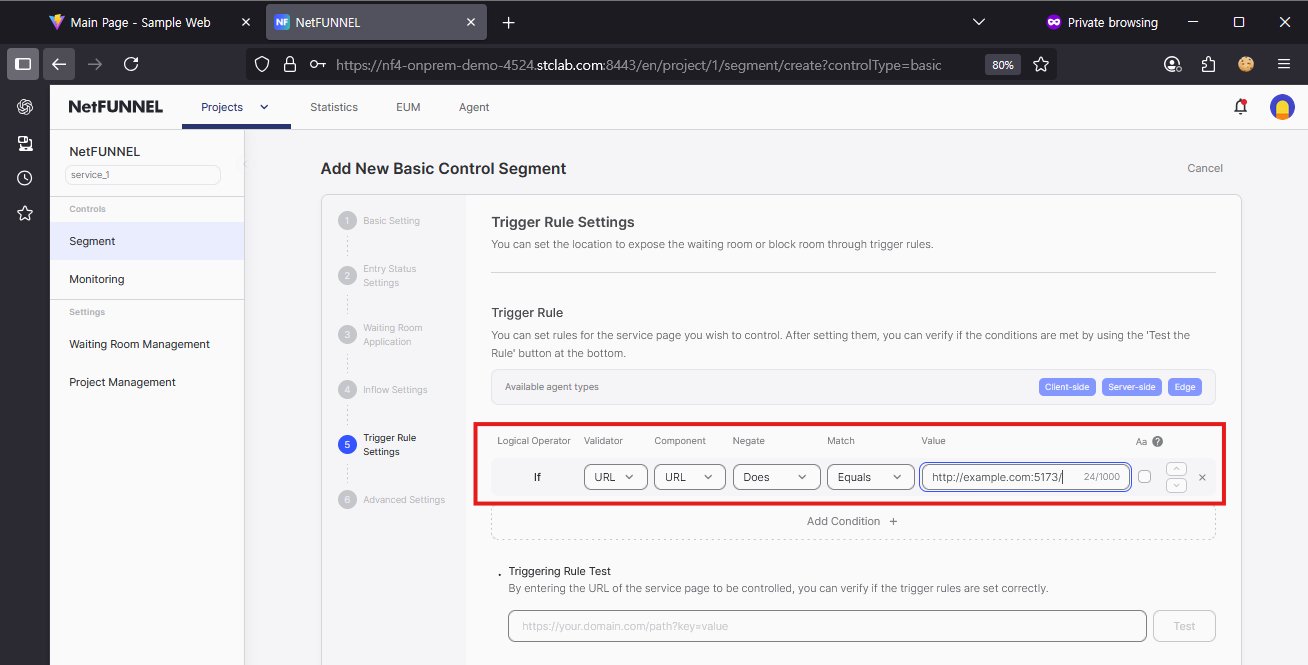
4.2 Configure URL Matching
For exact page matching:
- Validator:
URL - Component:
URL - Negate:
Does - Match:
Equals - Value: Copy exact URL from browser address bar (e.g.,
http://example.com:5173/)
When Component is URL, you must include the protocol (https or http). Copy the exact URL from your browser's address bar.

4.3 Test Trigger Rule
Use the test feature to verify your rule matches the intended URL:
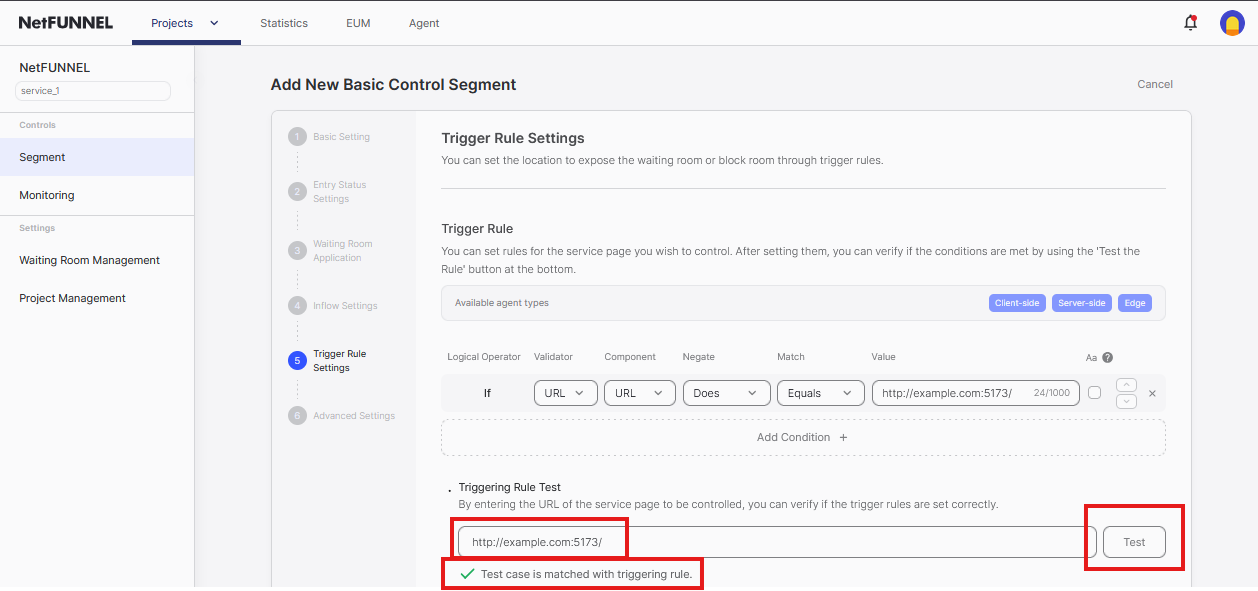
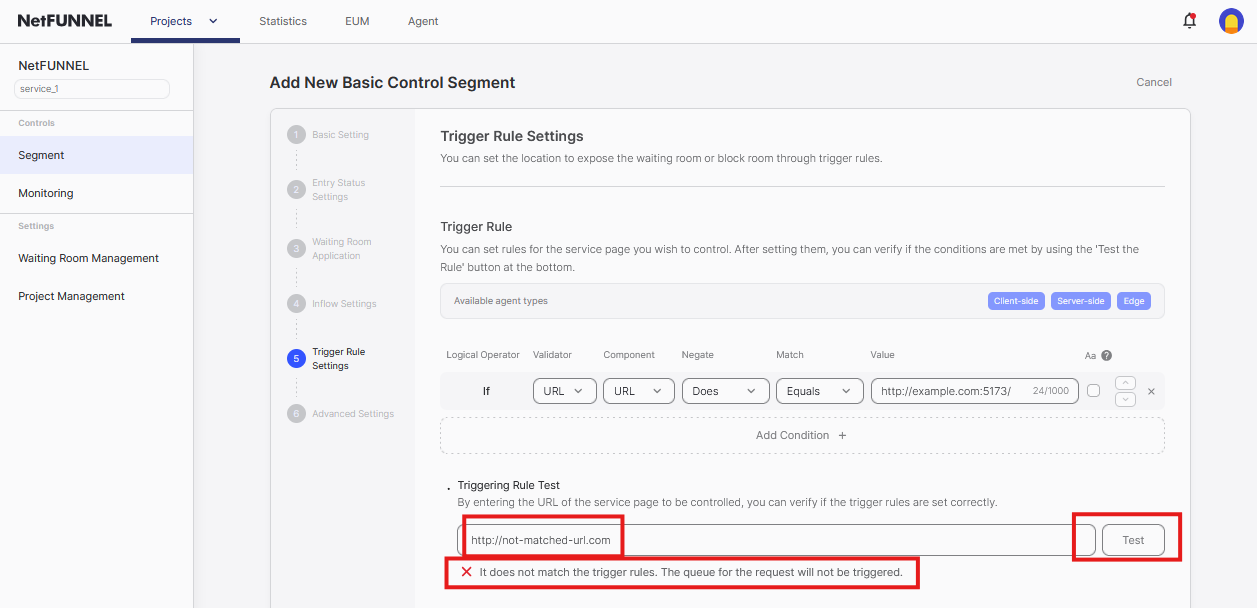
Expected Results:
✅ Success: Test case is matched with triggering rule.
❌ Failure: it does not match the trigger rules. The queue for the request will not be triggered.
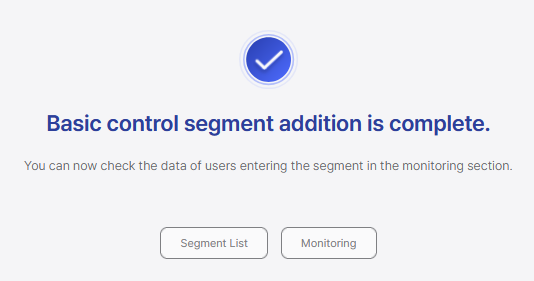
4.4 Create Segment
Click Create to finalize the segment
Step 5: Test Waiting Room (Limited Inflow = 0)
5.1 Access Target URL
Navigate to your target URL (e.g., http://example.com:5173/)
Expected result: Immediate redirect to waiting room page
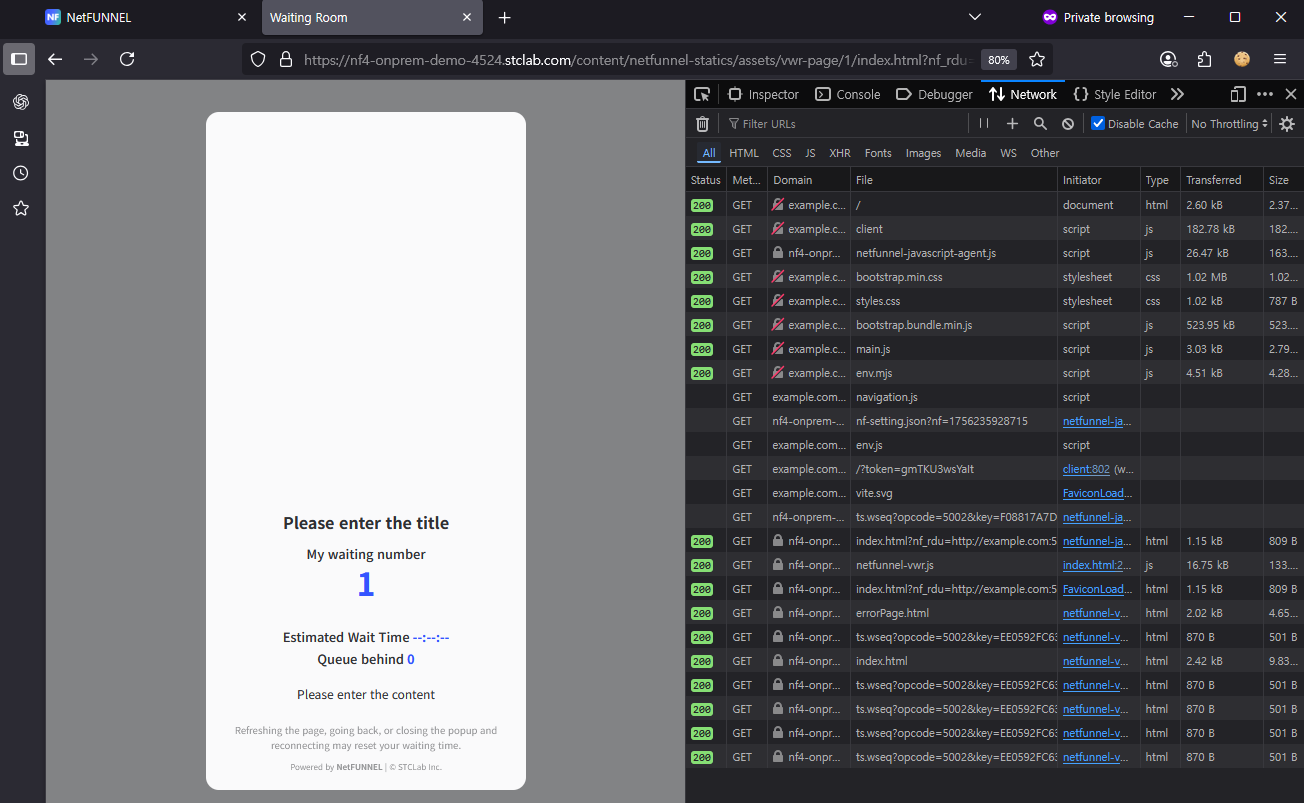
5.2 Verify Waiting Room Display
Check these elements are shown correctly:
- My waiting number: 1
- Estimated Wait Time: N/A
- Queue behind: 0
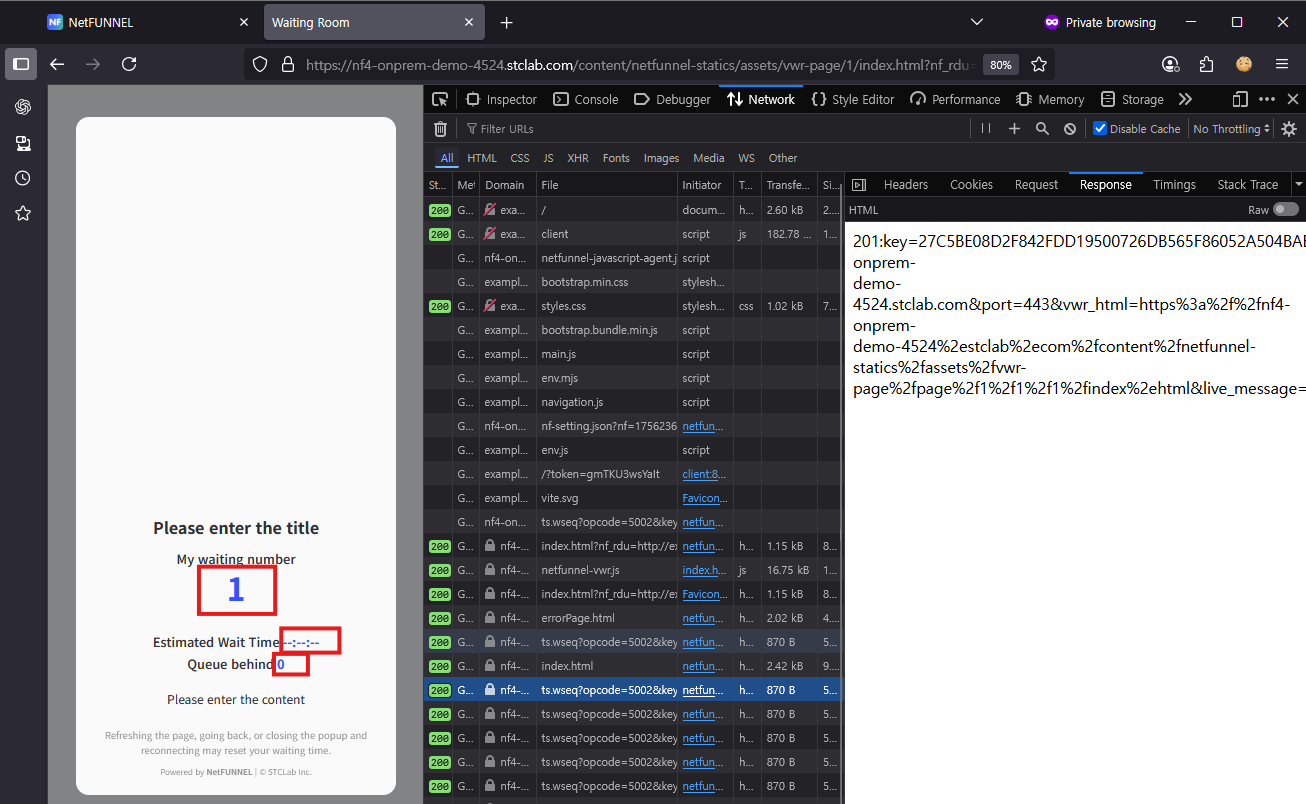
5.3 Check Network Activity
Verify periodic requests:
- Look for
ts.wseq?opcode=5002requests repeating opcode=5002= Re-Entry Request (asking if entry is allowed)
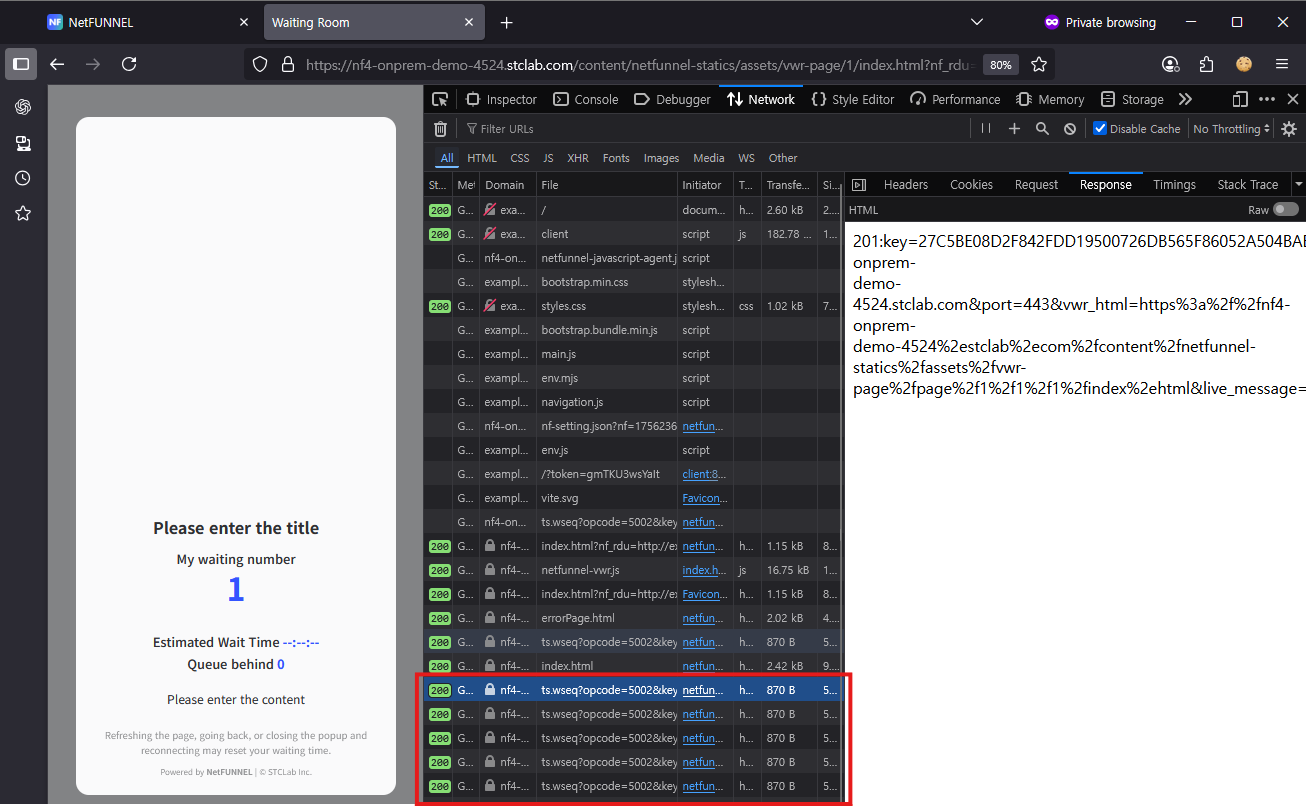
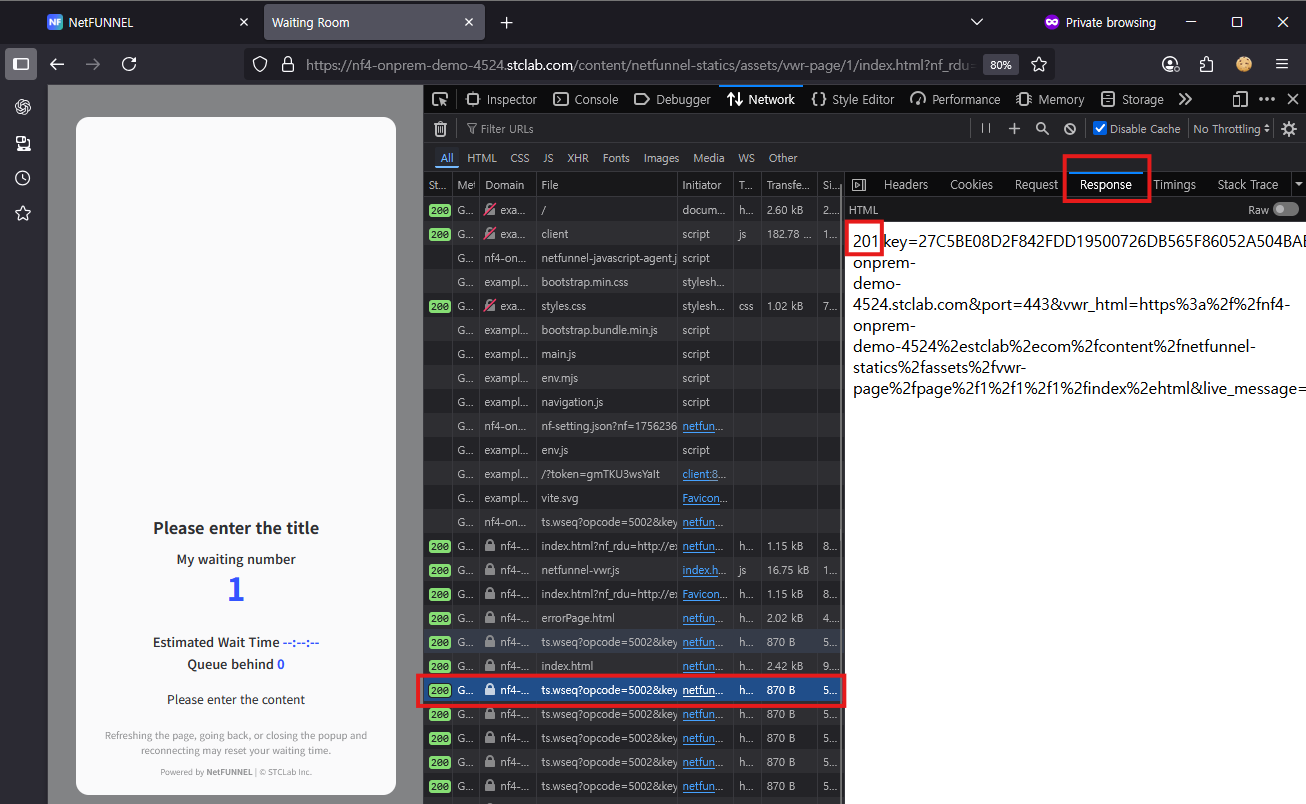
Verify response:
- Click a
ts.wseq?opcode=5002request - Check Response Body shows
201(WAIT) 201= WAIT,200= PASS (entry allowed)
Step 6: Test Entry (Limited Inflow = 1)
6.1 Update Segment Settings
- Go back to NetFUNNEL console
- Click segment's
Editbutton
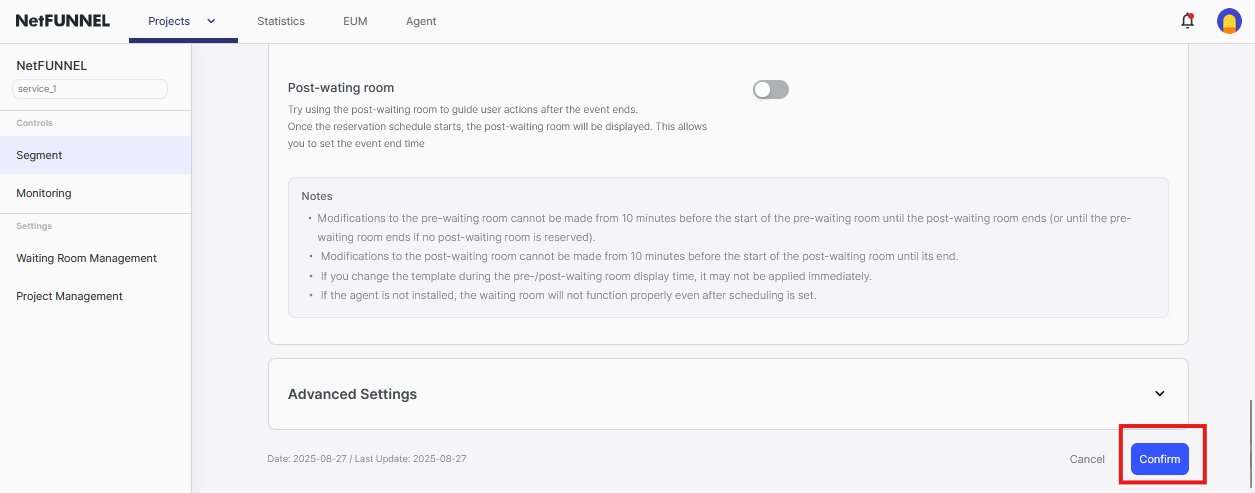
- Change Limited Inflow from
0to1 - Click
Confirm
6.2 Verify Entry
Expected result: Waiting room disappears immediately, user enters target page
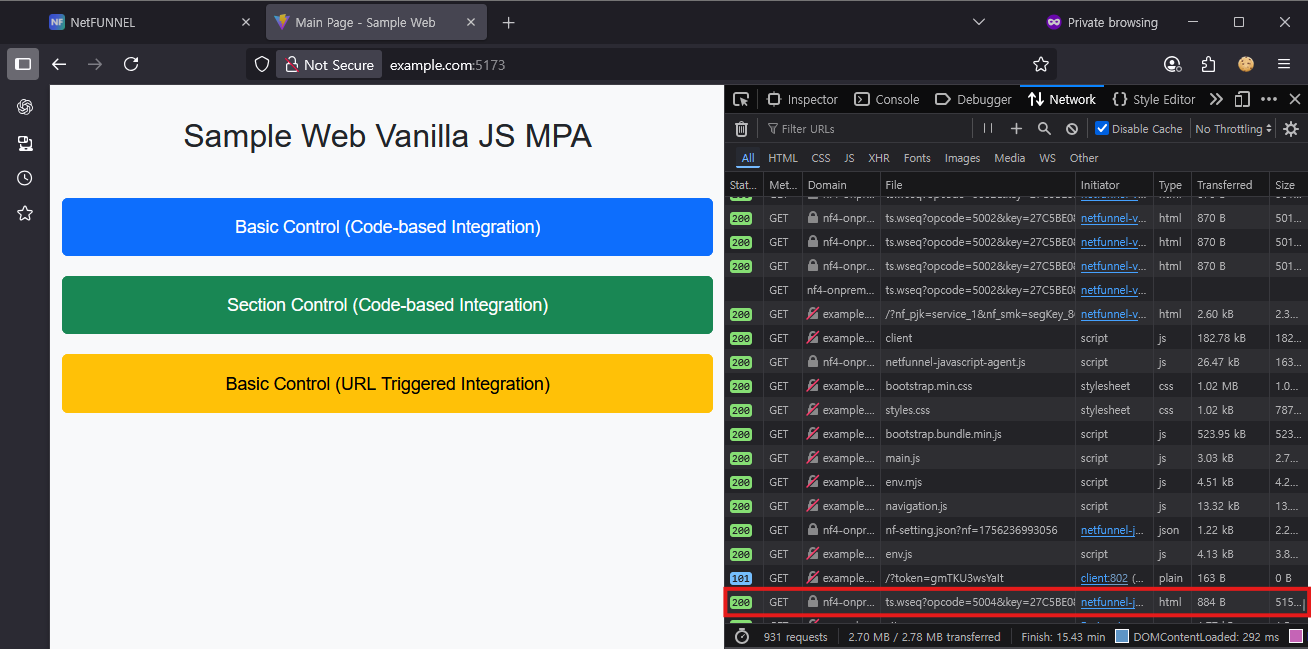
6.3 Check Key Return
Verify successful key return:
- Both agent files load with HTTP 200
ts.wseq?opcode=5004request with HTTP 200opcode=5004= Key Return request
Trigger Rule Examples
Single Page
Validator: URL
Component: URL
Match: Equals
Value: https://example.com/
Path-based (All pages under /promo/)
Validator: URL
Component: Path
Match: StartsWith
Value: /promo/2025/
Subdomain Group
Validator: URL
Component: Domain
Match: EndsWith
Value: .example.com
Production Only (Exclude Staging)
Condition 1:
- Validator: URL
- Component: Domain
- Match: EndsWith
- Value: .example.com

Condition 2:
- Validator: URL
- Component: Domain
- Negate: Does NOT
- Match: Contains
- Value: staging

Logical Operator: AND
QA Checklist
- Target URL matches rule exactly (pre-tested in console)
- With Limited Inflow = 0, waiting room page displays correctly
- With Limited Inflow = 0, changing to 1 allows immediate entry
- After entry, automatic key return works (opcode=5004, HTTP 200)
- Agent files reload successfully on target page